Introduction
POP3 (Post Office Protocol 3) is a protocol that allows users to retrieve emails from a server and store them on their device. The advantage of POP3 is messages can be read when the user is offline. Opening attachments is quick and easy as they are already downloaded. Less server storage space is required, all emails are stored on the local machine. The storage capacity of emails is limited by the size of your hard disk
Prerequisites
- cPanel account credentials
- An email account with credentials
- POP3 Enabled in the cPanel
- Outlook Installed in the local machine
Implementation
Step 1: Log in to cPanel
Step 2: Go to Email Accounts, select the email account that you want to configure in Outlook, and click Connect Devices or Configure Mail Client to view the server settings


Step 3: To Configure POP3 in Outlook, open Outlook and navigate to File > Add Account then select Manual Setup or Additional Server Types, and click Next.
Step 4: Choose POP or IMAP, then click Next.
Step 5: Update the following details
Name: <name>
Email Address: test@yourdomain.com
Account Type: POP3
Incoming Mail Server: mail.yourdomain.com (replace with the actual mail server)
Outgoing Mail Server (SMTP): mail.yourdomain.com(replace with the actual SMTP server)
Username: test@yourdomain.com
Enter the Password and click Next

Step 6: Click More Settings and update as mentioned
Under the Outgoing Server tab, check My outgoing server (SMTP) requires authentication
Under the Advanced tab
(I) Incoming Server (POP3): Port 110 (or 995 for SSL)
(II) Outgoing Server (SMTP): Port 25, 587, or 465
Step 7: Click Finish to complete the setup
Step 8: To empty the Inbox, log in to the webmail and navigate to the settings

Step 9: Click on Folder > Create to create a new folder
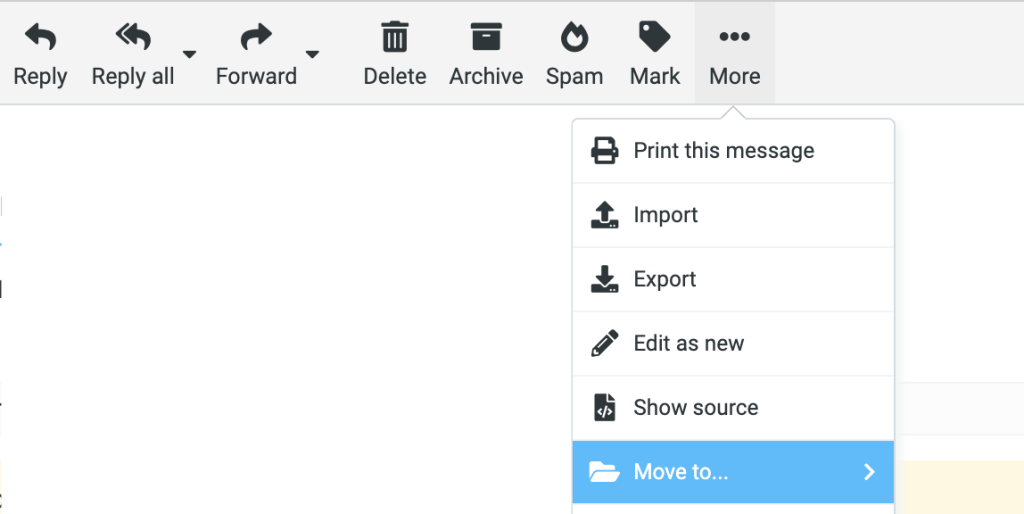
Step 10: Select the email from the inbox that needs to move to the new folder. Click on Move to and select the folder

Step 11: To set up a New PST File in Outlook
(I) Create a New Outlook Data File
In Outlook, go to File > Account Settings > Account Settings.
Select the Data Files tab.
Click Add and choose Outlook Data File (.pst).
Choose a location and name for the new PST file.
(II) Set the New PST File as Default
Set the new PST file as the default by selecting it and clicking Set as Default.
Step 12: Ensure Only New Emails are Downloaded