INTRODUCTION
Cloning a WordPress site can be incredibly useful for testing new features, creating a staging environment, or even moving your site to a different domain or directory. If you’re using cPanel, many hosting providers offer a Clone option within tools like Softaculous Apps Installer to make this process quick and easy. This eliminates the need for manual file copying and database configuration, reducing the risk of errors. In this guide, we’ll walk you through the steps to successfully clone your WordPress site using the clone option in cPanel.
Pre-requisites
Before you begin, make sure you have the following:
- Access to cPanel: Ensure you can log in to your cPanel account.
- WordPress Installed via Softaculous: The clone option is available only if your site was originally installed through Softaculous.
- Sufficient Disk Space: Make sure your hosting account has enough space to accommodate the cloned site.
- A Target Location: Decide where you want to clone the site (e.g., a subdomain or subdirectory).
- Backup (Optional but Recommended): Always back up your existing site before making any changes.
Step 1: Add the New Domain
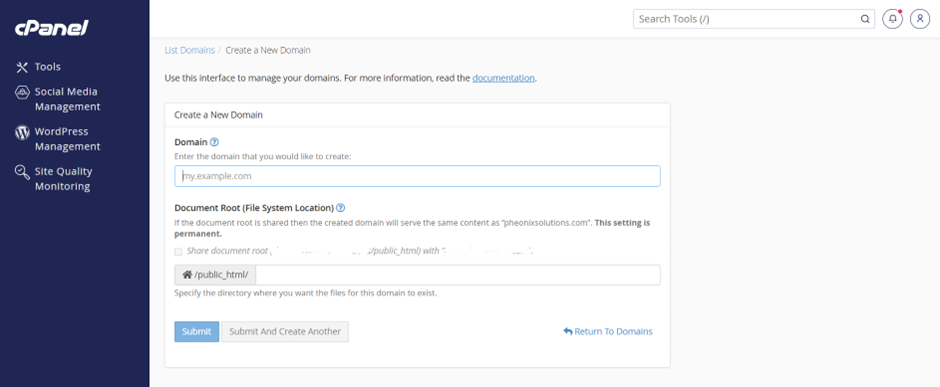
- Log in to cPanel.
- Go to Domains
- Click Create a New Domain.
- Enter your new domain (e.g., newblog.com).
- Leave “Share document root” unchecked
- It will automatically create a new folder like /public_html/newblog.com
- Click Submit or Add Domain.
- Now your new domain is added and ready to use.
Step 2: Open WP Toolkit
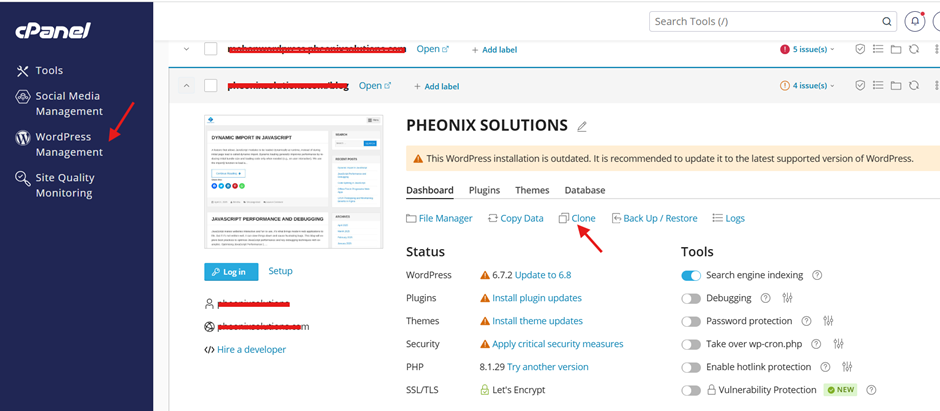
- In cPanel, find and open WP Toolkit.
- You’ll see a list of all your WordPress installations.
- Find the website you want to clone (e.g., www.oldsite.com).
- Click the Clone button
Step 3: Configure the Clone Settings

1. Target Domain:
Select the domain you just created (newblog.com) from the dropdown
2. Installation Path
- Leave it blank if you want it cloned directly at www.newblog.com.
Or enter a folder name (e.g., blog) if you want it at www.newblog.com/blog
3. WP Toolkit will automatically
- Copy all WordPress files
- Create a new database and user
- Adjust configurations
Step 4: Click “Start” to Clone
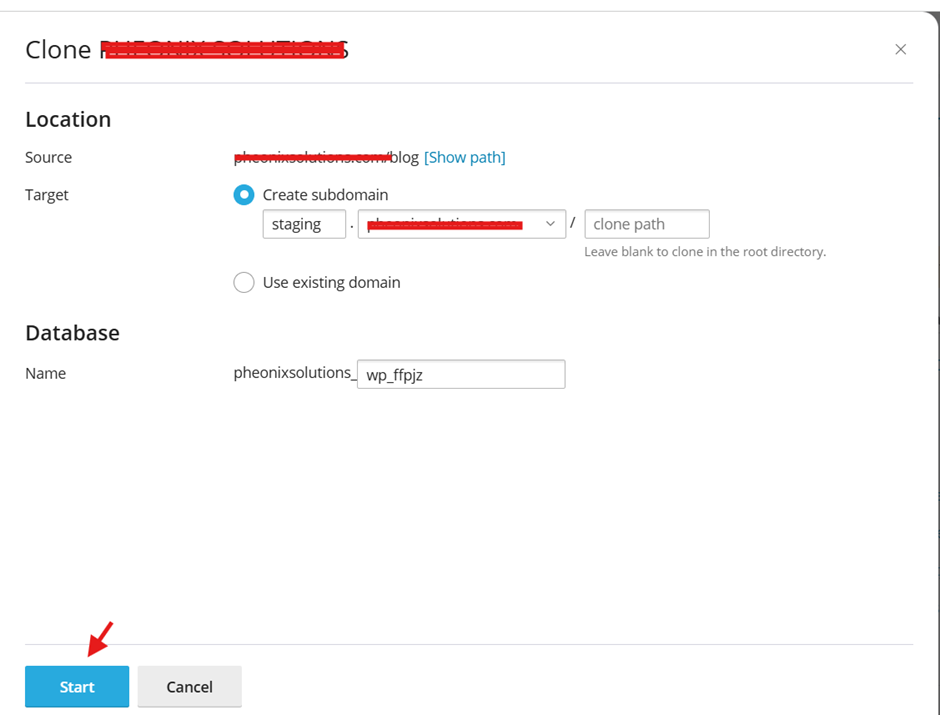
- Click the Start button.
- Wait for the cloning process to finish (1–3 minutes).
- Once done, it will show you:
- Site URL (your new blog site)
- Admin URL (login to wp-admin)
Your blog is now cloned and live! You’ve successfully cloned your WordPress site to a new domain using WP Toolkit and your blog is now ready to go live
Conclusion
Cloning a WordPress site using the Clone option in cPanel is a fast and efficient way to create a duplicate of your site without the hassle of manual migration. Whether you need a staging environment, want to test updates, or are planning a redesign, this method helps ensure a smooth transition with minimal risk. With just a few clicks, you can have a fully functional copy of your WordPress site ready for any purpose.