Introduction:
DMARC (Domain-based Message Authentication, Reporting, and Conformance) is an email authentication system that enables domain owners to protect their domains from unauthorised use, often known as email spoofing. By adopting DMARC, domain owners can designate which techniques (SPF and DKIM) are used when sending email from their domain, how to handle emails that fail these checks, and request email delivery and authentication reports.
Prerequisites:
1. WHM login root credentials.
Step 1:
Using the destination server URL login to the cPanel account.
Step 2:
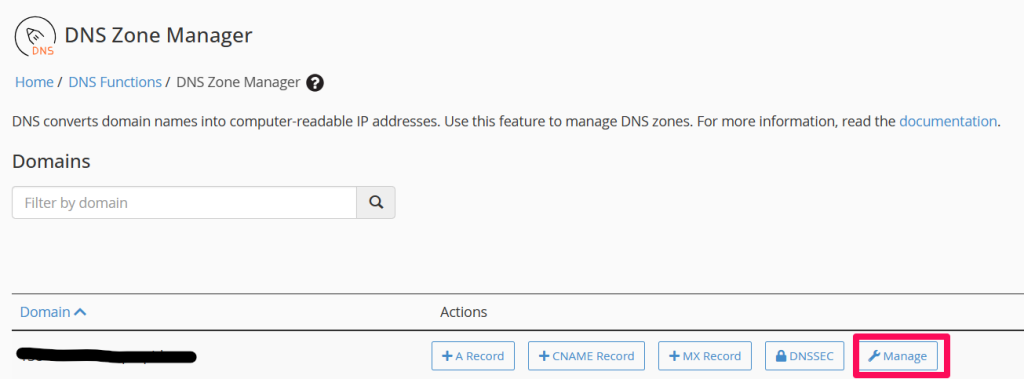
Go to the search bar and enter DNS Zone Manager. After the click, go to DNS Zone Manager and click on manage.
Step 3:
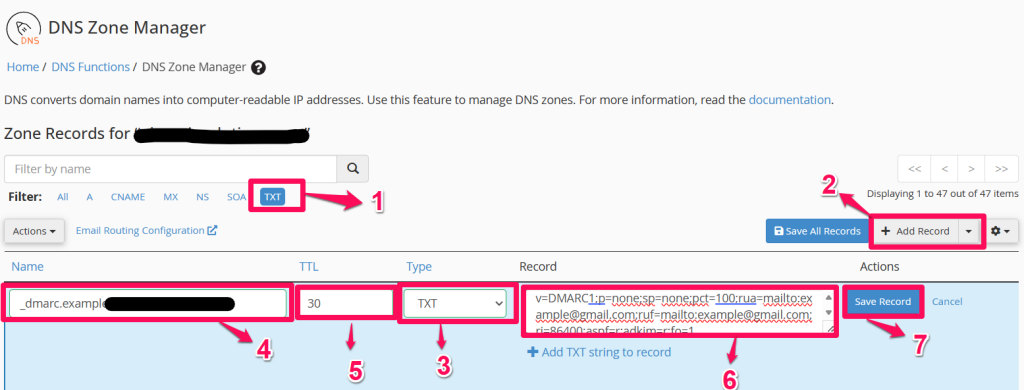
After clicking on manage, a zone record for the domain will appear. Please click on TXT and then +Add record.
1. Name: Enter the name you want to add, such as _dmarc, and cPanel will automatically add the domain name _dmarc.example.com.
2. TTL: Enter the value as you wish.
3. Record: Provide the right value for that box.
3. Finally, click on a save record.
If the record is added successfully, you will see a success message.
Conclusion:
Now by following the above steps, you can Add a DMARC Record in cPanel.