Introduction
AutoSSL is a feature in WHM/cPanel that automatically installs and renews free SSL certificates for hosted domains. It helps secure websites with HTTPS without requiring manual certificate purchase or renewal.
This KB explains the step-by-step procedure to enable and run AutoSSL for a specific cPanel account in WHM.
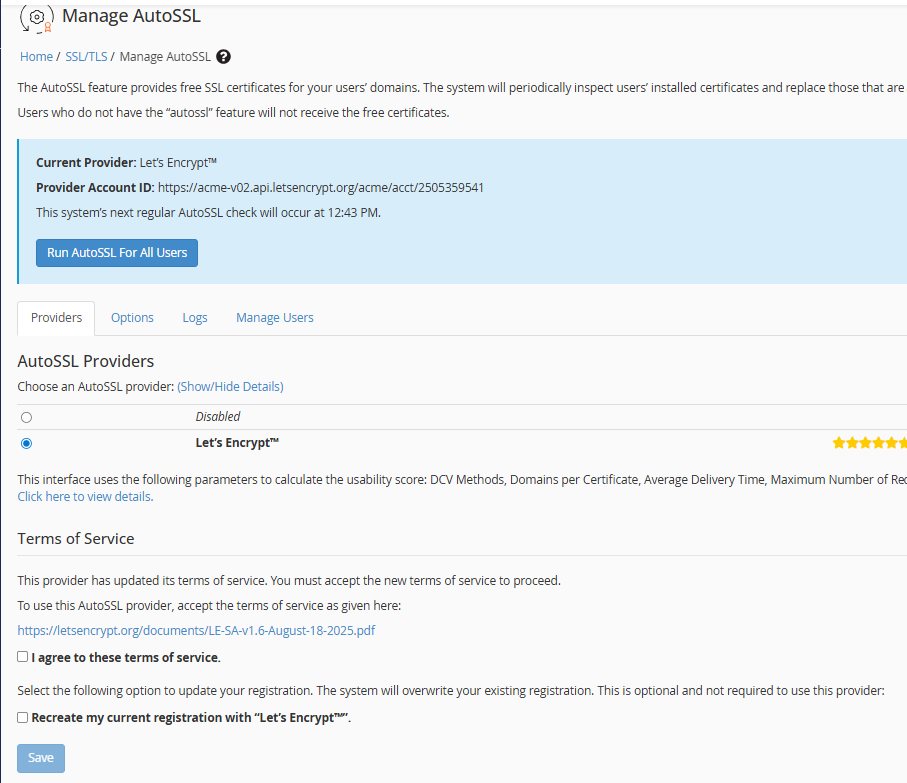
Step 1: Verify AutoSSL Provider is Enabled
1.Log in to WHM as root.
2. Navigate to:
WHM → Manage AutoSSL
3. Under AutoSSL Providers, ensure that Let’s Encrypt is enabled or disabled. If it is not enabled. kindly enabled it.
4. Accept the terms (if not already accepted).
5. Click Save.
Step 2: Enable AutoSSL for a Specific Account
1. In WHM, go to: Manage AutoSSL
2. Scroll down to the Manage Users section.
3. Locate the specific cPanel username.
4. Ensure the checkbox Enable AutoSSL is enabled for that user.
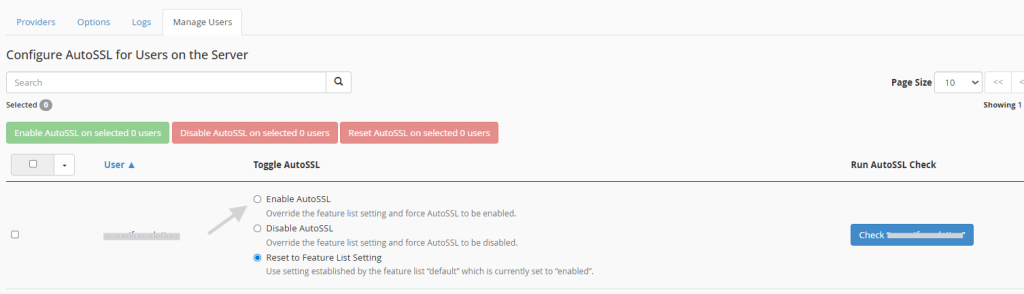
Step 3: Run AutoSSL for the Specific Account
You can trigger AutoSSL immediately:
- Click Run AutoSSL next to the selected user.
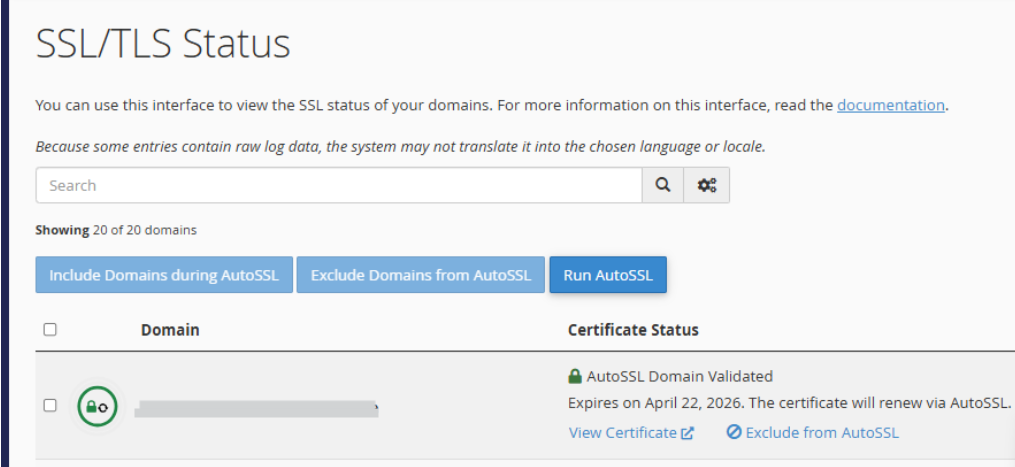
Step 4: Verify SSL Installation
After the process completes:
Conclusion
Enabling AutoSSL for a specific account in WHM ensures the domain is secured with a trusted SSL certificate without manual intervention. By verifying DNS settings and running AutoSSL from WHM, administrators can quickly secure websites and maintain automatic renewals.
If AutoSSL fails, review the error logs in Manage AutoSSL → Logs for detailed troubleshooting information.