Introduction
cPHulk Brute Force Protection is a built-in security feature in WHM/cPanel designed to protect servers from brute-force login attempts on services like WHM, SSH, cPanel, FTP, and Email. Sometimes, however, you may get locked out of WHM or SSH because cPHulk has blacklisted your IP. Clearing or flushing the cPHulk cache helps reset the failed login history and remove incorrect bans.
Prerequisites
Before clearing the cache, make sure you have either root access to WHM or an SSH user with sudo privileges
Implementation
Method 1: Clear cPHulk Cache via WHM Interface
- Log in to WHM as
root. - Navigate to:
- Security Center → cPHulk Brute Force Protection
- Click the History Reports tab.
- At the top right, click “Flush DB” or “Remove blocks and clear reports”.
- Confirm the action.
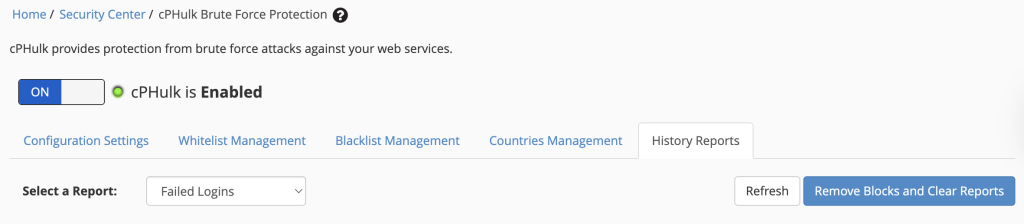
All existing failed login records and blocked IPs are cleared
Method 2: Clear cPHulk Cache via SSH (Root Access)
- SSH into your server as root
ssh root@your-server-ip - Flush the cPHulk login history
/usr/local/cpanel/bin/cphulk_pam_ctl –flush - Restart the cPHulk service
/scripts/restartsrv_cphulkd
All failed login attempts and bans are removed immediately.
Conclusion
Clearing the cPHulk cache in WHM is a crucial recovery step when you’re locked out or need to reset failed login attempts. Always re-enable cPHulk after maintenance and whitelist your trusted IPs to avoid future issues