How to generate SSL Certificates using AWS Certificate Manager
Date: 23-08-2020
Introduction:
AWS provides a solution called AWS Certificate Manager or ACM for short.
- Public — Free to provision public or private SSL certificates to use with ACM-integrated services, such as Elastic Load Balancing and API Gateway. You pay for the AWS resources only.
- Private — For private you pay a fee.
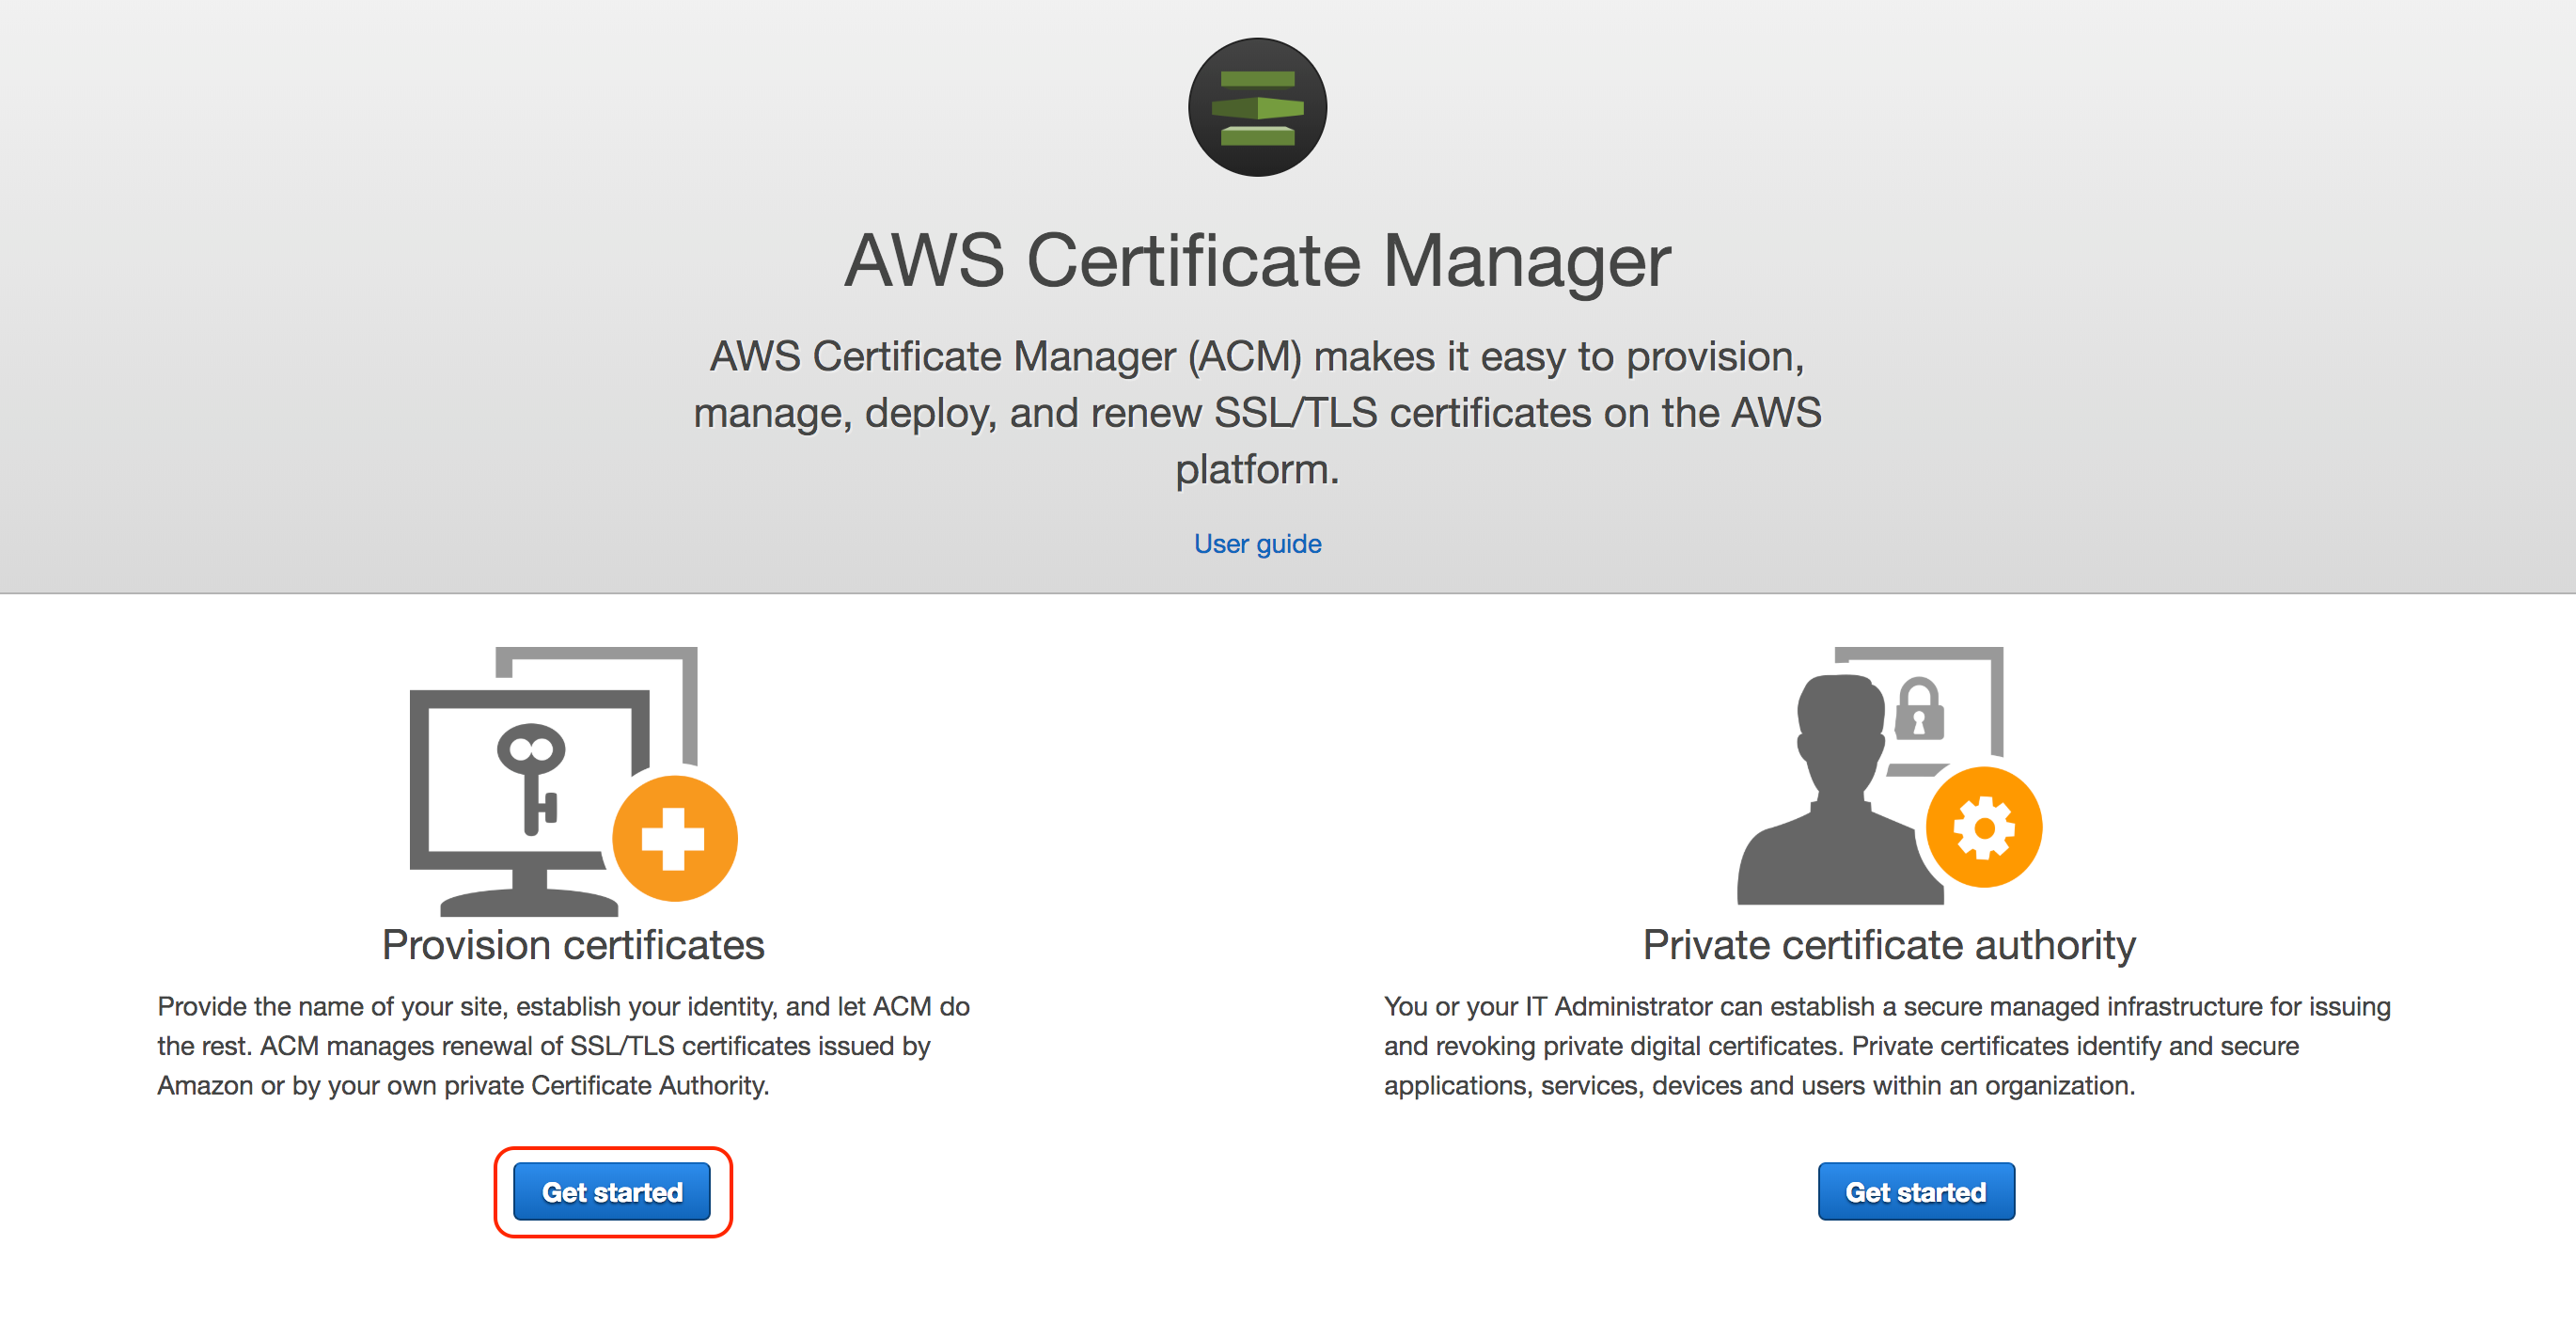
Step 1: Log in to AWS console and go to AWS Certificate Manager, click on Get started under Provision Certificates.
Step 2: Select Request a public certificate and click Request a certificate

Step 3: Enter domain names that you want to provision certificates for, we are doing our main domain including a wildcard.
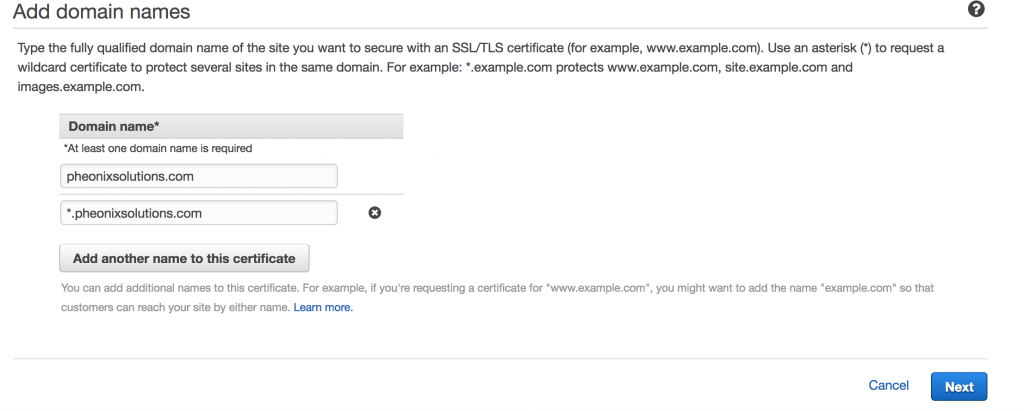
Step 4: To select a validation method, If you have access to DNS configuration then you need to validate access to the domain names that are part of the certificates. You can also select Email validation method, in our case we have access to our DNS configuration in Route 53 we selected DNS Validation if you have access to the DNS settings (this would be through Route53, Namecheap, GoDaddy or any other domain name provider) or Email Validation if you do not. DNS validation is better and faster.

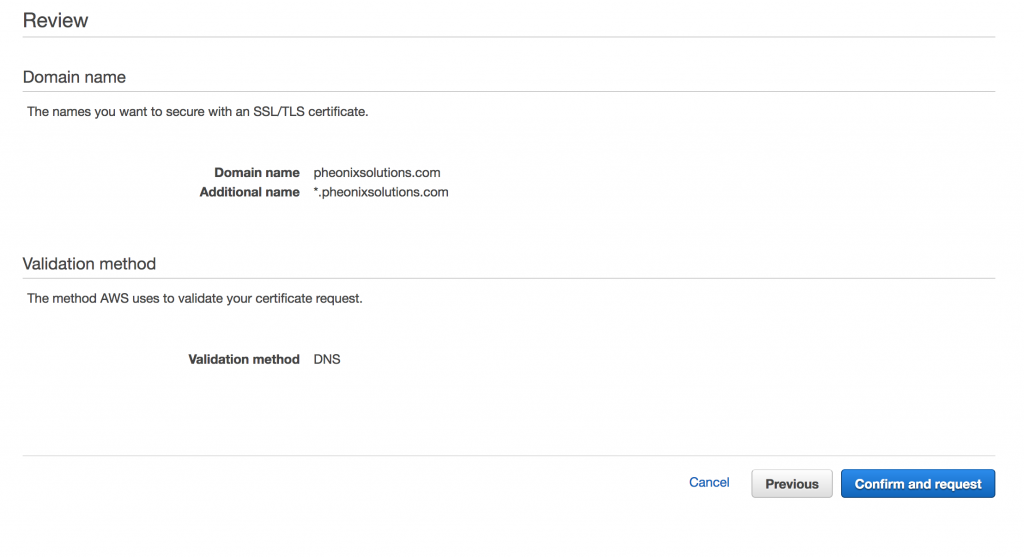
Step 5: Review the info and click Confirm and request
Step 6: AWS will generate and issue the certificate, meanwhile, we need to validate the domain, expand the panel with the domain name.
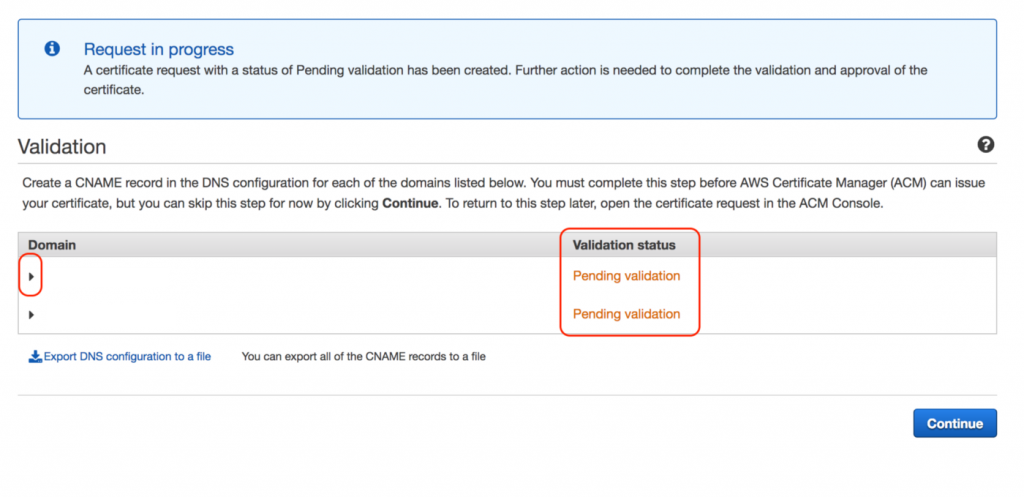
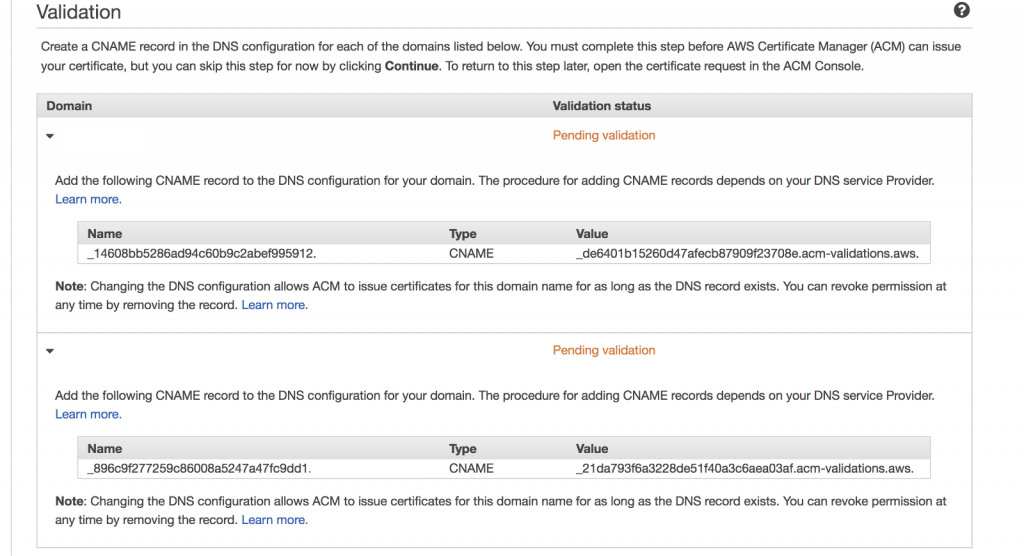
Step 7: We need enter CNAME in our DNS configuration, If you are using Route 53 as your DNS management tool then AWS also provides an option to create a record directly from here, since we have our domain registered using Route 53 we can click the button Create a record in Route 53.
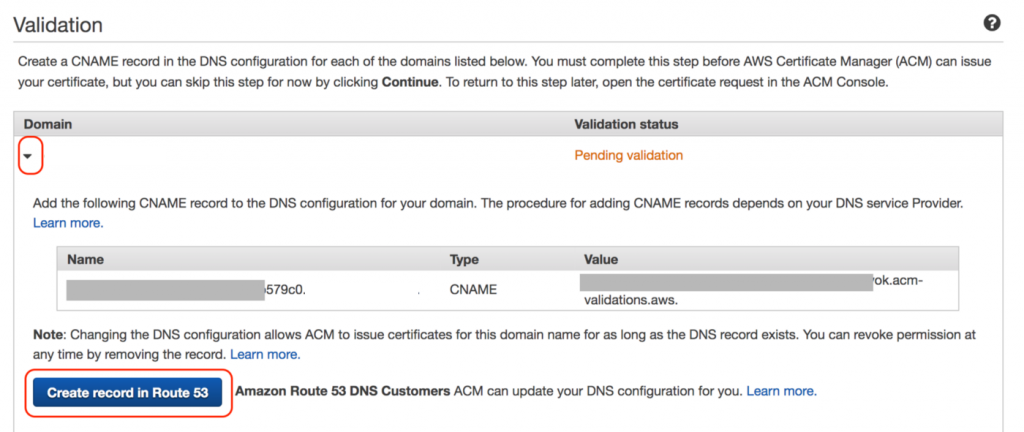
Step 8: Click Create to create a record in Route 53.

Step 9: Once the record is created, click Refresh on and wait for Validation status to show Success.
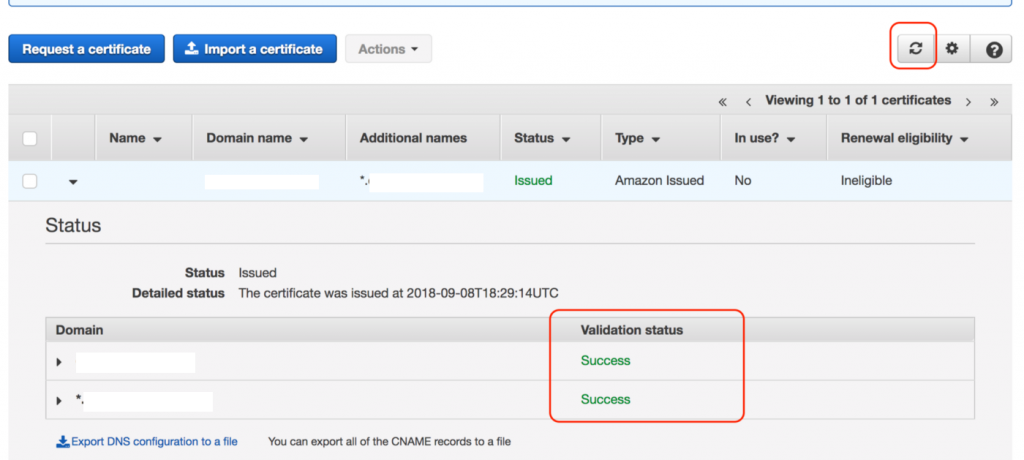
This completes the generation of the certificate using AWS Certificate Manager (ACM).