Introduction
SMTP2GO’s Verified Sender List is a feature that allows you to specify a list of approved email addresses or domains that are authorized to send emails through SMTP2GO’s email delivery service. When an email is sent from an address or domain on the Verified Sender List, SMTP2GO will allow the email to pass through without any additional checks or restrictions
Prerequisite
- An active account in SMTP2GO
- cPanel access for the domain
Implementation
Step 1: Log in to the SMTP2GO account

Step 2: Navigate to Sending > Verified Senders > Sender domains

Step 3: Add the required domain by clicking the Add sender domain then press continue with this domain

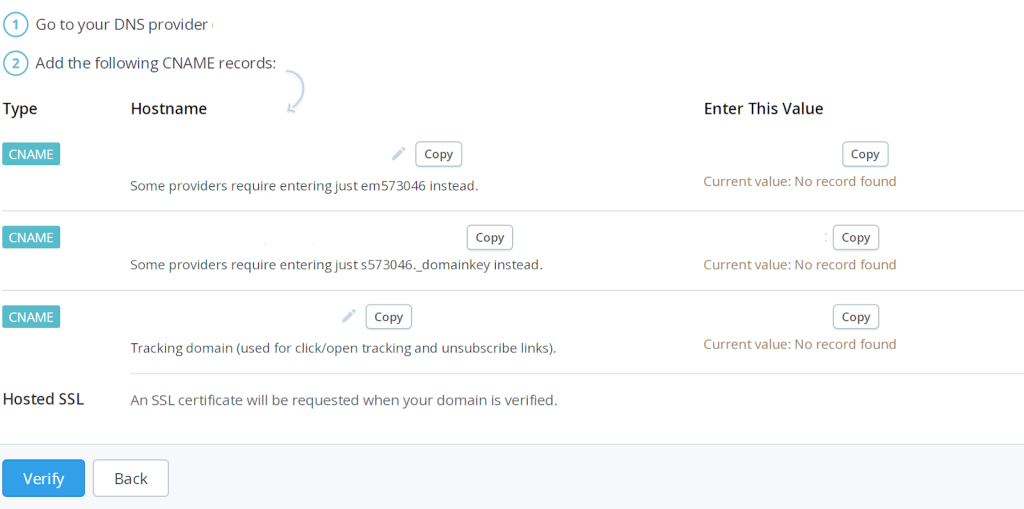
Step 4: It will show the CNAME record that needs to be updated in cPanel managed DNS section.

Step 5: Log in to the cPanel of the domain

Step 6: Click on Zone editor from the Domain section

Step 7: Click manage > add records

Step 8: Copy the first CNAME record from SMTP2GO and paste it into the corresponding field of the zone editor in cPanel. Add all three CNAME records in the DNS zone.
Hostname > valid zone name
Enter This Value > fully qualified domain name
Step 9: Click on verify in the SMTP2GO console
(i) If CNAME record are verified successfully we find the verified and enabled as green color
(ii) If the CNAME record is not verified, it will be displayed as unverified and disabled, and review the issue based on the warnings


Step 10: Once the domain has been verified and enabled, we can able to send mail without any additional checks or restrictions

Note: If any particular email needs to verify instead of the complete domain, add the email ID in the Sending > Verified Senders > Single Sender emails. A confirmation mail will be sent to that ID for .verification.