Introduction
The Domain Name System (DNS) translates human-readable domain names into IP addresses that computers use to communicate. Each DNS record has a Time to Live (TTL) value, which specifies how long DNS resolvers cache the record before requesting an updated version from the authoritative DNS server.
In WHM (Web Host Manager), you can configure the TTL value for a DNS zone. Adjusting the TTL helps control how quickly DNS changes, such as IP address updates, propagate across the internet. A lower TTL allows changes to take effect faster, while a higher TTL reduces DNS query traffic by increasing cache duration.
Prerequisites
Before proceeding, ensure you have the following:
- Root or sudo access to the server.
- Access to the WHM interface.
- An existing DNS zone configured for the domain.
- Basic knowledge of DNS records and TTL values.
Procedure
Step 1: Log in to WHM
Log in to your WHM account using your administrator credentials.

Step 2: Navigate to the DNS Zone TTL Settings
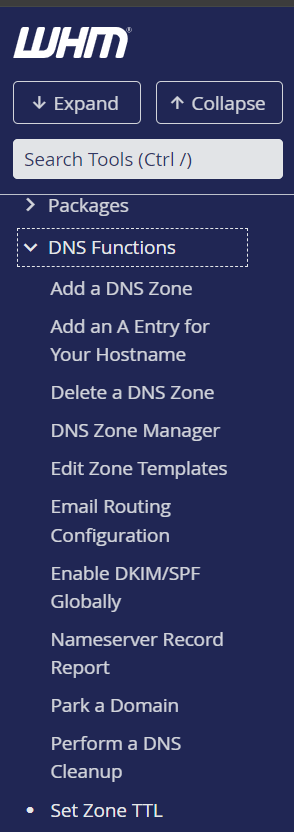
From the WHM dashboard, go to:
Home → DNS Functions → Set Zone TTL
Step 3: Select the DNS Zone
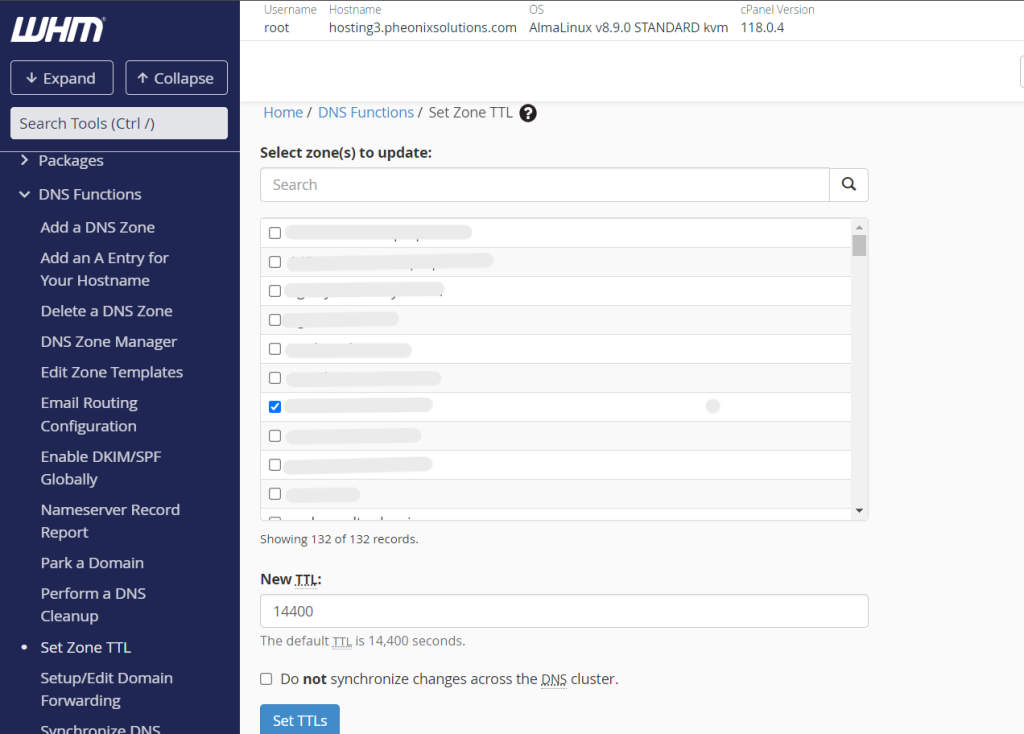
Choose the DNS zone (domain) for which you want to update the TTL value.
Step 4: Set the New TTL Value
Enter the desired TTL value (in seconds) in the New TTL field.
Step 5: Apply the Changes
Click Set TTLs to save the updated TTL value for the selected DNS zone.
Conclusion
You have successfully updated the DNS Zone TTL value in WHM. The new TTL setting determines how long DNS resolvers cache your DNS records before checking for updates. Keep in mind that DNS propagation behavior depends on the configured TTL and external DNS caching. For planned DNS changes, consider lowering the TTL in advance to minimize propagation delays.