Introduction
Creating a backup in cPanel is an important task to ensure your website data and recoverable in case of unexpected issues such as data loss, server failure, or accidental changes. cPanel provides an easy-to-use interface to generate full or partial backups, allowing you to restore your website whenever needed.
Prerequisites
Before creating a backup in cPanel, make sure you have:
- Valid cPanel login credentials
- Access to your hosting account with backup feature enabled
- Enough disk space to generate and store the backup file
Implementation
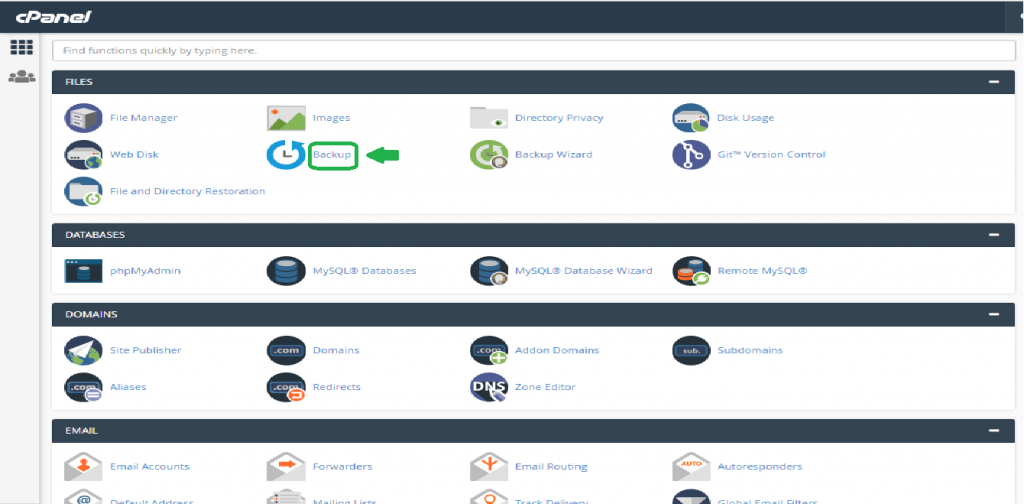
Step 1:
Login to your cPanel Account. In the FILES section, choose the option Backup
Step 2:
In the Backup Interface opened, there will be options to take full/partial backups of the account. Let us see how to take it.
First, to take full backup of your cPanel account, under “Full Backup” option, you will find a button Download a Full Account Backup. Click on it
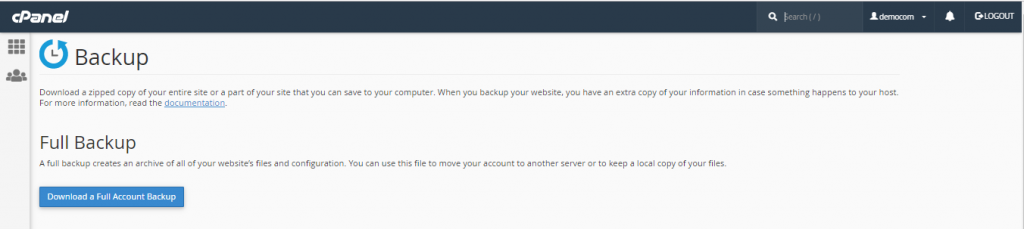
it will open a new interface to generate the backup.
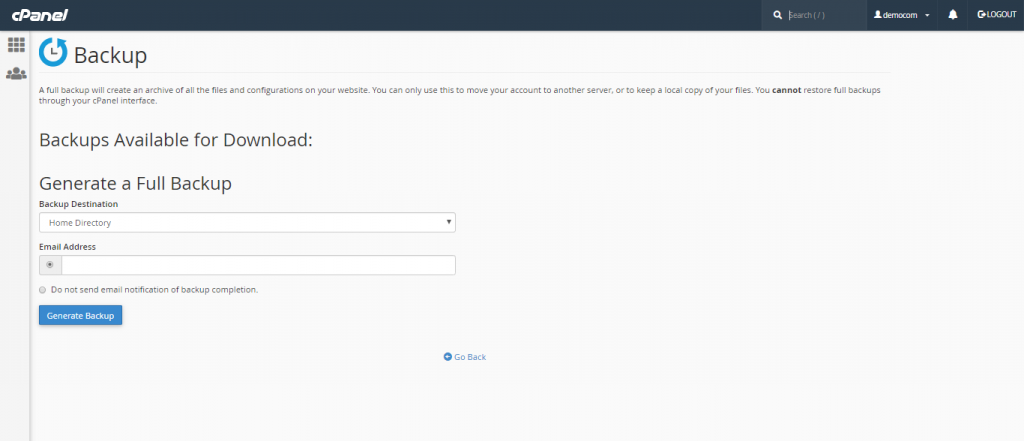
Here fill all the fields under the section “Generate a Full Backup“
In the Backup Destination field, select any of the following storage option from the dropdown list.
- Home Directory– this option is to save the backup file on the server.
- Remote FTP Server– this option is to use FTP to store the backup file on a remote server.
- Remote FTP Server(passive mode transfer): – this option is to use passive FTP to store the backup file on a remote server.
- Secure copy(SCP) – option to use secure copy protocol (SCP) to store the backup file on a remote server.
Note : If you have selectedRemote FTP Server, Remote FTP Server (passive mode transfer), or Secure Copy (SCP)in theBackup Destinationfield dropdown, enter the remote destination's information in the available text boxes.
Step 3:
In the Email Address field, enter the email address to which you want to receive a notification when the backup is generated successfully.
If you do not wish to be notified when the backup process completes, then you can select the option, Do not send email notification of backup completion.
Now click on Generate Backup button.
That’s it! We have successfully taken a full account backup
Step 4:
Now let us see how to take a partial account backup.
Let us see only the downloading backup options now. We can keep the restore options for the upcoming articles.
Under the “Partial Backups” section, you will find the following fields.
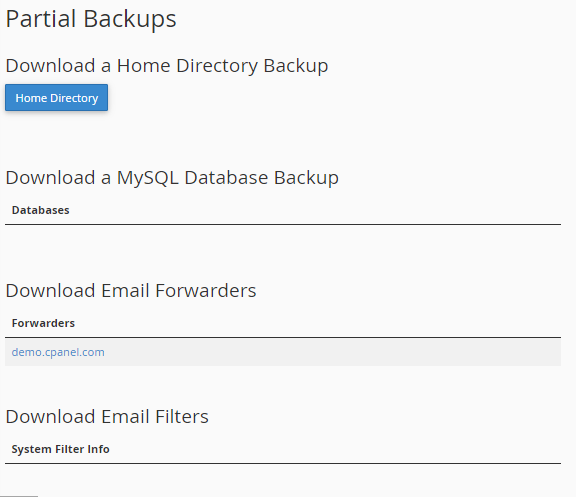
To download only your /home directory backup, click on the button Home Directory which is under the section “Download a Home Directory Backup“
Note: /home directory backup includes the files which you own and the files for which you have access(eventhough you do not own it). But the files which you do not own and have no access will not come under the backup.
Step 5:
You can download your database backup by clicking on the database from the dropdown under the section “Download a MySQL Database Backup“
Step 6:
You can also download Email Forwarders and Email filters with the options available under the sections, “Download Email Forwarders” and “Download Email Filters” respectively.
Conclusion
Creating regular backups in cPanel is a best practice for maintaining website security and reliability. It ensures that your data is protected and can be restored quickly during emergencies. Always keep your backups updated and store them in a secure location for maximum safety.