Create Email accounts in cPanel
Date: 12/10/2019
Hello!! In this article, let us see how to create e-mail accounts from cPanel
Step 1:
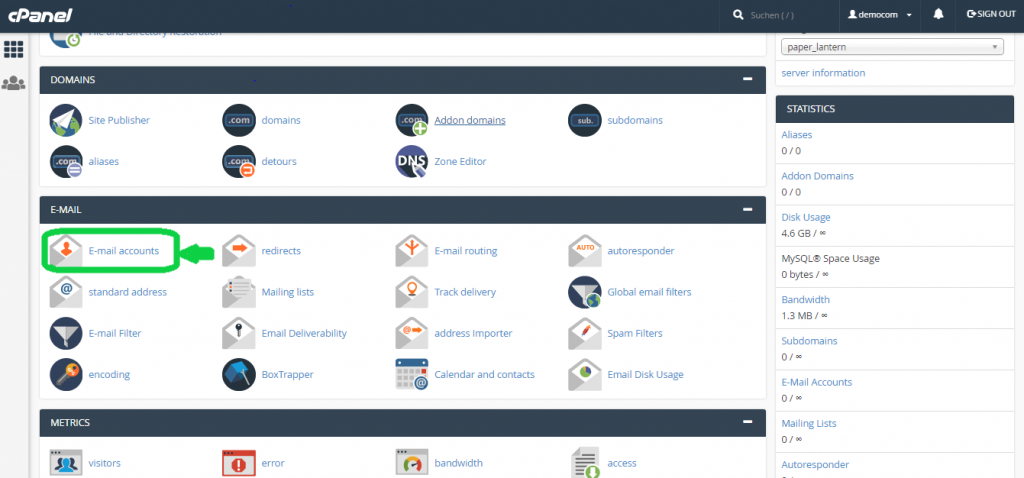
Login to Cpanel and in the home page, go to E-MAIL section and click on E-mail accounts

Step 2:
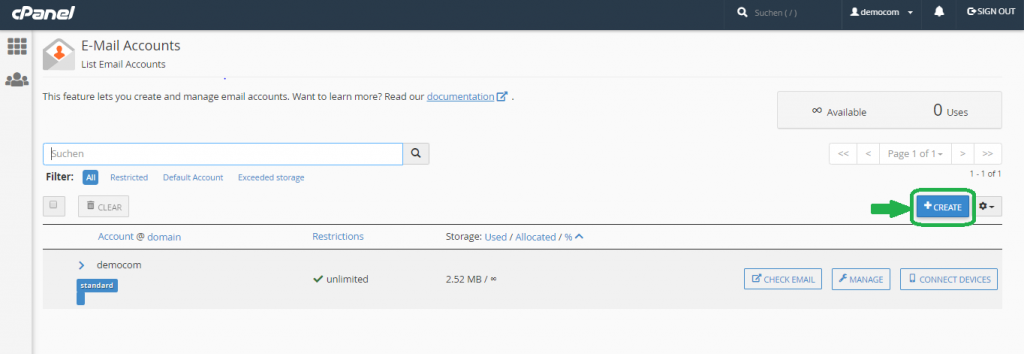
Click on +Create icon on the right-side to proceed for e-mail creation process

Step 3:
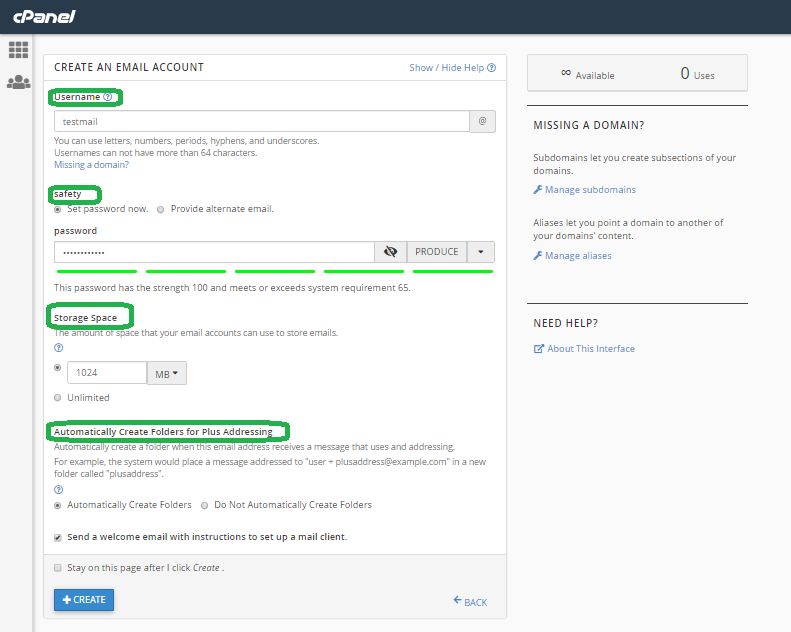
Now in the new interface will be opened to provide details of the mail account to be created.

Step 4:
Under “Username” section, enter the mail address to be created in the Username text box.
If you have only one domain, email id will be automatically created on your domain name itself
For Example: testmail@primarydomain_name.com
If you have more than one domain on your account, Domains section will be available before Username section. You can choose the domain on which you need to create account using Domains option.
Step 5:
Then under “safety” section, two options will be there. Choose either of the following options to set the password.
Set password now—> Give a password for the email account and make sure it is strong. You can also click onPRODUCEoption on right side of the text boxProvide alternate email—> Link to create password will be sent to this email address.
Step 6:
Under “Storage Space” section, you can choose either of the following two options to allocate storage space for the mail account being created.
- Manually provide the storage size( Ex.1024 MB, 10 GB). if you want the mail account storage to be limited
- Select
Unlimitedbutton, if you do not want to limit the mail account storage
Step 7:
Under “Automatically Create Folders for Plus Addressing” section,
- Either choose
Automatically Create Folders, if you want the system to create a new folder, when you receive an email that uses plus addressing - Else choose
Do Not Automatically Create Folders, if you do not want the system to create a new folder, when you receive an email that uses plus addressing.
Step 8:
Select the option ” Send a welcome email with instructions to set up a mail client. “, if you want a welcome mail that contains the instructions to setup the mail account.
Step 9:
Select the option “ Stay on this page after I click Create . “, if more accounts need to be created after the current mail account is created.
Step 10:
Now, Click on +Create button to create the e-mail account with the details provided above.
There you go!!! You have successfully created an e-mail account on your domain.