Create E-mail forwarder in cPanel
Date : 16-Oct-2019
Hello!!! In this article, let us learn about E-mail forwarder and how to create it.
What is e-mail forwarder?
E-mail forwarder helps you to configure E-mail addresses to send a copy of incoming e-mails from one mail address to another automatically.
By doing this, you can manage multiple E-mail accounts by forwarding copy of all mails from multiple accounts to a single mail address. You can also forward e-mails from one account to multiple accounts automatically.
Okay!!! Now let us see how to add e-mail forwarder step by step.
Steps to add e-mail forwarder
Step 1:
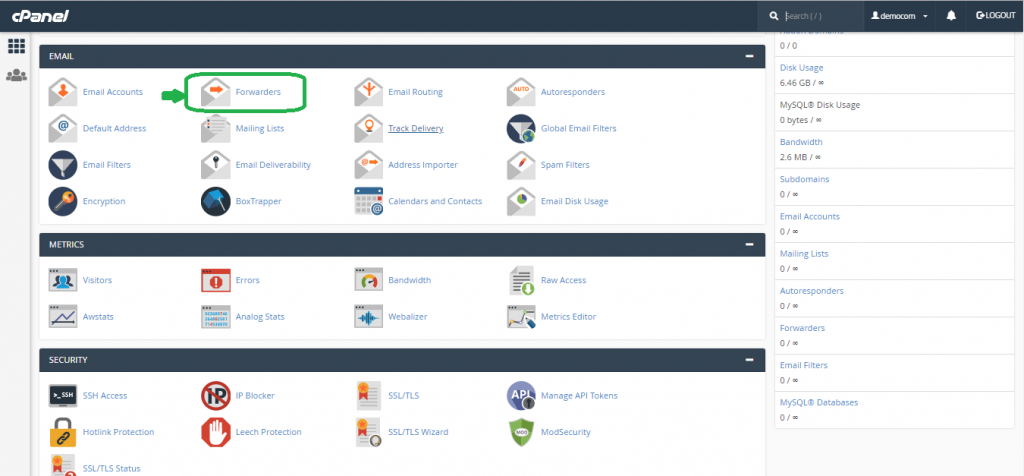
Login to your cPanel account and in the home page displayed, go to EMAIL section and click on Forwarders
Step 2:
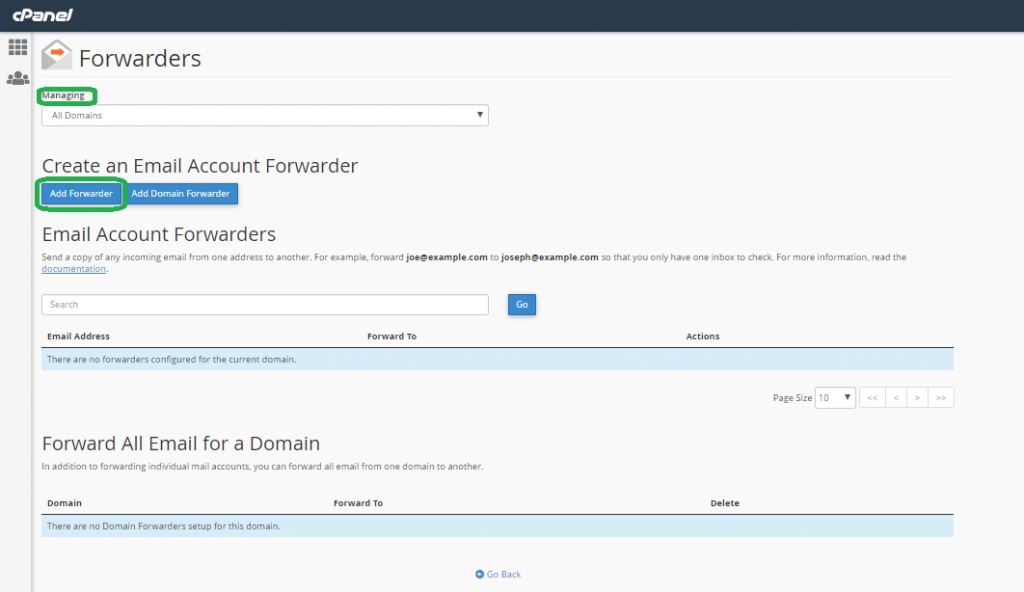
In the new page opened, you will find the first option as “Managing”. If you are managing multiple domains, you can use this option to choose under which account you need to add e-mail forwarder.
Step 3:
The next section you will find is “Create an Email Account Forwarder”.
Under this section, click on Add Forwarder to send a copy of emails from one e-mail account to another.
Step 4:
A new page will be opened. Here lets give the details of the e-mail addresses to forward copies of emails.
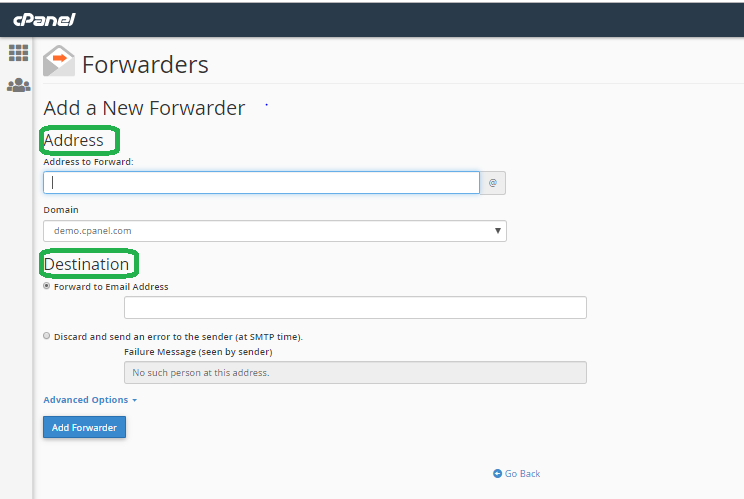
Under the “Address” section, you will find the following fields.
Address to Forward – Enter the source E-mail address from which you want to send a copy of incoming mails.
Domain section – If you have only one domain, your Email id will be pointing to that domain by default. If you have multiple domains/sub-domains, select your domain here.
Step 5:
Under the “Destination” section, select any of the following options.
Forward to Email Address – Use this option to enter the destination mail address to which you want to forward copy of the incoming mails from the source address mentioned above in “Address to Forward” field.
Discard and send an error to the sender (at SMTP time). – Use this option, if you want to discard the incoming mail and send a failure message back to the sender automatically.
You can provide the failure message in the text box "Failure Message (seen by sender)" which is given below this option.
Step 6:
Click on Advanced options to find the additional options which may you may need to add some additional futures.
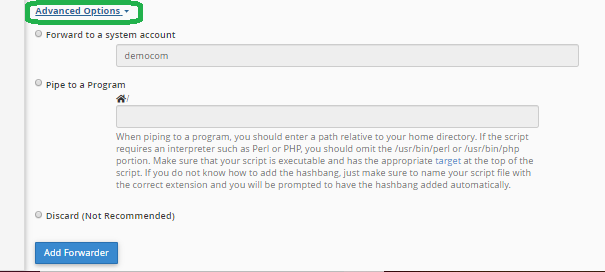
The following 3 options will be displayed.
- Forward to a system account – Select this option if you want to forward the incoming email to your user account name itself
- Pipe to a Program – Select this option if you want to pipe an incoming email message to a script file. You can program the script file to automatically process the incoming message however you want.
- Discard (Not Recommended) – Select this option if you want to discard the incoming email without any failure notice messages.
Step 7:
click on Add forwarder.
You have successfully added an E-mail forwarder !!!
Now all your incoming E-mail of the source account given will be successfully forwarded to your destination email account provided!!!
Step 8:
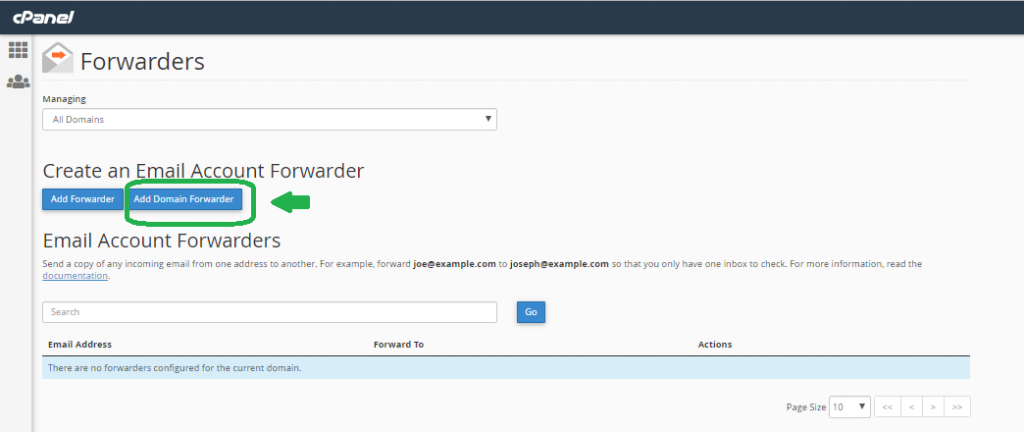
You can also have an option to forward incoming emails from one domain to another.
As you are familiar with EMAIL section now, go to EMAIL—> Forwarders—> Add Domain Forwarder (Under “Create an Email Account Forwarder” section)
Step 9:

If you have only one domain, it will be displayed by default in “Domain” field. If you have multiple domains/subdomains , choose the domain from which you want to forward copies of all the incoming emails.
In the plain text box after “to”, enter the domain name to which you want to forward copies of the chosen domain’s incoming mails.
Step 10:
Click on Add Domain Forwarder .
Congratzzz!!!Now you have successfully created forwarder for domains!!!