How to Add a new DNS Zone in WHM
Introduction
Adding a DNS zone in WHM (Web Host Manager) allows you to manage DNS records for a domain hosted on your server. This is essential for directing traffic, configuring email services, and ensuring proper domain resolution.
Prerequisites
Before adding a DNS zone, ensure the following:
- Access to WHM with root or reseller privileges
- A valid domain name
- The server’s IP address where the domain will point
- Basic understanding of DNS records (optional but helpful)
Implementation
Follow these steps to add a new DNS zone:
Step 1: Login to WHM.
Step 2: Enter DNS Zone on the search bar in the dashboard. Click Add a DNS Zone under the DNS Functions.
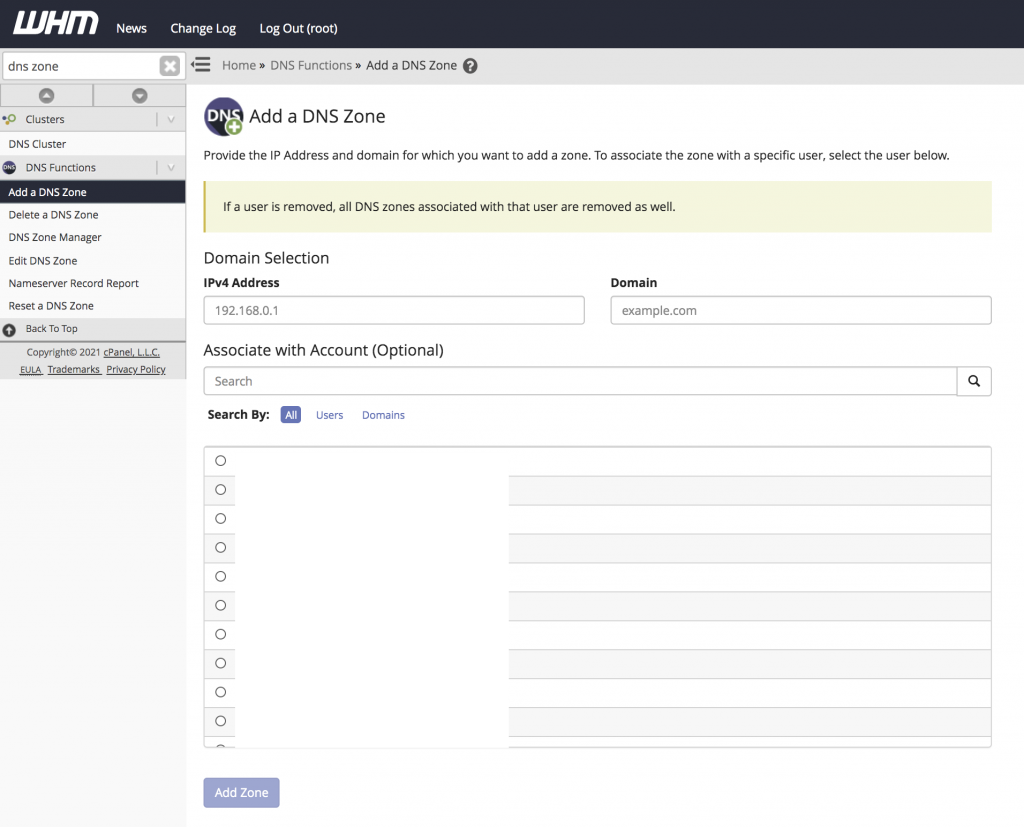
Step 3: Enter the IP address and domain name under Domain Section and click Add Zone.
Conclusion
Adding a DNS zone in WHM is a straightforward process that enables proper domain management and routing. Once the zone is created, you can further customize DNS records such as A, CNAME, MX, and TXT based on your requirements.