
Introduction
This Magento 2 admin panel guide explains every main section of the Magento back office in simple steps. The Magento 2 admin panel is where you add products, process orders, manage customers, run promotions, and configure your whole store. If you know where each tool lives, daily store work becomes much faster.
New store owners often feel lost after the first login, because the admin has many menus and hundreds of settings. In this guide, we will walk through the 10 key Magento admin panel sections in the order they appear in the sidebar, and explain what each one is used for.
This is Day 2 of our Magento and eCommerce series. In Day 1, we installed Magento 2.4.9 on Ubuntu. Today, we log in to that store and explore the Magento 2 admin.
Key takeaways:
- The Magento 2 admin panel has 10 main sidebar sections, from Dashboard to Find Partners and Extensions.
- Stores > Settings > Configuration holds almost every store setting.
- System > Tools > Cache Management is where you refresh the cache after changes.
- Protect the admin with 2FA, a custom admin URL, and the security settings under Advanced > Admin.
On This Page
Why the Magento 2 Admin Panel Matters
The Magento 2 admin panel is the control room of your online store. Every product, price, order, invoice, customer account, and store setting is managed from here. A store owner who understands the admin can make changes without waiting for a developer.
Knowing the Magento admin panel sections also helps your team work safely. You can give each staff member access to only the sections they need, such as Sales for the order team or Catalog for the product team.
Prerequisites for This Magento 2 Admin Panel Guide
Before you start, make sure you have the following:
- A working Magento 2 store: Follow our Magento 2 setup guide if you have not installed Magento yet.
- Admin URL and login: The admin username, password, and the Admin URI that the installer displayed.
- An authenticator app: Google Authenticator, Microsoft Authenticator, or a similar app for two-factor authentication (2FA).
- SSH access (optional): Needed only for the command line tips in this guide.
How to Log In to the Magento 2 Admin
Open your admin URL in the browser. It looks like this:
https://shop.example.com/admin_1a2b3c
If you forgot the Admin URI, run this command from your Magento root folder as the file system owner:
cd /var/www/magento2
bin/magento info:adminuri
Output:
Admin URI: /admin_1a2b3c
Enter your admin username and password. On the first login, Magento asks you to set up two-factor authentication. Follow the link sent to your admin email, scan the QR code with your authenticator app, and enter the one-time code.
Note: If an admin account gets locked after too many failed login attempts, unlock it with bin/magento admin:user:unlock storeadmin. Replace storeadmin with the locked username.
10 Key Magento 2 Admin Panel Sections
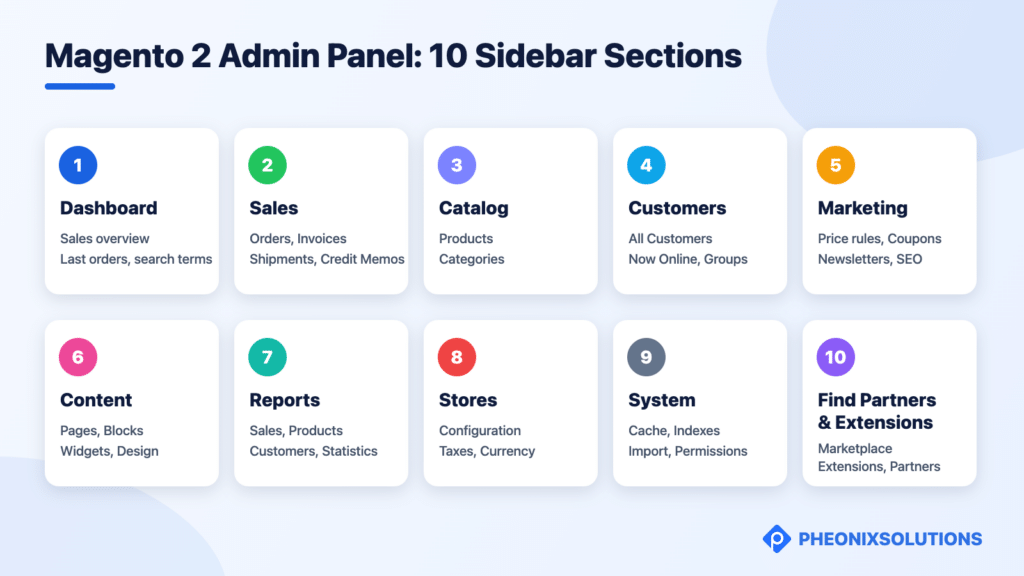
The admin sidebar on the left is the main menu of the Magento 2 admin. Here is a quick map of the 10 sections and what each one is used for.
| No. | Sidebar section | What you manage there |
|---|---|---|
| 1 | Dashboard | Sales overview, recent orders, top search terms |
| 2 | Sales | Orders, invoices, shipments, credit memos, transactions |
| 3 | Catalog | Products and categories |
| 4 | Customers | Customer accounts, online customers, customer groups |
| 5 | Marketing | Price rules, coupons, newsletters, SEO and reviews |
| 6 | Content | Pages, blocks, widgets, media, and design |
| 7 | Reports | Sales, product, customer, and marketing reports |
| 8 | Stores | Configuration, websites, taxes, currency, attributes |
| 9 | System | Cache, indexes, import and export, admin users |
| 10 | Find Partners & Extensions | Commerce Marketplace extensions and partners |
1. Dashboard
The Dashboard is the first page you see after login. It gives a quick snapshot of lifetime sales, average order value, last orders, last search terms, and tabs for bestsellers, most viewed products, new customers, and top customers.
To show the sales chart, go to Stores > Settings > Configuration > Advanced > Admin > Dashboard and set Enable Charts to Yes.
Tip: On stores with a lot of data, keep the chart turned off to make the dashboard load faster.
2. Sales
The Sales menu is where you process orders from start to finish. The main pages are:
- Orders: View, invoice, ship, hold, or cancel customer orders.
- Invoices: All invoices created for orders.
- Shipments: Shipment records with tracking numbers.
- Credit Memos: Refunds issued to customers.
- Transactions: Payment gateway transactions.
Tip: Use the filters and saved views in the Orders grid to quickly find pending or unpaid orders every morning.
3. Catalog
The Catalog menu holds everything you sell:
- Products: Add and edit simple, configurable, grouped, virtual, bundle, and downloadable products.
- Categories: Build the category tree that shoppers use to browse your store.
We will cover product types and categories in detail later in this series.
4. Customers
The Customers menu manages your buyers:
- All Customers: Create, edit, or log in as a customer (when enabled).
- Now Online: See which customers and guests are browsing right now.
- Customer Groups: Create groups such as Wholesale or VIP for special pricing and tax rules.
5. Marketing
The Marketing menu helps you sell more:
- Promotions: Catalog Price Rules and Cart Price Rules for discounts and coupon codes.
- Communications: Email templates, newsletter templates, queue, and subscribers.
- SEO & Search: URL rewrites, search terms, search synonyms, and the XML sitemap.
- User Content: Product reviews waiting for approval.
6. Content
The Content menu controls what shoppers see:
- Elements: CMS pages, blocks, widgets, and the media gallery.
- Design: Theme configuration for each website and store view, including logo, header, footer, and design schedule.
Tip: Change the store logo and footer from Content > Design > Configuration, not by editing theme files.
7. Reports
The Reports menu gives business insights:
- Sales: Orders, tax, invoiced, shipping, refunds, and coupons reports.
- Products: Bestsellers, views, low stock, and ordered products.
- Customers: Order totals, order count, and new accounts.
- Marketing and Reviews: Abandoned carts, search terms, and reviews.
- Statistics: Refresh report statistics so the data stays current.
8. Stores
The Stores menu is the most important area for setup:
- Settings > All Stores: Websites, stores, and store views.
- Settings > Configuration: Almost every store setting, such as store name, emails, catalog, checkout, payment, shipping, and security.
- Taxes: Tax rules, tax zones, and rates.
- Currency: Currency rates and symbols.
- Attributes: Product attributes, attribute sets, and ratings.
Tip: After you save a configuration change, Magento shows a message if a cache needs to be refreshed. Click the link in that message to refresh it.
9. System
The System menu handles technical operations:
- Data Transfer: Import and export products, customers, and prices with CSV files.
- Extensions: Integrations for connecting other apps through the API.
- Tools: Cache Management and Index Management.
- Permissions: All admin users, user roles, and locked users.
- Other Settings: Notifications, custom variables, and the encryption key.
You can also clear the cache and reindex from the command line:
bin/magento cache:flush
bin/magento indexer:reindex
bin/magento indexer:status
Note: Run these commands from the Magento root folder as the file system owner, not as root. Reindexing a large catalog can take several minutes.
10. Find Partners & Extensions
This section links to the Commerce Marketplace, where you can find extensions, themes, and technology partners for your store. Install extensions with Composer on a staging server first, and always check that they support your Magento version.
How to Secure Your Magento 2 Admin Panel
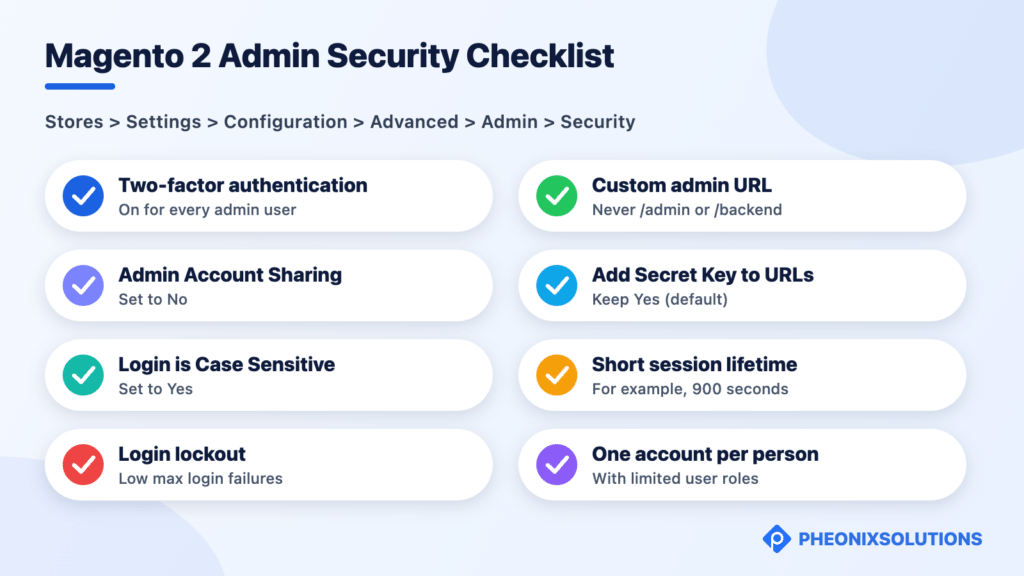
The admin is the main target for attackers, so good Magento 2 admin security starts on day one. Go to Stores > Settings > Configuration > Advanced > Admin > Security and review these settings:
- Admin Account Sharing: Set to No so one account cannot be used on many devices at the same time.
- Add Secret Key to URLs: Keep it set to Yes (the default) to protect admin links.
- Login is Case Sensitive: Set to Yes.
- Admin Session Lifetime (seconds): Use a short time, such as 900 seconds (15 minutes).
- Maximum Login Failures to Lockout Account: Keep a low number. The default is 6 attempts.
Next, create a separate admin account for each team member instead of sharing one login. You can do it in System > Permissions > All Users, or from the command line:
bin/magento admin:user:create \
--admin-user=priya \
--admin-password='Strong@Pass2026' \
--admin-email=priya@example.com \
--admin-firstname=Priya \
--admin-lastname=Kumar
Then go to System > Permissions > User Roles to create roles with limited access, for example, a Sales role that can only see orders and customers.
Note: For strong Magento 2 admin security, keep two-factor authentication enabled for every admin user, and never use simple admin URLs such as /admin or /backend.
Common Magento 2 Admin Mistakes to Avoid
- Sharing one admin login: You lose track of who changed what. Give each person their own account.
- Giving everyone full access: Use user roles so staff only see the sections they need.
- Ignoring cache messages: Changes may not appear on the storefront until the cache is refreshed.
- Changing settings at the wrong scope: Check the Scope switcher at the top of the configuration page before you save.
- Installing untested extensions on live stores: Always test on a staging copy first.
Conclusion
The Magento 2 admin panel looks big at first, but it follows a clear structure. Once you know the 10 main sections, you can find any setting quickly and manage your store with confidence.
Quick recap:
- Dashboard, Sales, Catalog, and Customers are for daily store work.
- Marketing, Content, and Reports help you grow and track sales.
- Stores > Configuration holds most store settings.
- System handles cache, indexes, imports, and admin users.
- Secure the admin with 2FA, roles, and the Advanced > Admin > Security settings.
Bookmark this Magento 2 admin panel guide for your team. In the next article of this series, we will cover the most useful Magento 2 CLI commands every developer should know.
FAQs
1. How do I find my Magento 2 admin URL?
Run bin/magento info:adminuri from the Magento root folder. It shows the Admin URI, which you add to your store domain, for example, https://shop.example.com/admin_1a2b3c.
2. How do I reset a forgotten Magento 2 admin password?
Use the Forgot your password link on the admin login page, or reset it from the command line. See our guide on how to reset the Magento 2 admin password using the CLI.
3. Where are most settings in the Magento 2 admin panel?
Most settings are in Stores > Settings > Configuration. The left panel groups them into General, Catalog, Customers, Sales, Advanced, and other sections.
4. Can I disable two-factor authentication in the Magento 2 admin?
You can disable it on a local development server, but never on a live store. 2FA protects your admin from stolen passwords.
5. How do I limit what an admin user can see?
Create a role in System > Permissions > User Roles, choose only the resources the person needs, and assign the role to their admin account.
Related Articles
- Magento 2 Setup Guide: Install Magento 2.4.9 on Ubuntu in 9 Steps
- How to Reset the Admin Password in Magento 2 Using the Command Line Interface Tool
- How to Enable Maintenance Mode in Magento and Customize the Maintenance Page
- How to Update Secure and Unsecure URLs Directly in the Magento Database
- How to Set Up and Install Stripe in Magento 2
Official Documentation
- What Is the Admin?
- The Admin Sidebar
- Admin Dashboard
- Configure Admin Security
- Two-Factor Authentication
- Login Credentials and URLs
Talk to Magento Experts
Managing a Magento store takes time, especially when settings, extensions, and security all need attention. At Pheonix Solutions, our team sets up, customizes, and supports Magento stores so you can focus on selling.
We can help you with:
- eCommerce development on Magento 2, including admin setup, user roles, and custom modules.
- Software maintenance and support for daily admin tasks, upgrades, and security patches.
- Security services to harden your Magento admin and server.
Need help setting up your Magento admin or training your team? Talk to our Magento experts and get your store running smoothly.