Post Date: November 13, 2026
Introduction
Exporting a database is an important task when managing websites and web applications. A database export creates a copy of the database structure and its stored data, which can be used for backup, migration, or transferring information to another server.
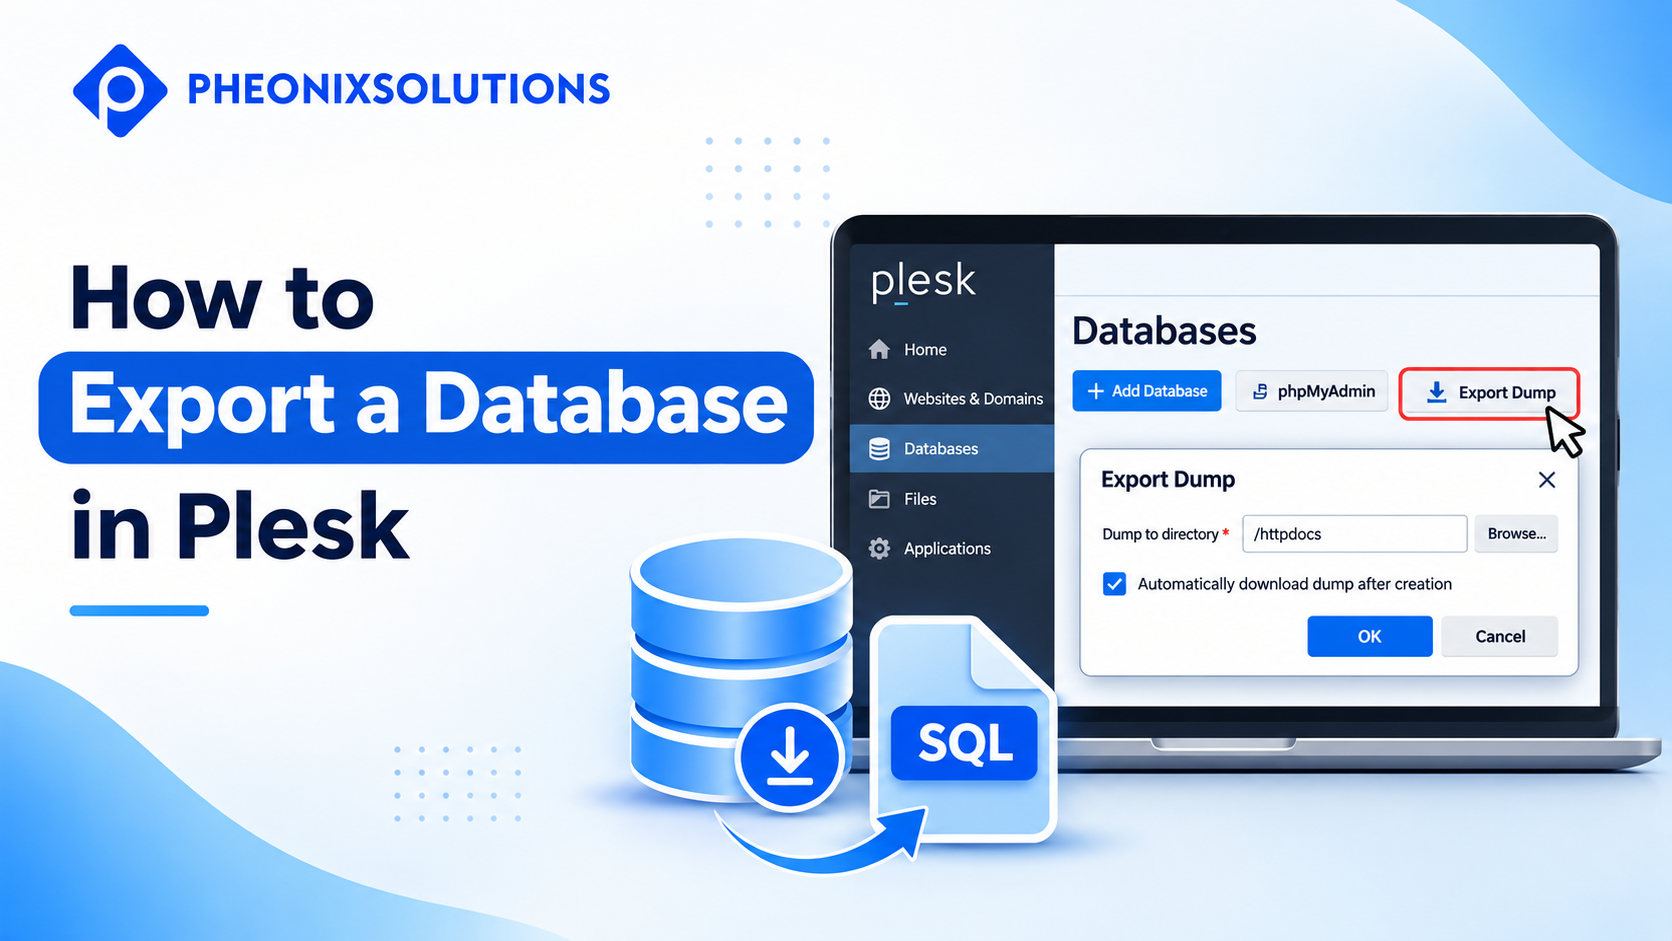
Plesk provides a built-in Export Dump feature that allows users to export databases directly from the control panel. You can also use phpMyAdmin to export a database in SQL format.
In this guide, we will explain how to export a database in Plesk using both methods with simple step-by-step instructions.
Prerequisites
Before exporting a database in Plesk, ensure that you have:
- Access to the Plesk control panel.
- Valid Plesk login credentials.
- Permission to access the required website and database.
- The correct database name that needs to be exported.
- Sufficient storage space to save the database dump.
- Access to phpMyAdmin, if you plan to use the alternative export method.
Implementation
Method 1: Export a Database Using Plesk Export Dump
Follow these steps to export a database directly from the Plesk control panel.
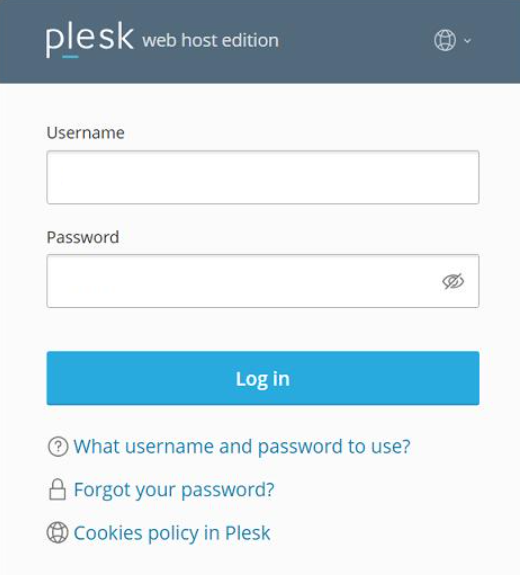
Step 1: Log in to Plesk
Open your web browser and access the Plesk control panel using your login URL.
Enter your Plesk username and password to log in.
Step 2: Open the Databases Section
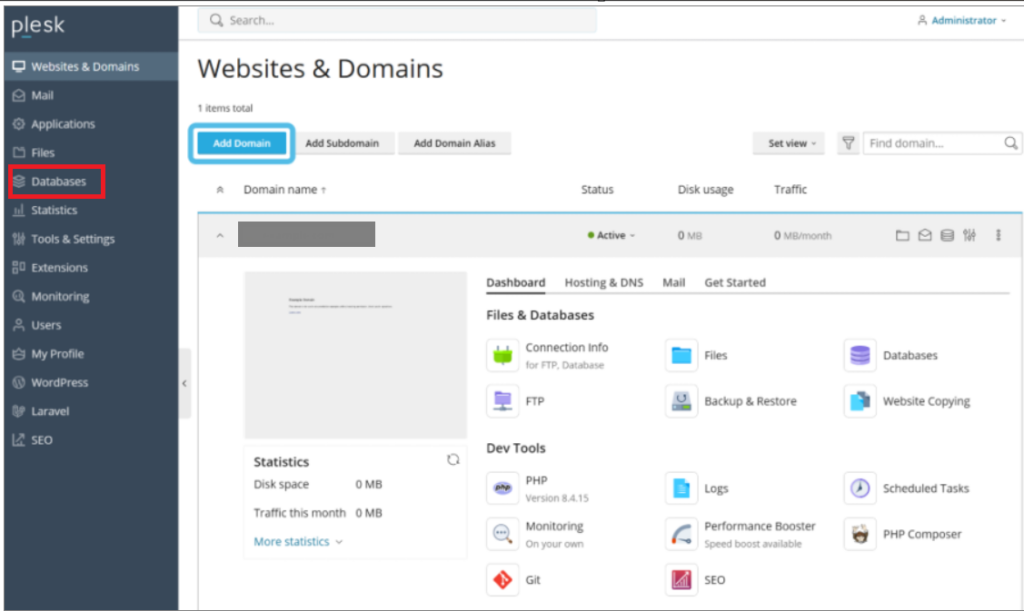
After logging in:
- Navigate to Websites & Domains.
- Select the required domain.
- Click Databases.
The Databases section displays the databases associated with your website.
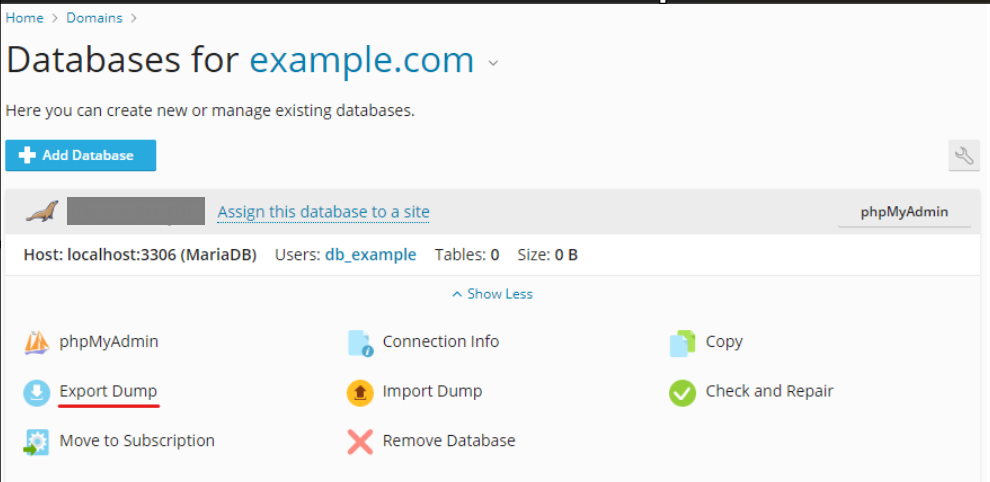
Step 3: Select the Database
Find the database you want to export from the database list.
Verify the database name and its associated domain before proceeding. This helps prevent exporting the wrong database when multiple databases are available.
Step 4: Click Export Dump
Locate the required database and click the Export Dump option.
A window will appear where you can configure the database export settings.
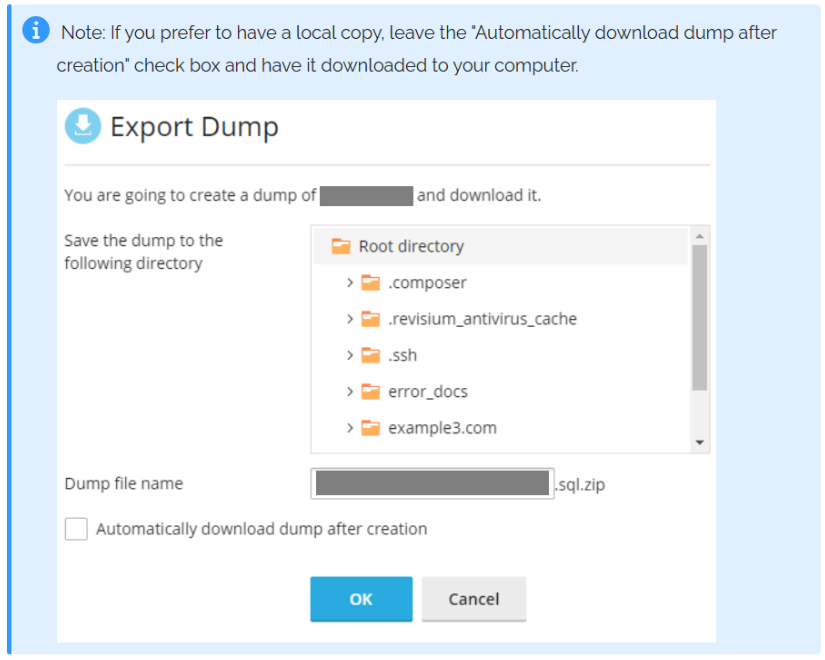
Step 5: Configure the Export Settings
In the Export Dump window:
- Select the directory where you want to save the database dump.
- Enter or confirm the dump file name if the option is available.
- Select Automatically download the dump after creation if you want the file downloaded directly to your local computer.
- Review the selected settings.
Important: Avoid saving database dump files inside publicly accessible directories such as httpdocs. Store database exports in a secure location to prevent unauthorized access.
Step 6: Start the Database Export
Click OK to start the export process.
Plesk will create the database dump and save it in the selected server directory. If automatic download was enabled, the file will also be downloaded to your computer.
The exported database dump is generally provided as a ZIP archive containing the SQL dump.
Method 2: Export a Database Using phpMyAdmin
You can also export a database using phpMyAdmin from the Plesk control panel.
Step 1: Open phpMyAdmin
- Log in to Plesk.
- Navigate to Websites & Domains → Databases.
- Locate the required database.
- Click phpMyAdmin.
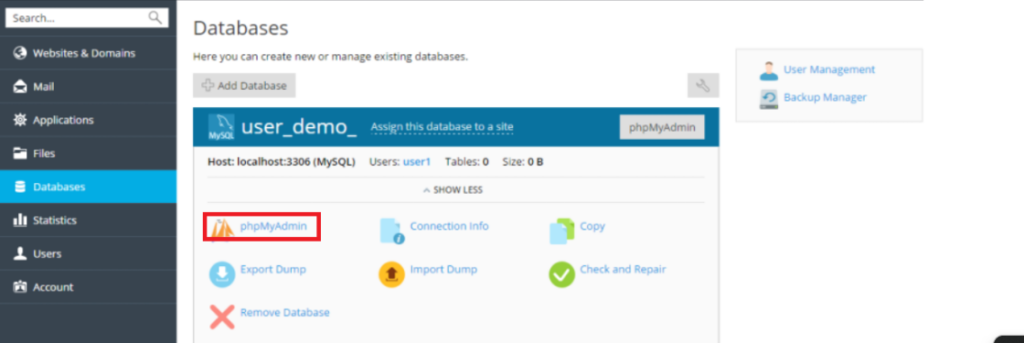
The phpMyAdmin interface will open.
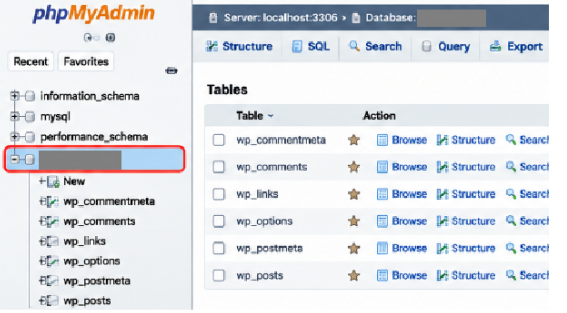
Step 2: Select the Database
In phpMyAdmin, locate and select the database you want to export from the left-side navigation panel.
Verify that the correct database is selected before continuing.
Step 3: Open the Export Tab
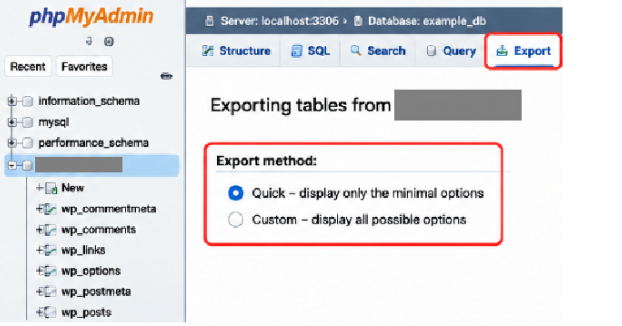
Click the Export tab from the top navigation menu.
Select the export method:
- Quick: Uses the default export settings.
- Custom: Allows you to select specific tables and configure additional export options.
For a complete database export, Quick is generally sufficient.
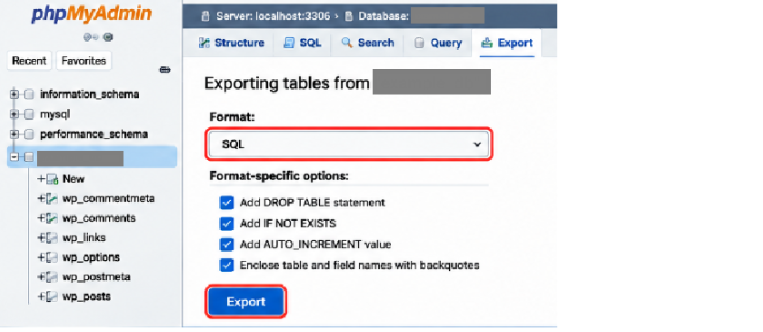
Step 4: Choose the Export Format
Select SQL as the export format.
If you choose Custom, verify that the required database tables and both structure and data are selected.
You can also select a compression option if available.
Step 5: Download the Database
Click Export or Go, depending on your phpMyAdmin version.
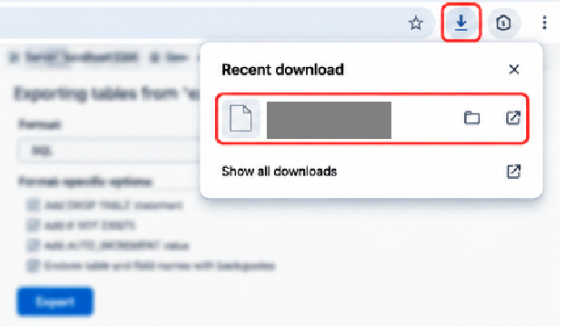
The database export file will be generated and downloaded to your local computer.
Keep the downloaded file in a secure location for future backup or migration requirements.
Conclusion
Exporting a database in Plesk is a straightforward process using the built-in Export Dump feature or phpMyAdmin.
The Export Dump option allows you to create and store a database dump directly through Plesk, while phpMyAdmin provides additional control over the export format and selected tables.
Always verify the database name before exporting and store the generated backup securely to protect your website data.
Frequently Asked Questions (FAQs)
1. How do I export a database in Plesk?
Log in to Plesk, navigate to Websites & Domains → Databases, select the required database, and click Export Dump. Choose the destination directory and click OK to generate the database dump.
2. Where is the exported database stored in Plesk?
The exported database dump is saved in the directory selected during the export process. By default, Plesk uses the subscription’s home directory.
3. Can I download a database directly from Plesk?
Yes. Enable the Automatically download dump after creation option in the Export Dump window. Plesk will create the dump and download a copy to your local computer.
Related Articles
Official Documentation
How Pheonix Solutions Can Help
Managing databases efficiently is essential for maintaining website performance, protecting important information, and ensuring reliable data backups.
Pheonix Solutions provides web development, database management, cloud solutions, and DevOps services to help businesses manage their digital infrastructure effectively.
Our experts can help you with database configuration, backup management, migration, troubleshooting, and server administration.
Looking for professional database management support? Contact our experts to discuss your requirements.