Introduction

RainLoop is a lightweight, fast, and user-friendly webmail client that provides a modern web interface for managing email accounts. When integrated with the Ajenti Control Panel, RainLoop allows users to access their email accounts through a browser without requiring desktop email clients such as Outlook or Thunderbird.

This guide explains how to install and configure RainLoop Webmail on a Linux server running Ajenti and Ajenti-V. It also covers creating email accounts and verifying webmail access.

Prerequisites

Before proceeding, ensure the following requirements are met:

  • Linux server
  • Ajenti Control Panel installed
  • Ajenti-V website package installed
  • Functional mail server configured on the host
  • Domain name pointing to the server
  • PHP installed and working

Example domain used in this guide:

domain.tld mail.domain.tld

Step 1: Create a Website in Ajenti

1. Login to Ajenti

Open the Ajenti Control Panel:

https://SERVER-IP:8000

2. Create a New Website

Navigate to:

WEB → Websites

Domains Tab

1.Click Add

2.Enter the domain:

mail.domain.tld

3. Click Apply ChangesConfigure Rainloop Webmail:

Access the URL https://mail.domain.tld/?admin. 
Step 2: Install RainLoop

Create Webmail Directory

mkdir -p /home/webmail

cd /home/webmail

Download RainLoop Installer

wget http://repository.rainloop.net/installer.php

Install RainLoop

php installer.php

Example output:

RainLoop Webmail installation completed successfully.

Set File Permissions

chown -R www-data:www-data /home/webmail

chmod -R 755 /home/webmail

Verify permissions:

ls -la /home/webmail

Step 3: Access RainLoop Administration Panel

Open the following URL in a browser:

https://mail.domain.tld/?admin

Default Credentials

Username: admin

Password: 12345

Important: Change the default administrator password immediately after login.

Add Email Account on Ajenti Control panel:

Step 4: Change Administrator Password

Navigate to:

Security

Enter:

Current Password
New Password
Repeat Password

Click:

Update Password

You should receive a confirmation message indicating the password has been updated successfully.

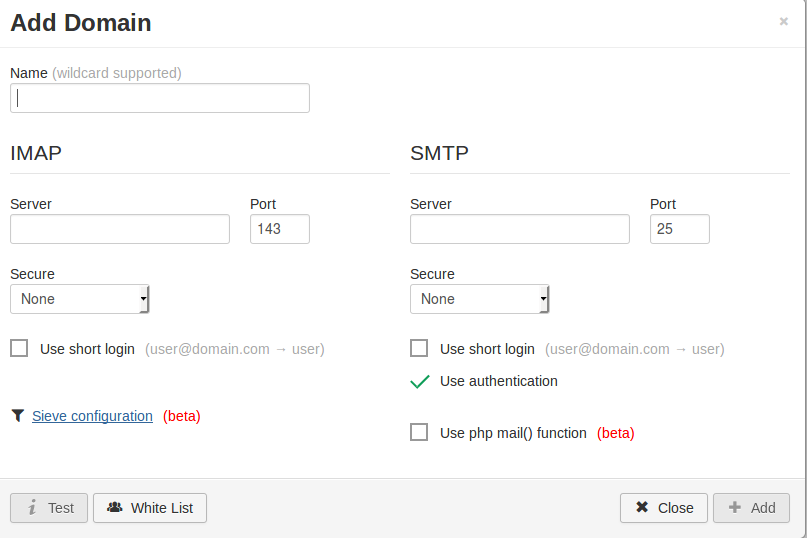
Step 5: Configure Email Domain

Navigate to:

Domains → Add Domain

You may remove unused domains such as:

gmail.com
outlook.com
yahoo.com

Add Your Domain

General Settings

Name: domain.tld

IMAP Settings

Server: mail.domain.tld
Port: 143
Secure: None

SMTP Settings

Server: mail.domain.tld
Port: 25
Secure: None

Test Connectivity

Click:

Test

Expected result:

IMAP connection successful
SMTP connection successful

If no errors are displayed, click:

+ Add

to save the domain configuration.

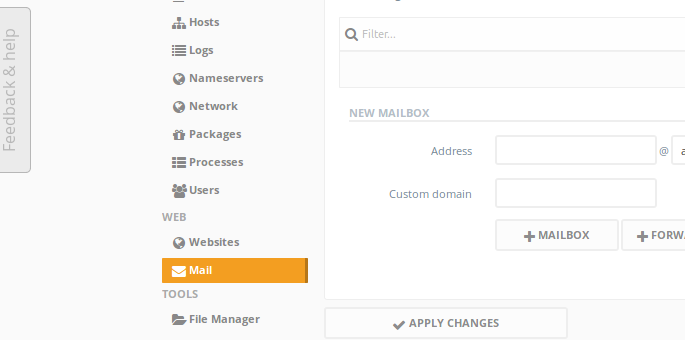
Step 6: Create an Email Account in Ajenti

Login to Ajenti:

https://SERVER-IP:8000

Navigate to:

WEB → Mail

Create Mailbox

Enter:

Address: user@domain.tld

Click:

+ Mailbox

Set Password

Under the mailbox section:

Select Mailbox
→ Change Password

Enter the new password and save the changes.

Click:

Apply Changes

Step 7: Verify Email Login

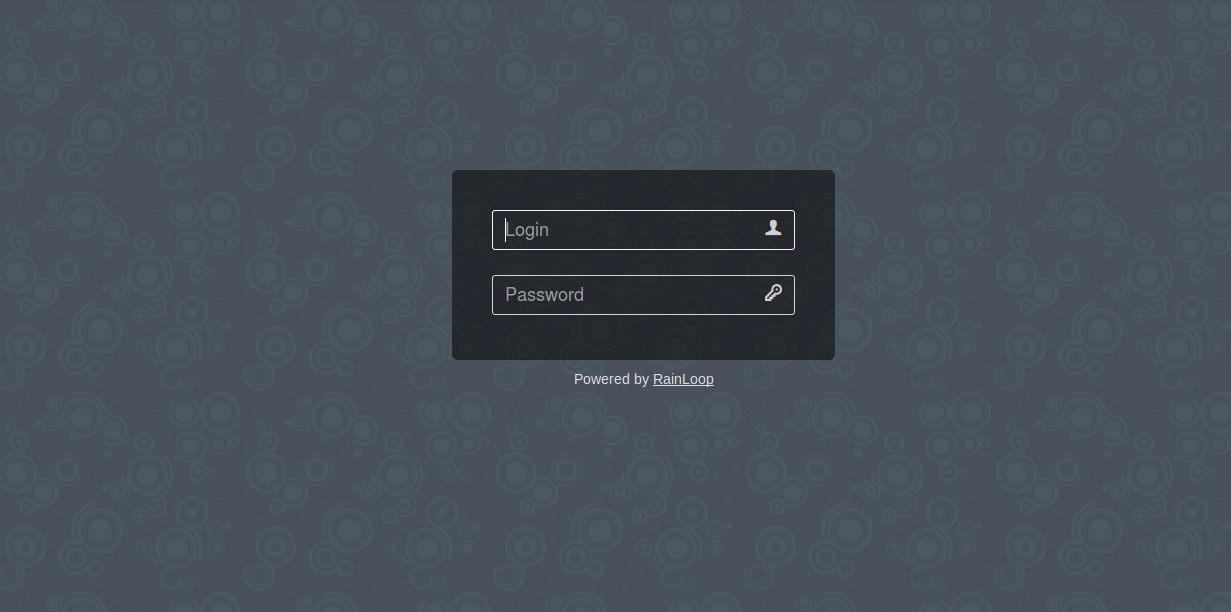
Open the RainLoop login page:

https://mail.domain.tld

Login using:

Email: user@domain.tld
Password: mailbox password

If the configuration is correct, the mailbox dashboard will load successfully.

Troubleshooting

Verify Web Server

systemctl status nginx

or

systemctl status apache2

Verify PHP

php -v

Verify IMAP Port

telnet mail.domain.tld 143

Verify SMTP Port

telnet mail.domain.tld 25

Check Mail Services

systemctl status postfix
systemctl status dovecot

Verification:

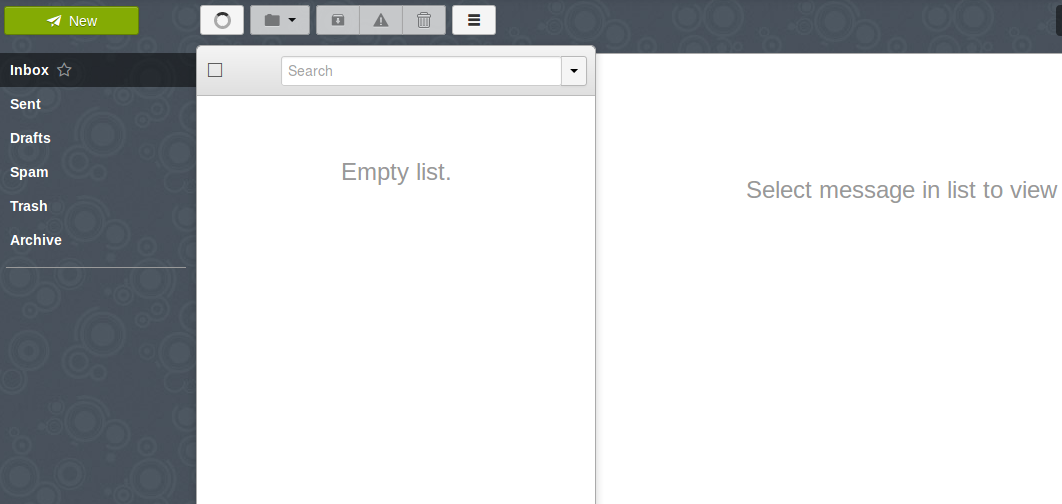
Access the webmail interface on the browser http://mail.domain.tld

Use the login which you created to access the webmail.
 

Review Logs

Nginx:

tail -f /var/log/nginx/error.log

Apache:

tail -f /var/log/apache2/error.log

Mail Logs:

tail -f /var/log/mail.log

Useful Commands

Restart Web Server

Nginx:

systemctl restart nginx

Apache:

systemctl restart apache2

Restart Mail Services

systemctl restart postfix
systemctl restart dovecot

Check Listening Ports

ss -tulpn | egrep ':25|:143|:993|:587'

Conclusion

RainLoop provides a lightweight and modern webmail interface that integrates seamlessly with Ajenti Control Panel. By creating a dedicated website, configuring IMAP and SMTP settings, and adding mailboxes through Ajenti, users can access their email accounts securely through a web browser from any location.

This setup is ideal for small business environments, VPS hosting platforms, and self-hosted mail server deployments where a simple and efficient webmail solution is required.

Leave a Reply