Date Posted : December 21,2018
Last Updated: October 04, 2026
Introduction
cPanel Moodle Migration is a common requirement for organizations looking to move their Moodle learning management system from shared hosting to a more scalable and reliable server environment. Migrating to a Bitnami Moodle Stack offers improved performance, simplified application management, enhanced security, and greater flexibility for future growth.
Bitnami provides a pre-configured Moodle deployment that includes all required components, making installation, maintenance, and upgrades significantly easier compared to traditional cPanel hosting environments. By moving your Moodle site to Bitnami, you can benefit from a streamlined infrastructure while maintaining all existing courses, users, grades, and learning content.
This step-by-step guide explains the complete cPanel Moodle Migration process, including backing up Moodle files and databases, transferring data to the Bitnami server, updating configuration settings, applying the correct permissions, and validating the migrated installation. By following this guide, you can perform a successful migration with minimal downtime and ensure that your Moodle platform continues to operate smoothly on the new environment.
By the end of this tutorial, your Moodle site will be fully migrated to the Bitnami Stack and ready to serve learners with all data, courses, and configurations preserved.
Prerequisites
Before starting the migration, ensure the following requirements are met:
- A Bitnami Moodle instance is already installed and running.
- SSH access to both the cPanel server and Bitnami server.
- Moodle website files copied from the cPanel server.
- Moodle data directory (
moodledata) copied from the cPanel server. - Moodle database exported from cPanel.
- Sufficient disk space available on the Bitnami server.
Migration Flow
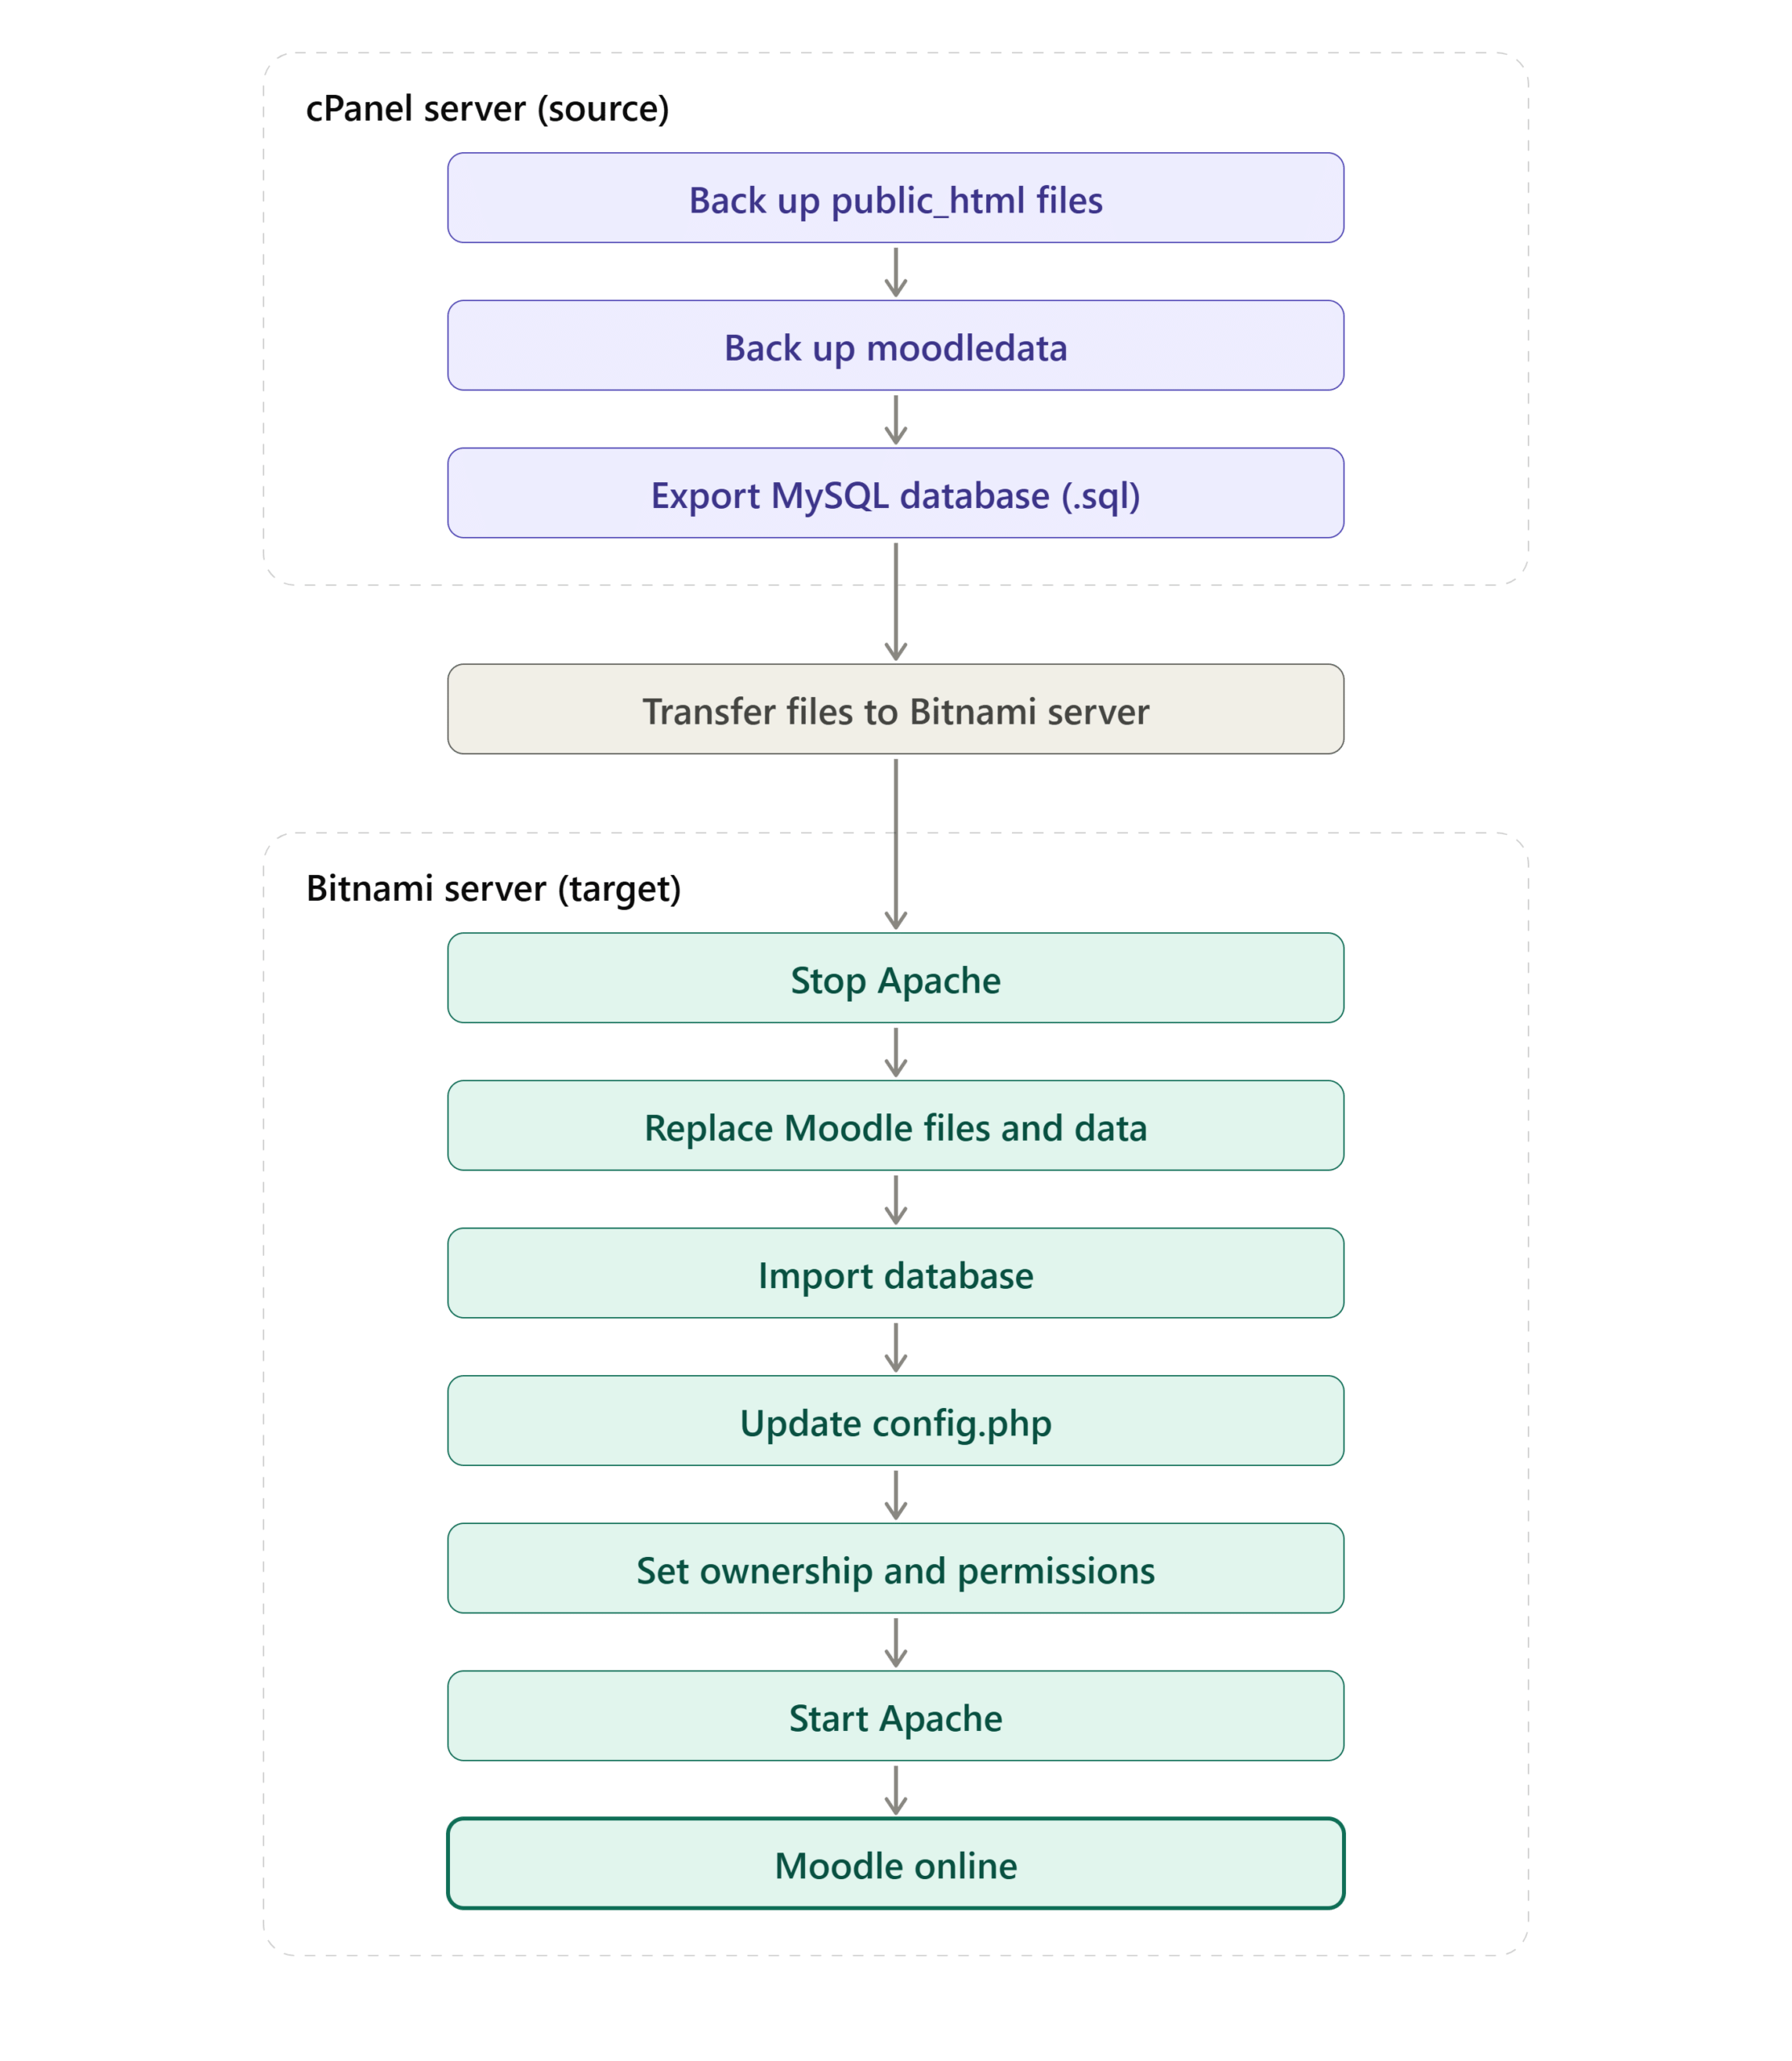
Step 1: Backup Existing Data from cPanel
Copy the Moodle web files and Moodle data directory from your cPanel server to the Bitnami server under a backup directory.
Moodle Files
/home/username/public_html
Moodle Data
/home/username/moodledata
Store the files on the Bitnami server:
/backup/cpbackup-username/
Step 2: Backup Moodle Database
- Log in to cPanel.
- Open phpMyAdmin.
- Select the Moodle database (for example,
username_moodle). - Click Export.
- Choose:
- Export Method: Quick
- Format: SQL
- Click Go.
- Download the generated SQL file.
Transfer the SQL backup file to the Bitnami server.
Step 3: Stop the Bitnami Apache Service
sudo /opt/bitnami/ctlscript.sh stop apache
Step 4: Rename Existing Bitnami Moodle Installation
Create backups of the default Bitnami Moodle installation.
mv /opt/bitnami/apps/moodle/htdocs \
   /opt/bitnami/apps/moodle/htdocs-OLD

mv /opt/bitnami/apps/moodle/moodledata \
   /opt/bitnami/apps/moodle/moodledata-OLD
Step 5: Restore Moodle Files and Data
Copy the Moodle website files:
cp -pr /backup/cpbackup-username/public_html/* \
/opt/bitnami/apps/moodle/htdocs/
Copy the Moodle data directory:
cp -pr /backup/cpbackup-username/moodledata/* \
/opt/bitnami/apps/moodle/moodledata/
Step 6: Import the Moodle Database
Create a new database on the Bitnami server and import the SQL backup.
mysql -u root -p moodledb < moodle_backup.sql
Verify that all Moodle tables have been imported successfully.
Step 7: Update Moodle Configuration
Edit the Moodle configuration file:
vi /opt/bitnami/apps/moodle/htdocs/config.php
Update the following variables:
$CFG->wwwroot = 'https://learn.example.com';
$CFG->dataroot = '/opt/bitnami/apps/moodle/moodledata';
$CFG->directorypermissions = 02775;
Replace the URL with your actual Moodle domain.
Step 8: Apply Correct Ownership
chown -R bitnami:daemon /opt/bitnami/apps/moodle/htdocs/

chown -R bitnami:daemon /opt/bitnami/apps/moodle/moodledata/

chown -R daemon:daemon \
/opt/bitnami/apps/moodle/moodledata/sessions/
Step 9: Configure Permissions
chmod 2775 /opt/bitnami/apps/moodle/moodledata

cd /opt/bitnami/apps/moodle/moodledata

find . -type d -exec chmod 2775 {} \;
Step 10: Start Apache Service
sudo /opt/bitnami/ctlscript.sh start apache
Post-Migration Verification
After starting Apache, verify the following:
- Moodle login page loads successfully.
- User authentication works.
- Courses and content are visible.
- File uploads function correctly.
- Cron jobs execute without errors.
- Plugins are working as expected.
- SSL certificate is properly configured.
Conclusion
A successful cPanel Moodle Migration to a Bitnami Stack can significantly improve the performance, security, and manageability of your Moodle environment. By carefully backing up Moodle files, exporting the database, migrating the moodledata directory, updating configuration settings, and applying the correct ownership and permissions, you can ensure a smooth transition with minimal disruption to users.
The Bitnami Stack provides a pre-configured and well-maintained platform that simplifies Moodle administration while offering greater flexibility for future growth and scalability. After completing the migration, it is recommended to thoroughly test user logins, course access, file uploads, plugins, scheduled tasks, and SSL functionality before directing production traffic to the new server.
Following the steps outlined in this guide will help you complete your cPanel Moodle Migration confidently and ensure that all courses, users, grades, and learning resources remain fully accessible in the new Bitnami environment.
Frequently Asked Questions (FAQ)
1. Will I lose my courses and student data during migration?
No. If the Moodle database, website files, and moodledata directory are migrated correctly, all courses, users, grades, assignments, and uploaded files will remain intact.
2. What should I do if Moodle displays a blank page after migration?
Check the Moodle error logs and verify:
- Database credentials in
config.php - File permissions and ownership
- PHP compatibility between the old and new servers
- Apache error logs
3. Can I migrate to a newer Moodle version during this process?
Yes. However, it is recommended to first migrate the existing version successfully and verify functionality. After validation, perform the Moodle upgrade using the official upgrade procedure to reduce migration risks.
Related Article
- How to migrate CPanel Account manually from backend
- Implement IPSET on csf on cPanel | Pheonixsolutions
- Change mysql data directory on cPanel| Safely move mysql data directory – Centos
Talk to our experts
Have a technology challenge or looking for the right solution for your business? Our team can help you with cloud, DevOps, development, infrastructure, design, and more. Feel free to reach out to our experts here.