Add another activity in Existing activity on Android Studio.
Add another activity in Existing activity on Android Studio.
Date : 20/03/2019
Introduction :
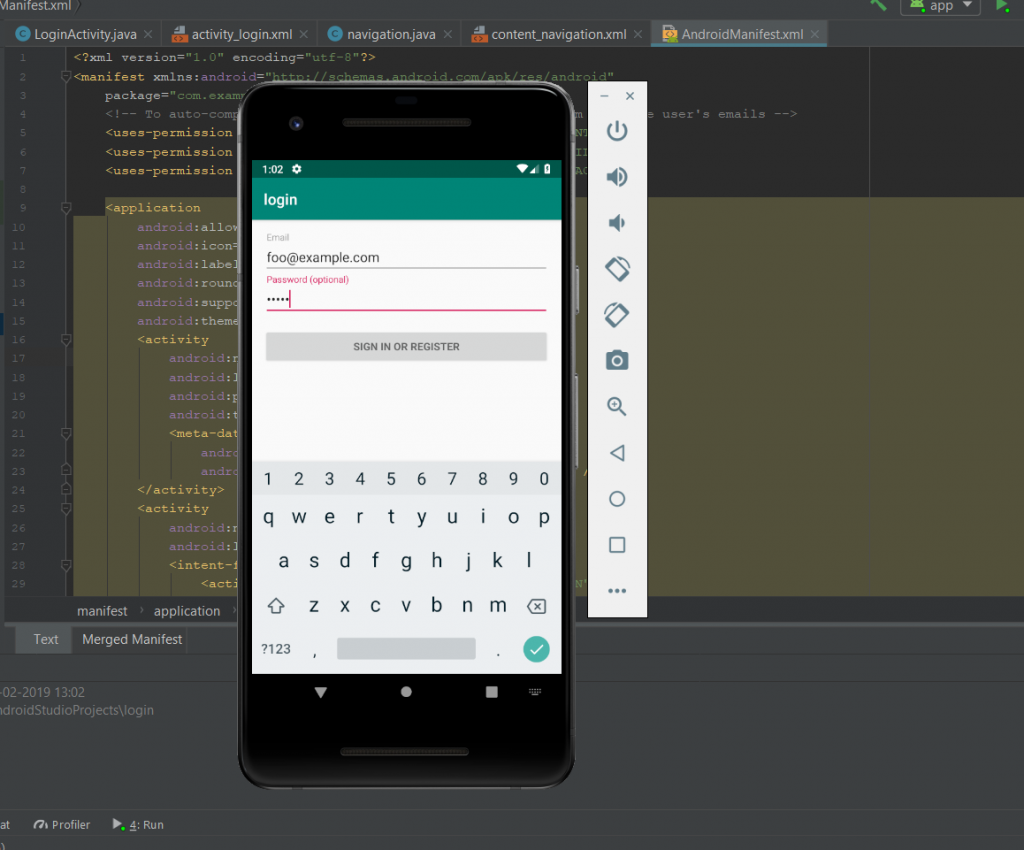
On here we are using first activity (login activity) after clicking login button it should redirect to an another activity(Navigation activity ).Navigation activity, it is nothing as like menu bar.
Steps : To add another activity (Navigation activity).
1). Before going to add another activity, create first activity as use this link ://blog.pheonixsolutions.com/how-to-create-first-project-in-android-studio/
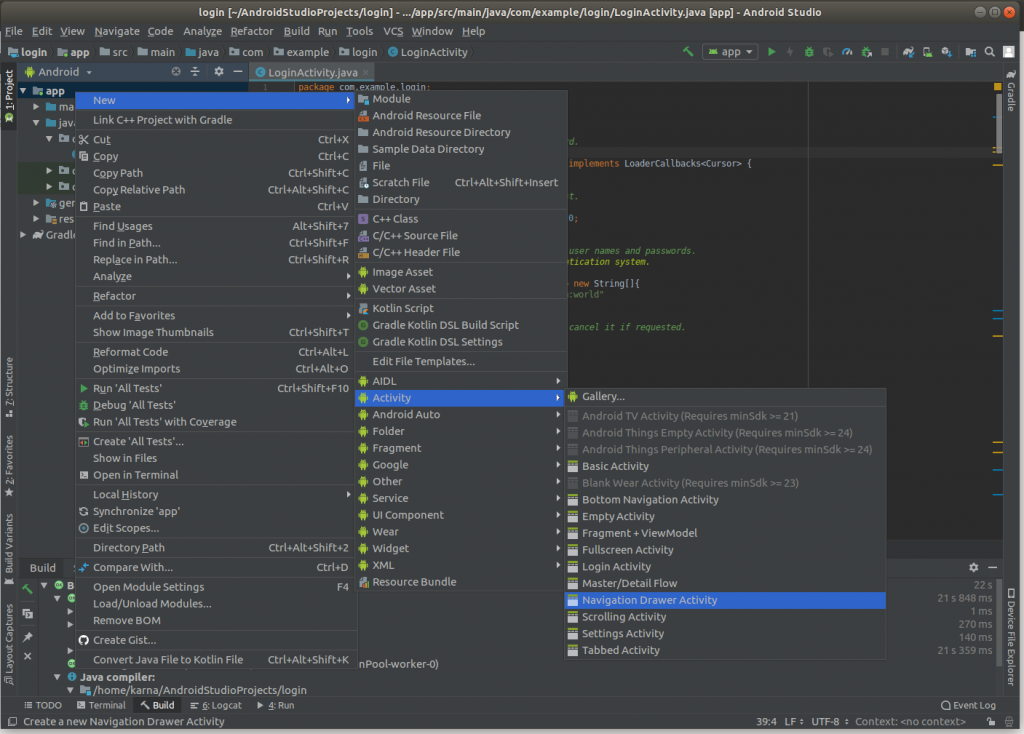
2). Then open first activity project in it right-click the app folder and select the New>Activity>Navigation Drawer Activity.
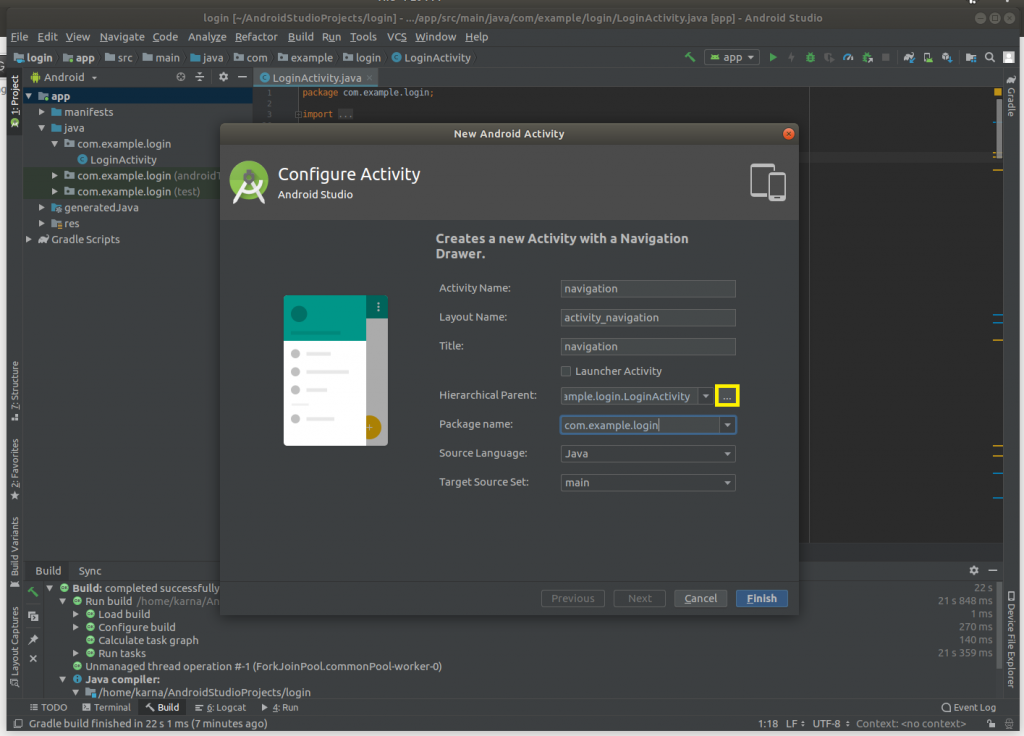
3).After that, new window will be appear in it change the name, select parent as login and click Finish button.
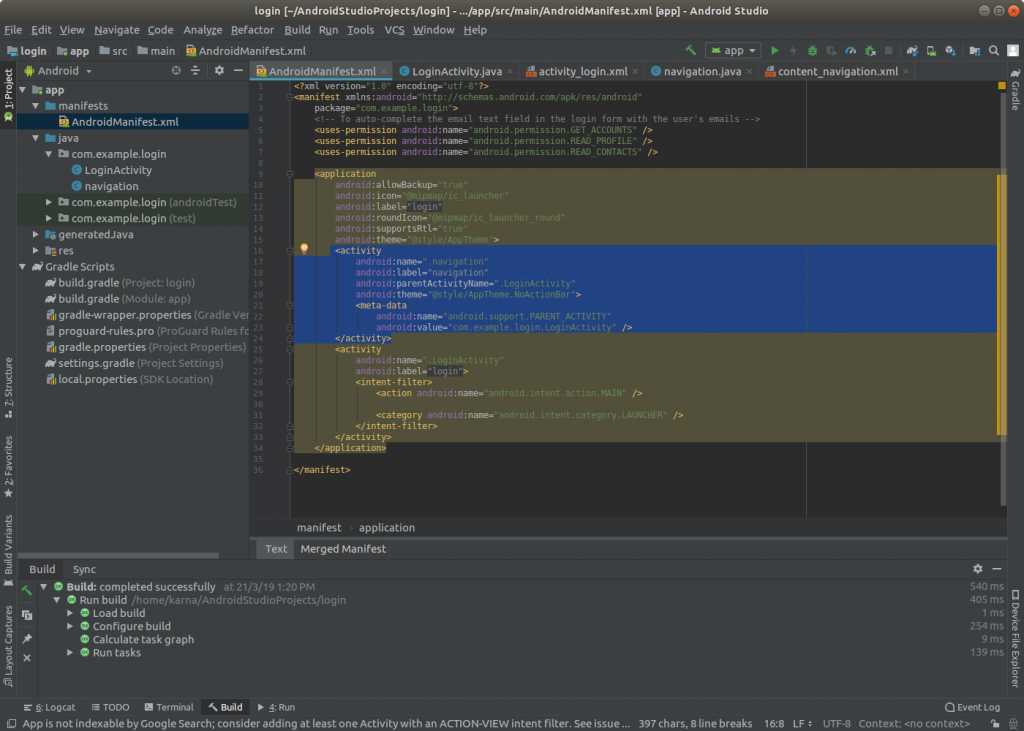
4). Then, In Androidmainfest.xml file you will find parent as login.
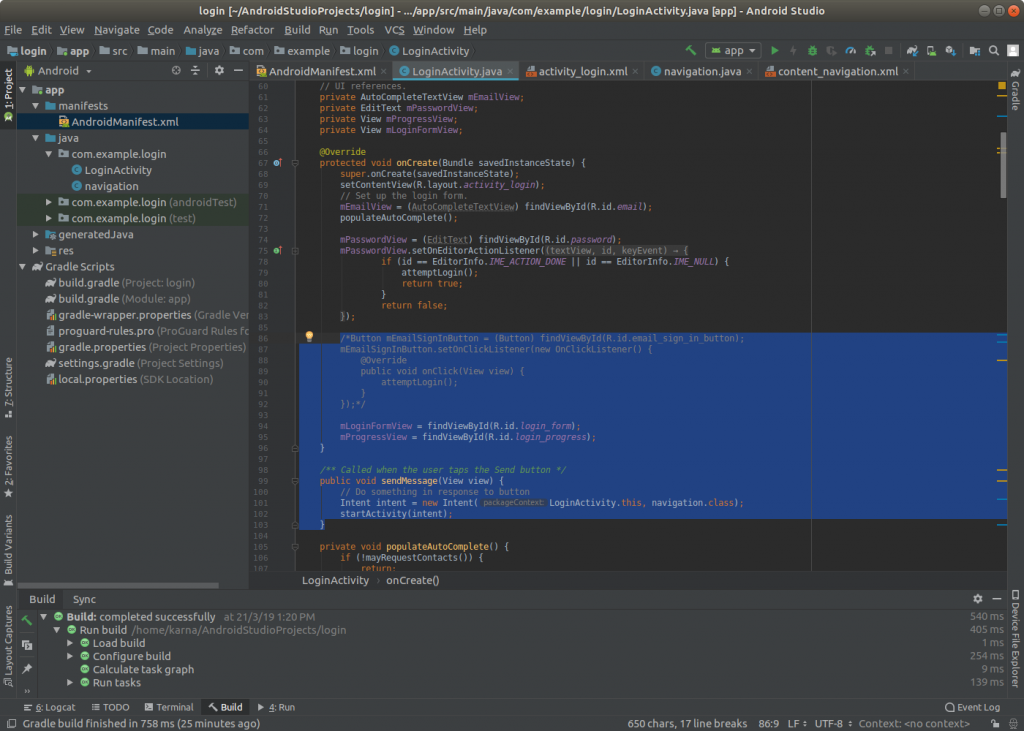
5).After that, second activity is created, then in first activity add sendMessage() method stub on below the onCreate() method : and make comment other onclick() code. If it so error, click cursor on it and enter Alt+Enter.
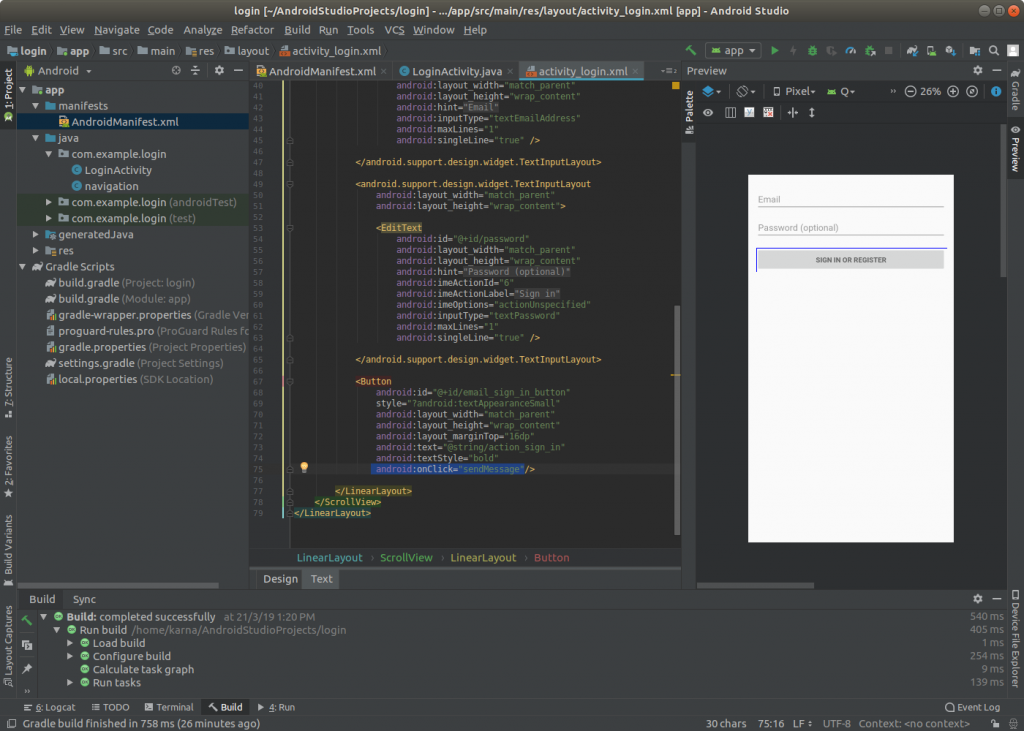
6).Then in activity login.xml file at the button addandroid:onClick=”sendMessage” code.
6).Then in navigation.java file add the Intent intent = getIntent(); code below oncreate() method .

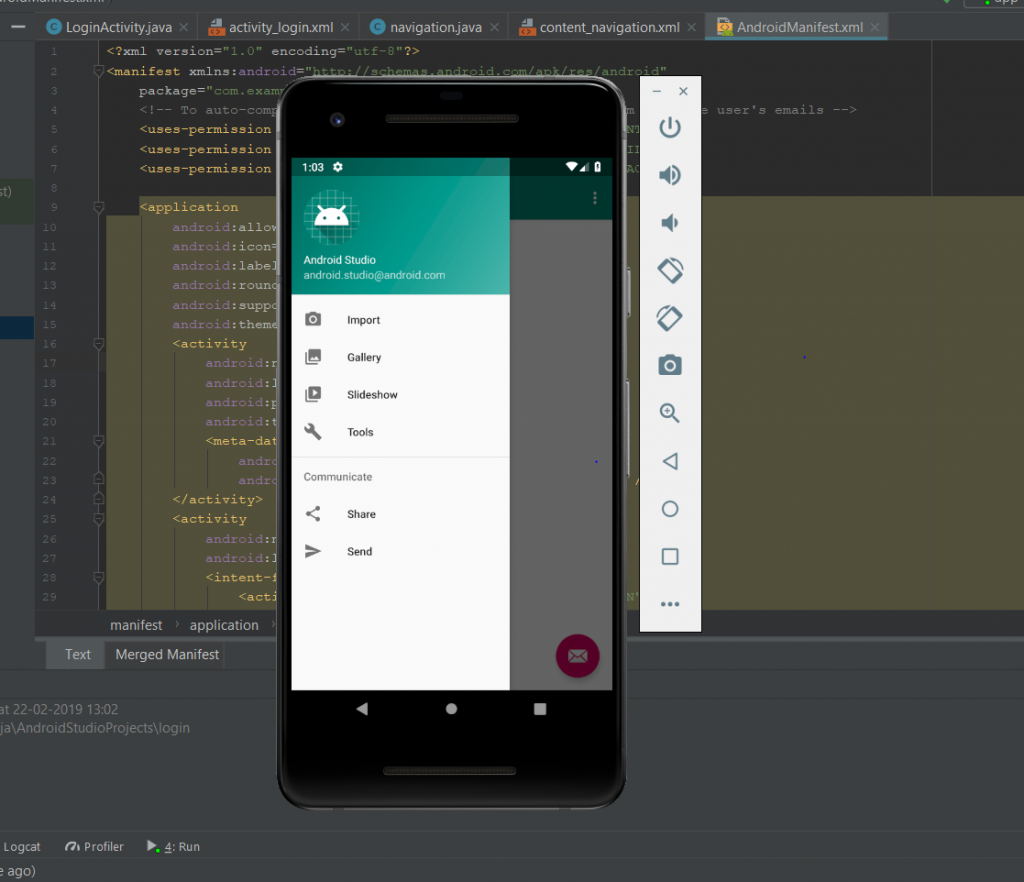
7). Finally click the Run(play) button and select the emulator and click ok button after few minutes your project will run on virtual device.


Thanks for using pheonix solutions.
You find this tutorial helpful? Share with your friends to keep it alive.