Automating Application Deployment with Webhooks
Introduction:
Automating application deployment is essential for delivering updates quickly and reliably. Manual deployment often slows down releases and increases the chance of errors. Webhooks offer a simple and powerful way to automate this process by triggering deployments whenever new code is pushed to the repository. This removes manual effort, speeds up workflows, and ensures consistent, efficient updates.
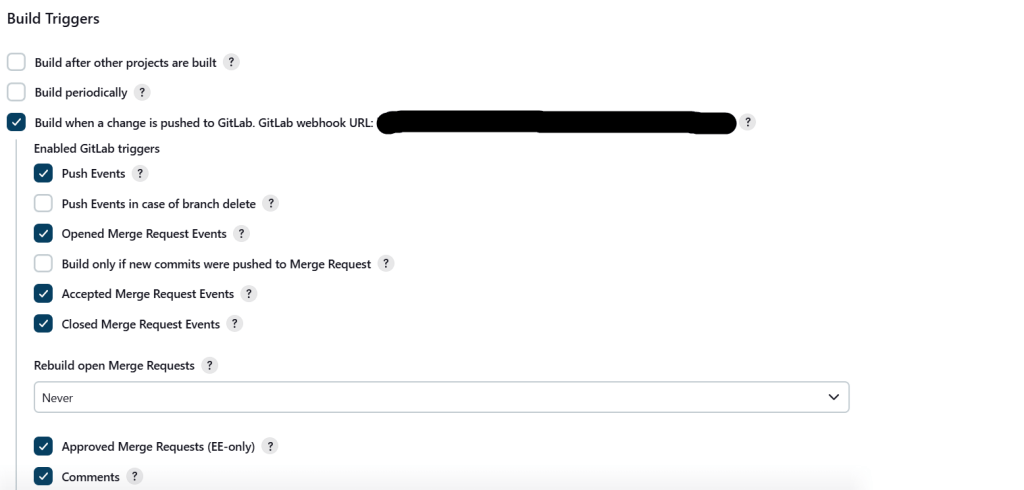
Step 1: Access Jenkins
- Log in to your Jenkins dashboard.
- Open the project/job you want to automate.
- Go to Configure → Build Triggers.


Auto-Deployment through Webhook:
Follow these steps to enable webhook-based deployment in GitLab.
Step 1: Login to GitLab
- Open your project in GitLab.
Step 2: Access Webhook Settings
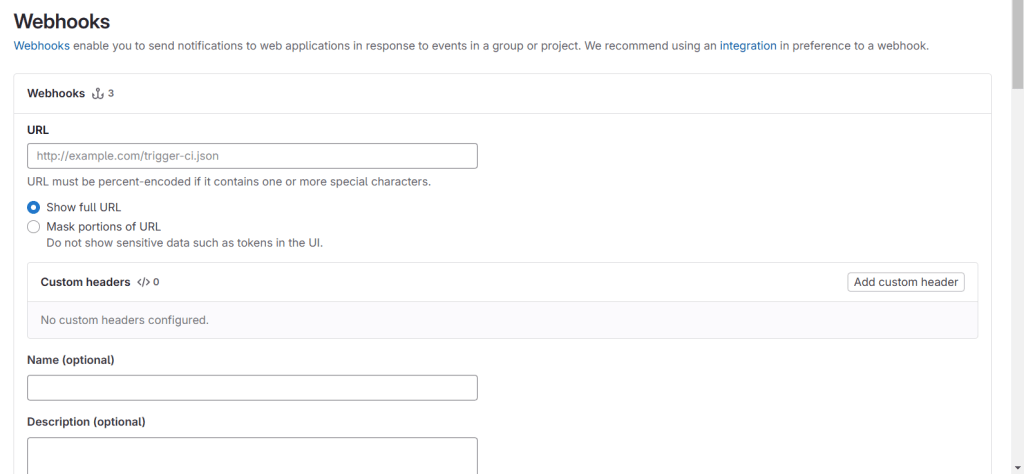
- From the left-hand sidebar, scroll down and click Settings → Webhooks.
Step 3: Add a New Webhook
- Click on “Add new webhook.”
You’ll now see a configuration page where you need to fill in details.

Step 4: Configure the Webhook
- Use the Jenkins webhook URL format
https://<your-jenkins-domain>/project/<jenkins-job-name>- Secret Token:
- Log in to Jenkins.
- Open the job for which you want to set up auto-deployment.
- Click “Configure.”
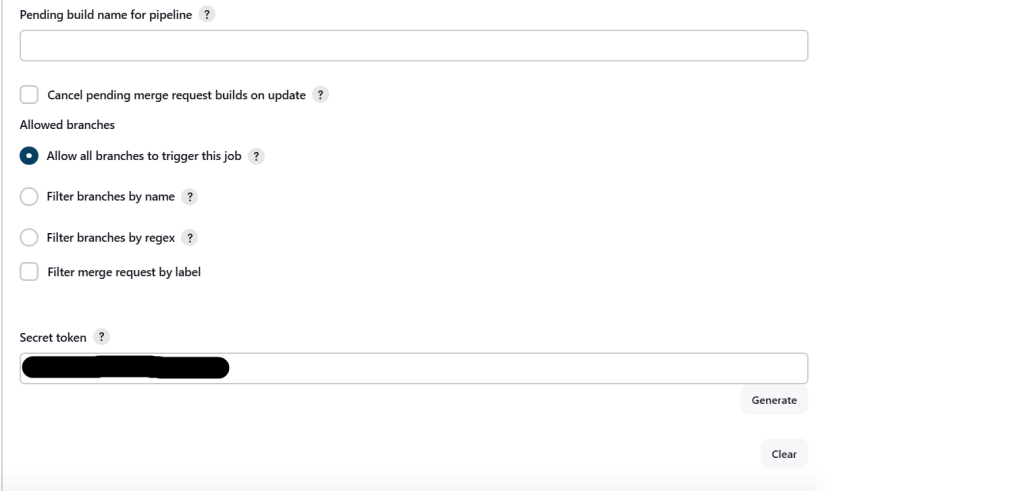
- Under Build Triggers, click “Advanced.”
- You’ll find a Secret Token — copy it and paste it into the Webhook form in GitLab.
Step 5: Configure the Trigger
- Under Trigger, check “Push Events.”
- In Regular Expression, specify your branch name (e.g., main, dev, or test).
- Click Add Webhook to save the configuration.
That’s it! Now every time you push code to the specified branch, Jenkins will automatically trigger a
deployment.
Conclusion
Auto-deployment with GitLab Webhooks and Jenkins makes your workflow faster, cleaner, and fully automated. Whether you’re deploying on every branch push or only on tagged releases, this setup ensures consistent, error-free deployments with zero manual effort. Simple to configure — powerful in action.
