Facebook Integration
Go to your facebook meta for developers
“app_id” , change it with our facebook app id
Create App add click on none
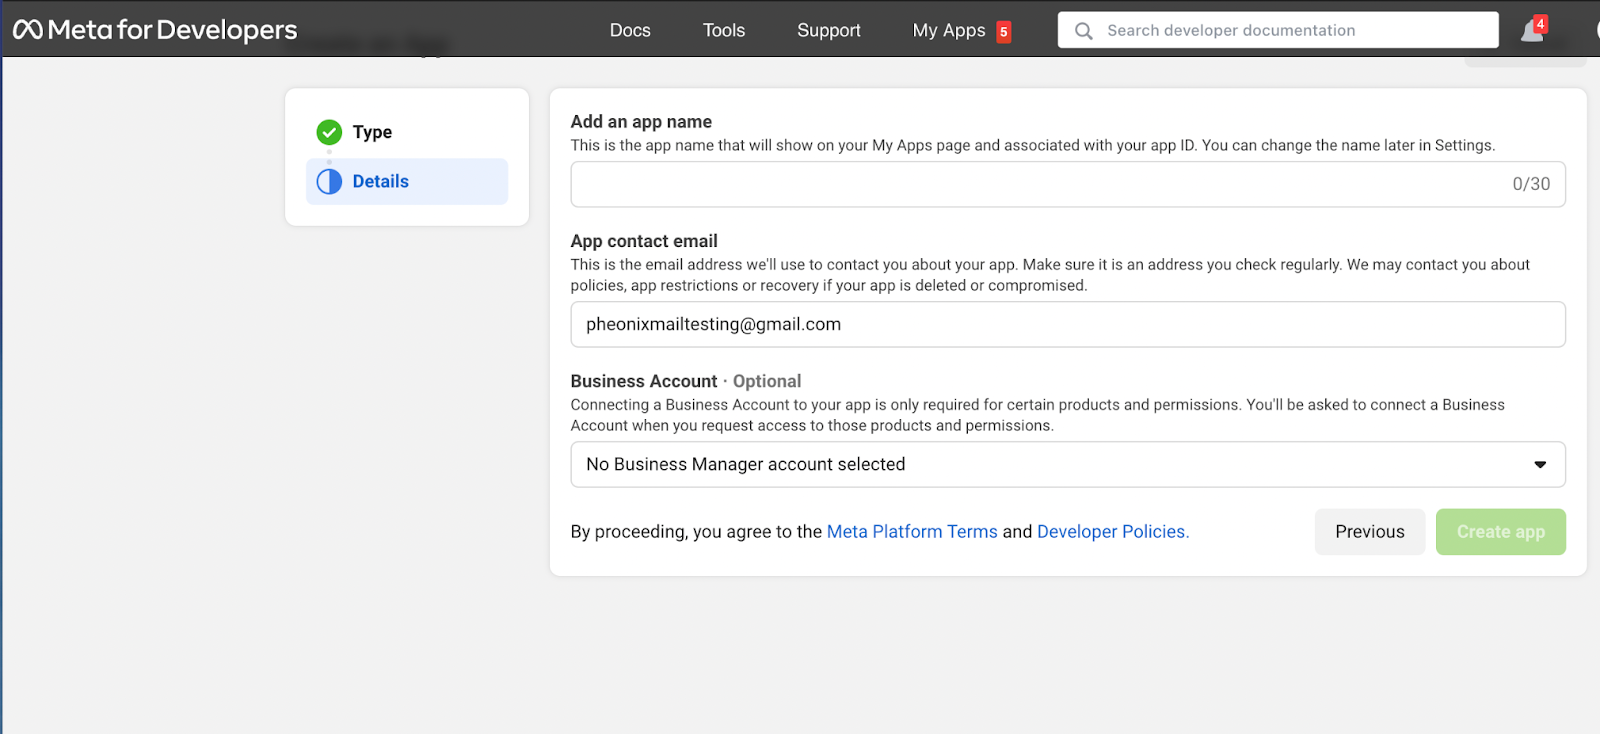
APP MODE : LIVE

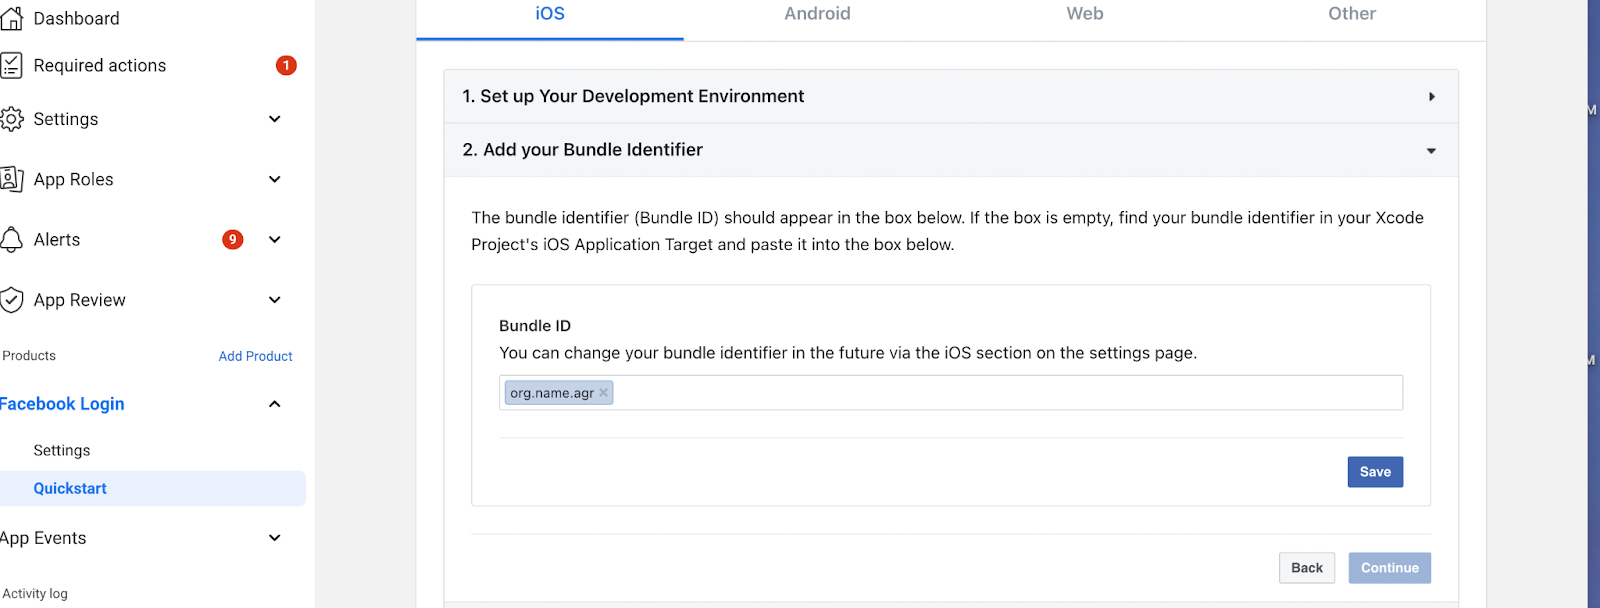
When click on Quickstart open platforms for facebook login

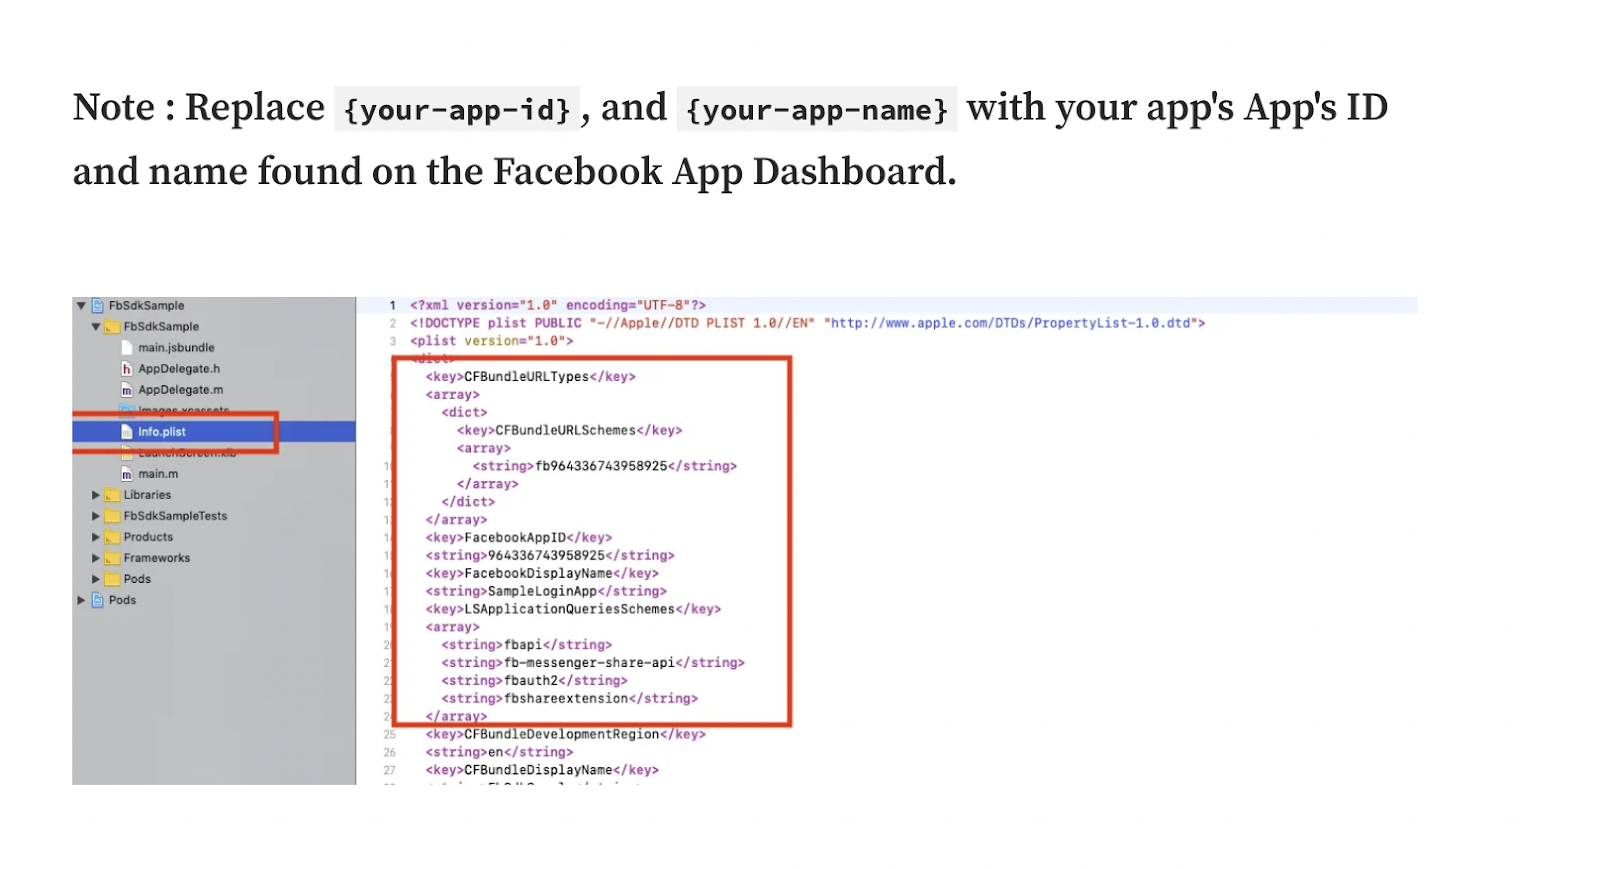
Add to info.plist In Xcode, right-click your project’s Info.plist file and select Open As -> Source Code.
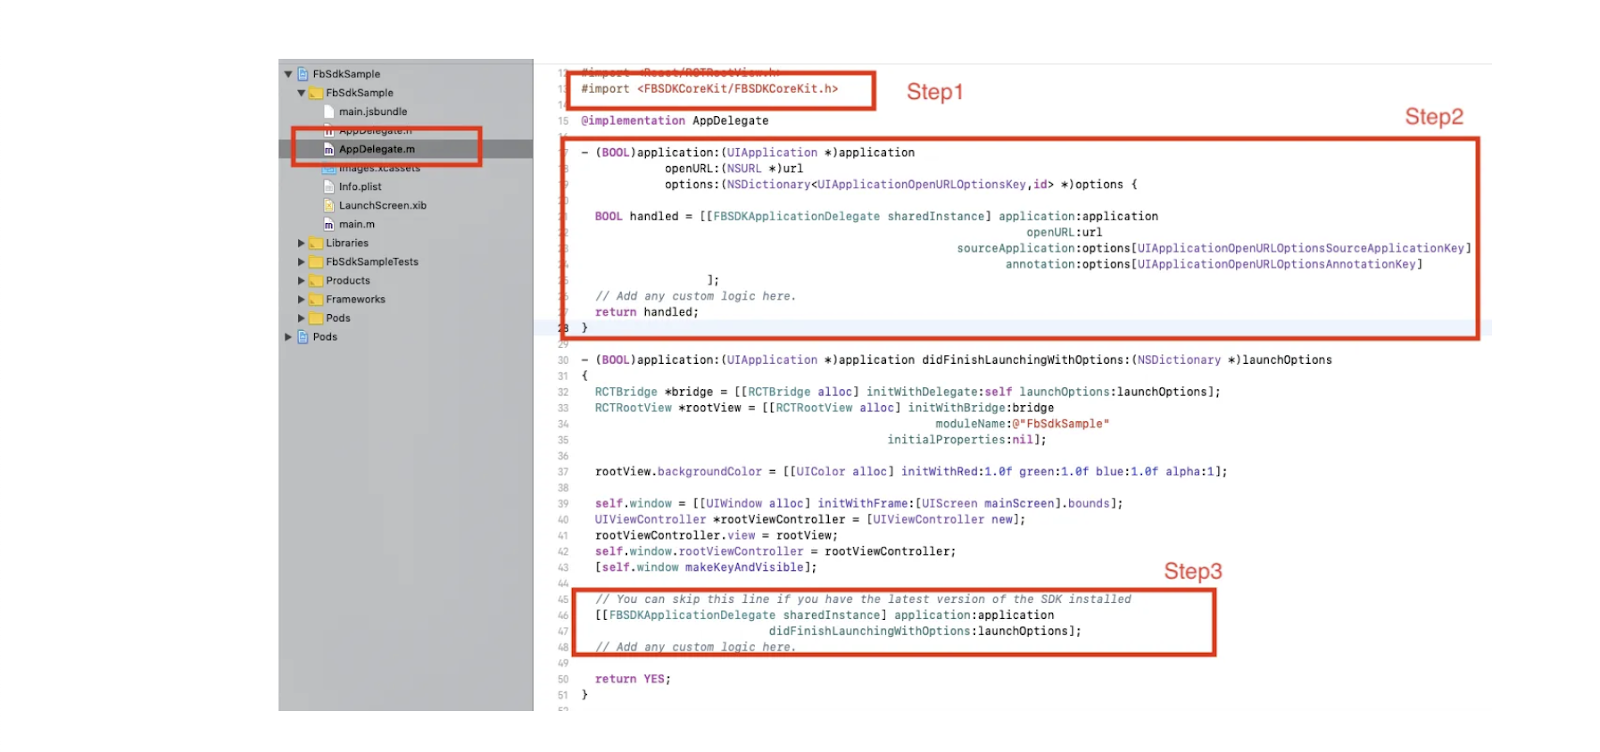
Connect App Delegate
| // AppDelegate.m | |
| #import <FBSDKCoreKit/FBSDKCoreKit.h> | |
| – (BOOL)application:(UIApplication *)application | |
| didFinishLaunchingWithOptions:(NSDictionary *)launchOptions { | |
| // You can skip this line if you have the latest version of the SDK installed | |
| [[FBSDKApplicationDelegate sharedInstance] application:application | |
| didFinishLaunchingWithOptions:launchOptions]; | |
| // Add any custom logic here. | |
| return YES; | |
| } | |
| – (BOOL)application:(UIApplication *)application | |
| openURL:(NSURL *)url | |
| options:(NSDictionary<UIApplicationOpenURLOptionsKey,id> *)options { | |
| BOOL handled = [[FBSDKApplicationDelegate sharedInstance] application:application | |
| openURL:url | |
| sourceApplication:options[UIApplicationOpenURLOptionsSourceApplicationKey] | |
| annotation:options[UIApplicationOpenURLOptionsAnnotationKey] | |
| ]; | |
| // Add any custom logic here. | |
| return handled; | |
| } |
- Go to Android Studio | New Project | Minimum SDK.
- Select API 15: Android 4.0.3 (IceCreamSandwich) or higher and create your new project.
- In your project, open your_app | Gradle Scripts | build.gradle (Project) and add the following repository to the buildscript { repositories {}} section to download the SDK from the Maven Central Repository:
mavenCentral() - In your project, open your_app | Gradle Scripts | build.gradle (Module: app) and add the following compile statement to the dependencies{} section to compile the latest version of the SDK:
implementation ‘com.facebook.android:facebook-android-sdk:latest.release’ - When you use the Facebook SDK, some events in your app are automatically logged and collected unless you disable automatic event logging. For details about what information is collected and how to disable automatic event logging, see Automatic App Event Logging.
- Build your project.
Add the following statements to import the Facebook SDK packages:
import com.facebook.FacebookSdk;
- import com.facebook.appevents.AppEventsLogger;
Generating a Development Key Hash
Mac OS :
keytool -exportcert -alias androiddebugkey -keystore ~/.android/debug.keystore | openssl sha1 -binary | openssl base64
Windows:
keytool -exportcert -alias androiddebugkey -keystore “C:\Users\USERNAME\.android\debug.keystore” | “PATH_TO_OPENSSL_LIBRARY\bin\openssl” sha1 -binary | “PATH_TO_OPENSSL_LIBRARY\bin\openssl” base64

Generate key hash and add it
Create strings for your Facebook app ID and for those needed to enable Chrome Custom Tabs. Also, add FacebookActivity to your Android manifest.
- Open your /app/res/values/strings.xml file.
Add string elements with the names facebook_app_id, fb_login_protocol_scheme and facebook_client_token, and set the values to your App ID and Client Token. For example, if your app ID is 1234 and your client token is 56789 your code looks like the following:
<string name=”facebook_app_id”>1234</string>
<string name=”fb_login_protocol_scheme”>fb1234</string>
<string name=”facebook_client_token”>56789</string>
- Copy Code
- Open the /app/manifest/AndroidManifest.xml file.
Add meta-data elements to the application element for your app ID and client token:
<application android:label=”@string/app_name” …>
…
<meta-data android:name=”com.facebook.sdk.ApplicationId” android:value=”@string/facebook_app_id”/>
<meta-data android:name=”com.facebook.sdk.ClientToken” android:value=”@string/facebook_client_token”/>
…
- </application>
- Copy Code
Add an activity for Facebook, and an activity and intent filter for Chrome Custom Tabs inside your application element:
<activity android:name=”com.facebook.FacebookActivity”
android:configChanges=
“keyboard|keyboardHidden|screenLayout|screenSize|orientation”
android:label=”@string/app_name” />
<activity
android:name=”com.facebook.CustomTabActivity”
android:exported=”true”>
<intent-filter>
<action android:name=”android.intent.action.VIEW” />
<category android:name=”android.intent.category.DEFAULT” />
<category android:name=”android.intent.category.BROWSABLE” />
<data android:scheme=”@string/fb_login_protocol_scheme” />
</intent-filter>
- </activity>
- Copy Code
Add a uses-permission element to the manifest after the application element:
<uses-permission android:name=”android.permission.INTERNET”/>
(Optional) To opt out of the Advertising ID Permission, add a uses-permission element to the manifest after the application element:
<uses-permission android:name=”com.google.android.gms.permission.AD_ID” tools:node=”remove”/>
These steps can be used to integrate Facebook