How to Add a Disk Quota for Harbor Projects?
Introduction:
In Harbor, disk quotas help administrators control the amount of storage each project can use. By setting quotas, we can prevent individual projects from consuming excessive disk space, ensuring optimal performance and fair resource distribution across all users. Harbor (v2.9.0 and later) supports setting quotas through both the web interface.
Prerequisites:
- Must log in to Harbor using admin access.
- Sufficient Backend Storage
- The Project Quotas feature is available in Harbor version 2.0 or later.
Step1:
Log in to the Harbor portal using an admin account.
Step 2:
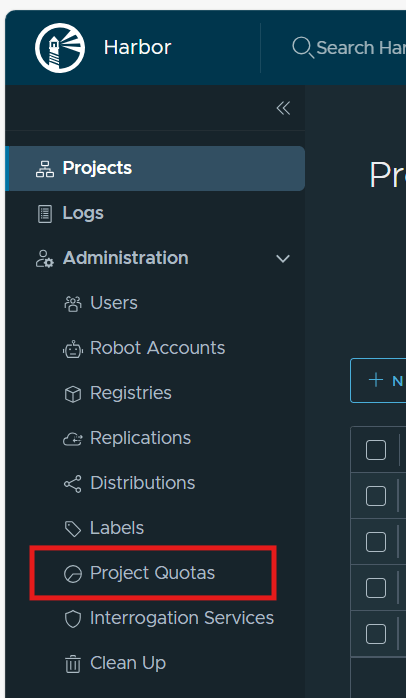
From the left sidebar, navigate to Administration → Project Quotas.
Step 3:
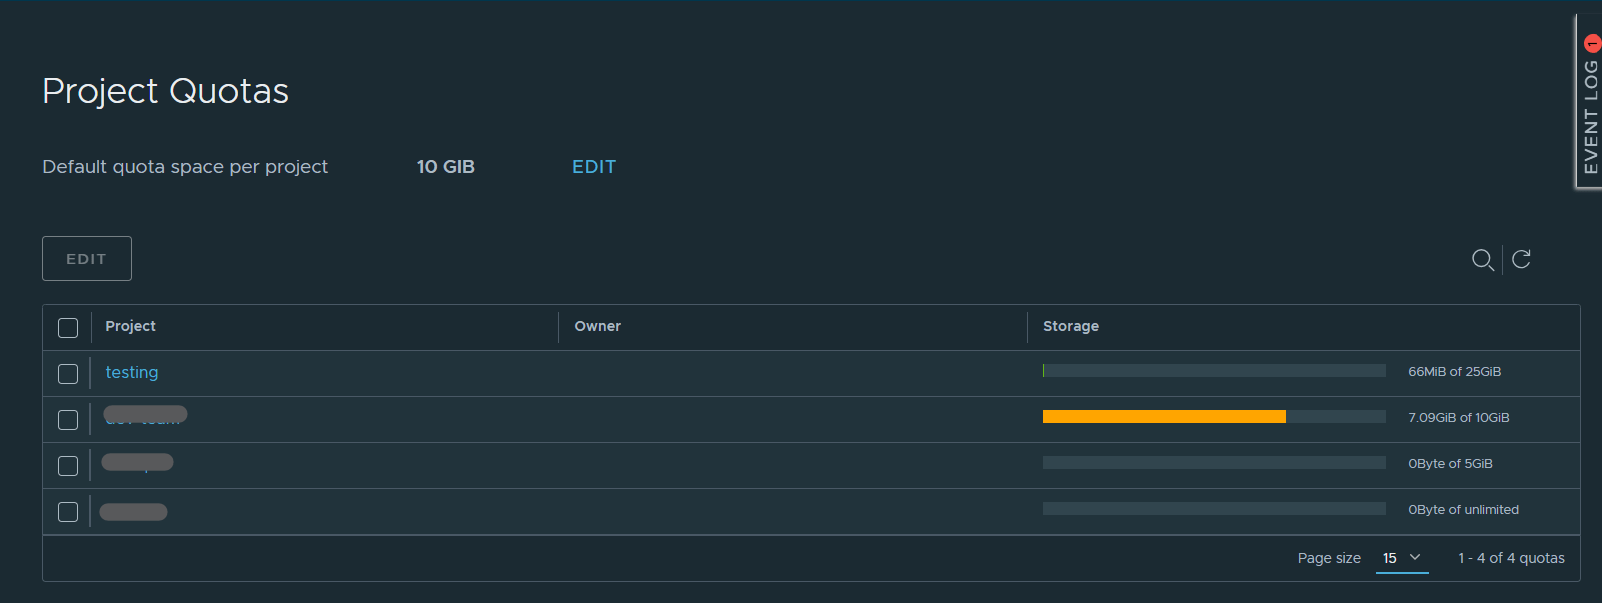
The Project Quotas page lists all existing projects with their respective owners and storage usage.
Step 4:
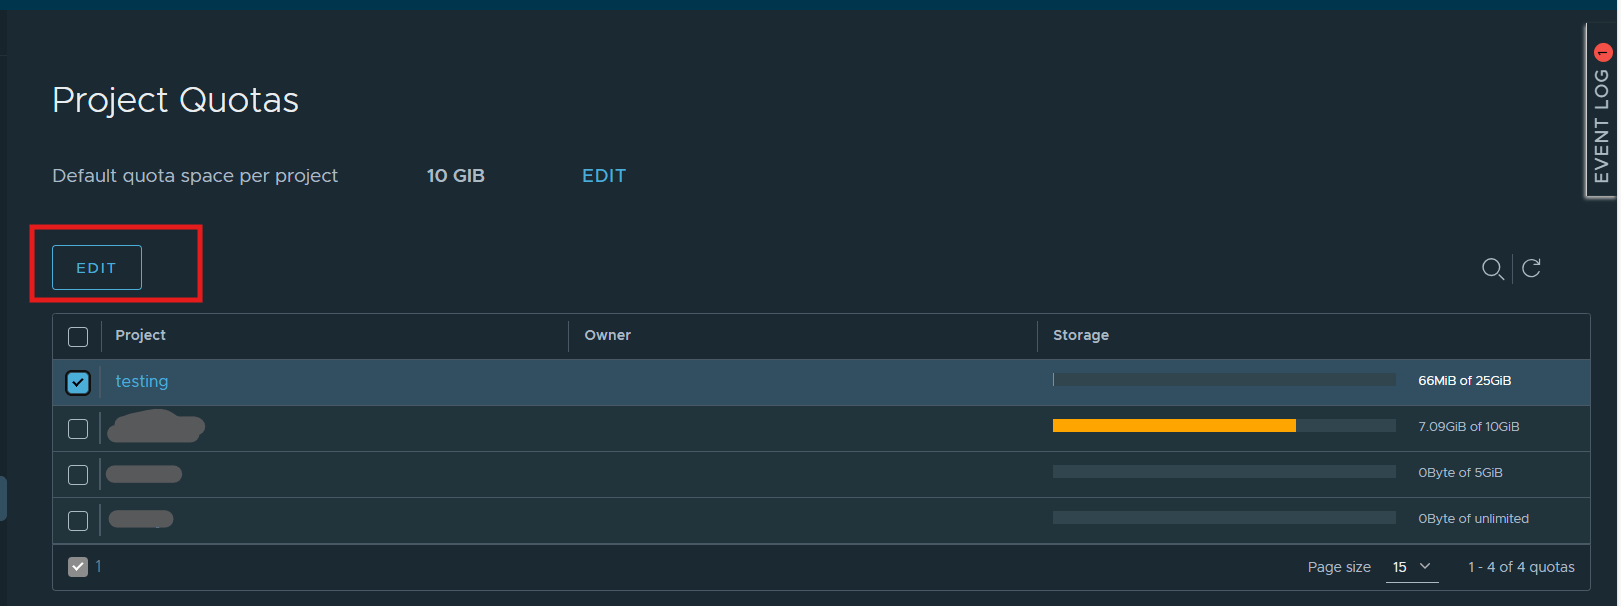
Select the project(s) you want to modify and click the Edit button.
Step 5:
Enter the new quota limit (e.g., 25 GiB, 50 GiB, etc.).

Step 6:
Click Save to apply the change.
Conclusion:
Configuring project quotas in Harbor is a straightforward and effective way to manage storage usage across your container registry. Using the Project Quotas interface (as shown in the screenshot), administrators can easily track usage, enforce limits, and prevent storage overconsumption.