How to Create an AWS EC2 Instance Using Terraform in Ubuntu
Introduction
Terraform is an infrastructure-as-code tool that lets you define both cloud and on-prem resources in human-readable configuration files that you can version, reuse, and share. You can then use a consistent workflow to provision and manage all of your infrastructure throughout its lifecycle. Terraform can manage low-level components like compute, storage, and networking resources, as well as high-level components like DNS entries and SaaS features.
Terraform, developed by HashiCorp, allows you to define and provision cloud resources using simple, declarative configuration files. With Terraform, infrastructure becomes version-controlled, repeatable, and automated, making it a core tool for DevOps engineers and system administrators.
Prerequisites:
Before you begin, ensure the following requirements are met:
- An active AWS account
- An IAM user with:
Programmatic access
EC2, VPC, and Elastic IP permissions - Ubuntu Linux
- Basic knowledge of:
Linux commands
AWS EC2 concepts
SSH access
Install AWS CLI (Ubuntu)
Terraform uses AWS credentials configured via the AWS CLI to authenticate with AWS.
Step 1: Update System Packages
This step updates the local package index and installs required utilities (curl and unzip) that are needed to download and extract the AWS CLI installer.
apt update
apt install -y curl unzip
Step 2: Download AWS CLI v2
Download the official AWS CLI v2 installer package from AWS to the local system.
curl "https://awscli.amazonaws.com/awscli-exe-linux-x86_64.zip" -o awscliv2.zipStep 3: Install AWS CLI
Extract the downloaded package and run the installation script to install AWS CLI v2 system-wide.
unzip awscliv2.zip
./aws/install
Step 4: Verify Installation
Confirm that AWS CLI is installed successfully and check the installed version.
aws --versionConfigure AWS Credentials
Run the following command and provide your IAM credentials:
aws configureEnter:
- AWS Access Key ID
- AWS Secret Access Key
- Default region name:
ap-south-1 - Default output format:json
Install Terraform
Step 1: Add HashiCorp Repository
Add HashiCorp’s official GPG key and repository so Terraform can be installed and updated securely using apt.
wget -O - https://apt.releases.hashicorp.com/gpg | sudo gpg --dearmor -o /usr/share/keyrings/hashicorp-archive-keyring.gpg
echo "deb [arch=$(dpkg --print-architecture) signed-by=/usr/share/keyrings/hashicorp-archive-keyring.gpg] https://apt.releases.hashicorp.com $(grep -oP '(?<=UBUNTU_CODENAME=).*' /etc/os-release || lsb_release -cs) main" | sudo tee /etc/apt/sources.list.d/hashicorp.list
sudo apt update && sudo apt install terraform
Step 2: Install Terraform
Update the package list and install Terraform from the official HashiCorp repository.
apt update
apt install terraform -y
Step 3: Verify Installation
Verify that Terraform is installed correctly by checking its version.
terraform -vTerraform Project Structure
Create a dedicated project directory:
mkdir terraform-ec2 && cd terraform-ec2Project structure:
terraform-ec2/
├── provider.tf
├── variables.tf
├── main.tf
├── outputs.tf
Terraform Configuration Files
provider.tf
| provider “aws” { region = “ap-south-1” } |
variables.tf
| variable “ami_id” { default = “ami-0f5ee92e2d63afc18” } variable “instance_type” { default = “t2.micro” } variable “key_name” { default = “my-keypair” } |
main.tf
| resource “aws_security_group” “ec2_sg” { name = “terraform-sg” ingress { from_port = 22 to_port = 22 protocol = “tcp” cidr_blocks = [“0.0.0.0/0”] } ingress { from_port = 80 to_port = 80 protocol = “tcp” cidr_blocks = [“0.0.0.0/0”] } egress { from_port = 0 to_port = 0 protocol = “-1” cidr_blocks = [“0.0.0.0/0”] } } resource “aws_instance” “ec2” { ami = var.ami_id instance_type = var.instance_type key_name = var.key_name vpc_security_group_ids = [aws_security_group.ec2_sg.id] tags = { Name = “Terraform-EC2” } } resource “aws_eip” “eip” { instance = aws_instance.ec2.id } |
outputs.tf
| output “public_ip” { value = aws_eip.eip.public_ip } |
Deploy the Infrastructure
Initialize Terraform:
terraform init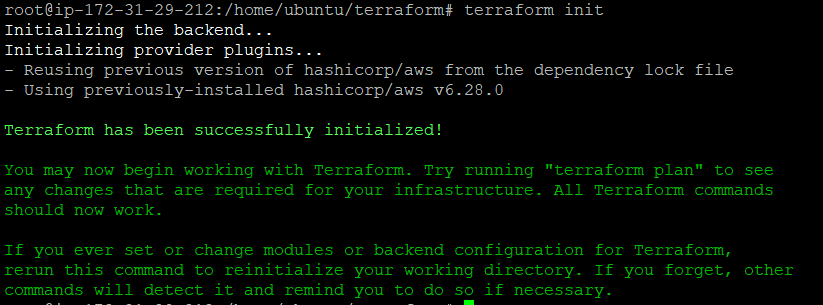
Preview the execution plan:
terraform planApply the configuration:
terraform apply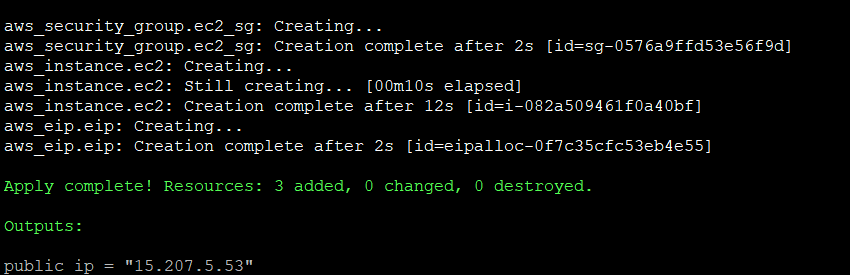
Type yes when prompted.
Verification
- Login to AWS Console
- Navigate to EC2 → Instances
- Verify:
Instance is running
Security group is attached
Elastic IP is assigned

SSH Access
Use the private key (.pem file) associated with your EC2 instance to establish an SSH connection.
ssh -i my-keypair.pem ubuntu@<Elastic-IP>Cleanup Resources
To avoid unnecessary AWS charges, destroy all resources when no longer needed:
terraform destroyConclusion:
Terraform simplifies cloud infrastructure management by enabling automation, consistency, and scalability. In this guide, we successfully created an AWS EC2 instance using Terraform, complete with security groups and an Elastic IP.