How to replace a security group of an EC2 instance in AWS
Introduction
A security group controls the traffic that is allowed to reach and leave the instance. It is a set of IP filter rules that define how to handle incoming (ingress) and outgoing (egress) traffic to both the public and private interfaces of an instance.
Prerequisites
- AWS root/IAM access
- List of rules that need to be associated with the instance
Implementation
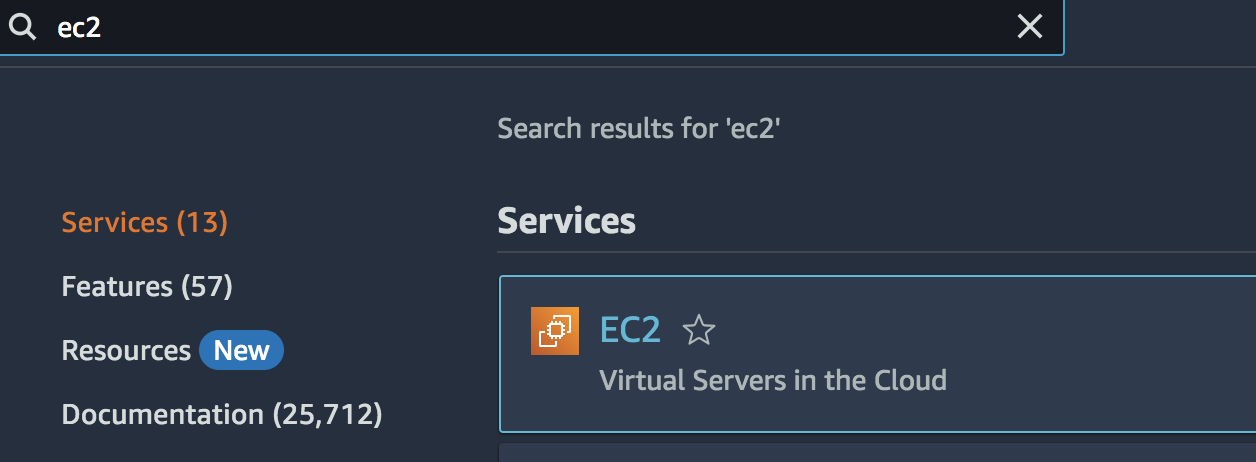
Step 1: Log into the AWS account, and select the EC2 service from the search bar
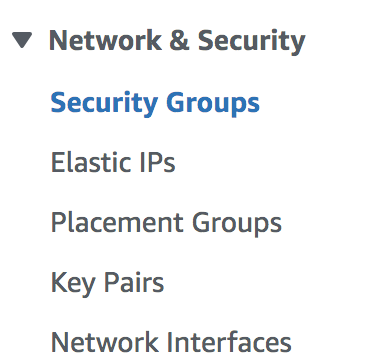
Step 2: Navigate to the Network & Security >> Security group and click on “create security group” to create a new one
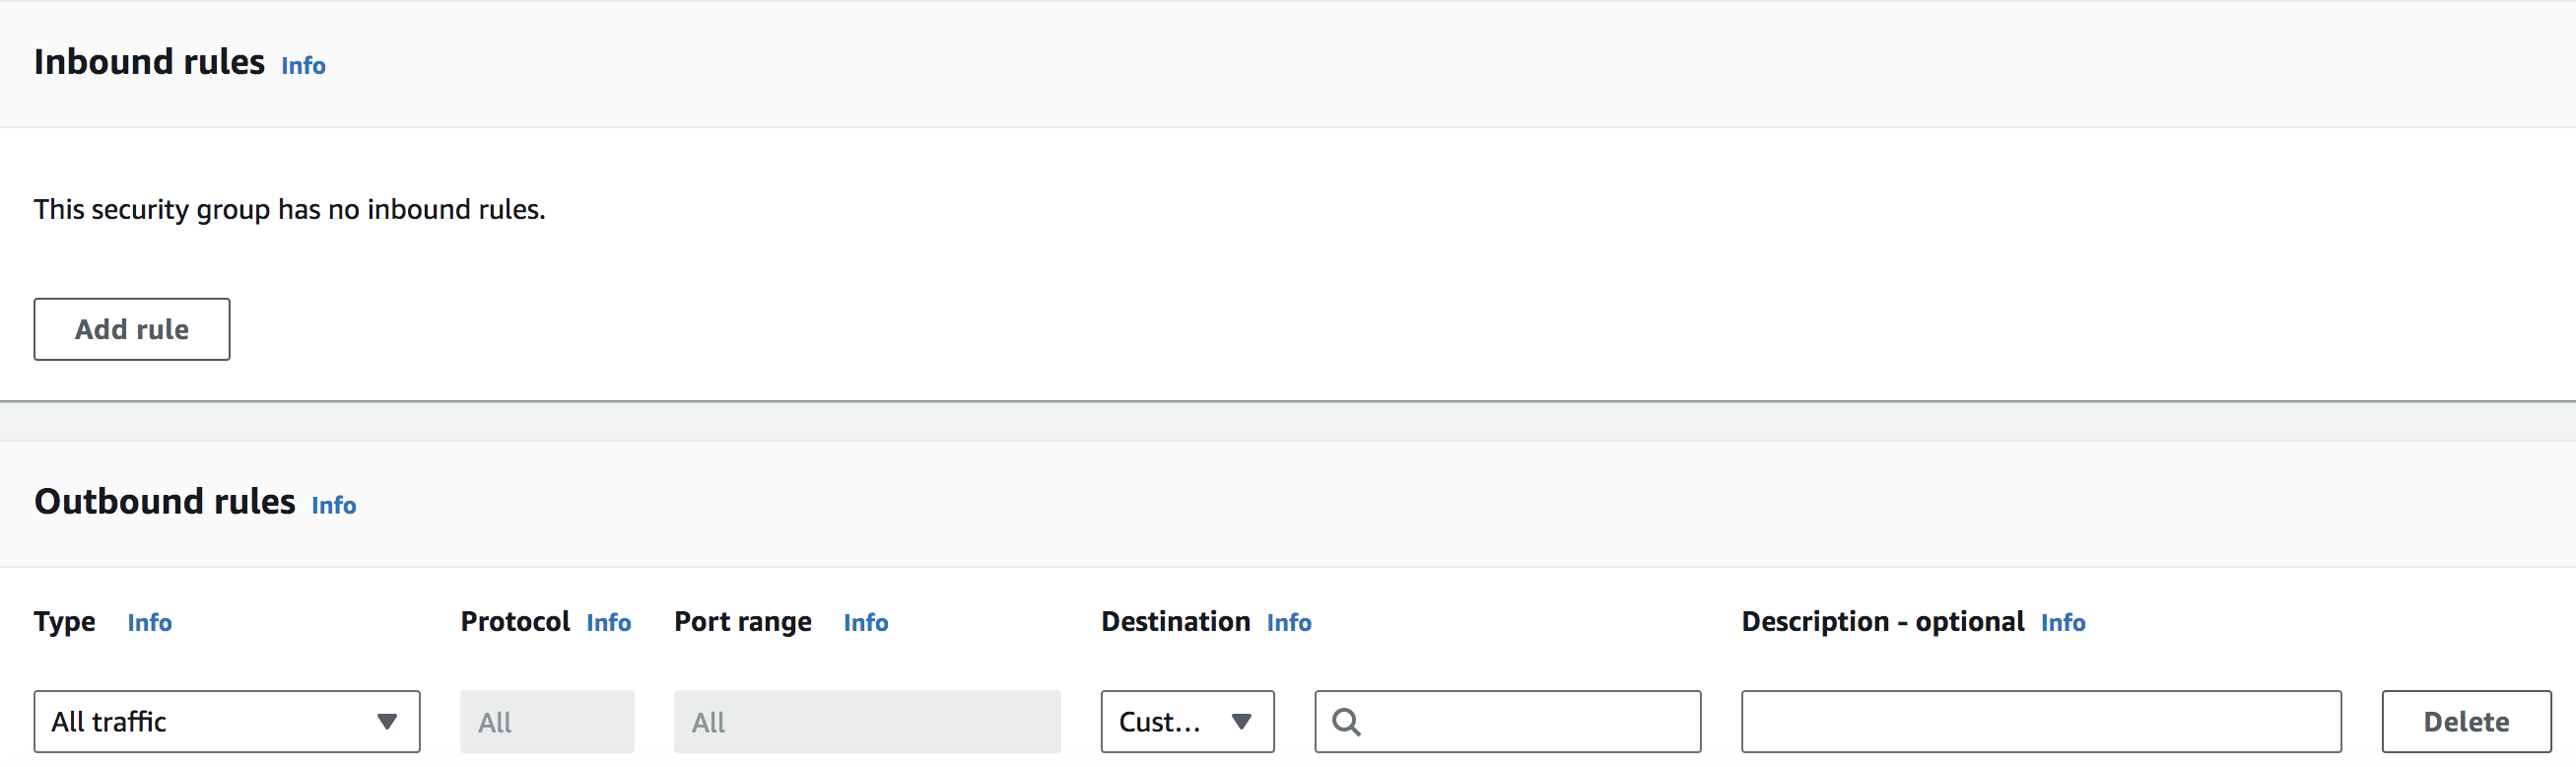
Step 3: Add the required inbound and outbound rules by clicking on “add rule”.
Step 4: Click on Create Security Group

Step 5: Navigate to the instance and select the instance that needs to replace the security group
Step 6: Click on Actions and navigate to Security >> Change Security Group
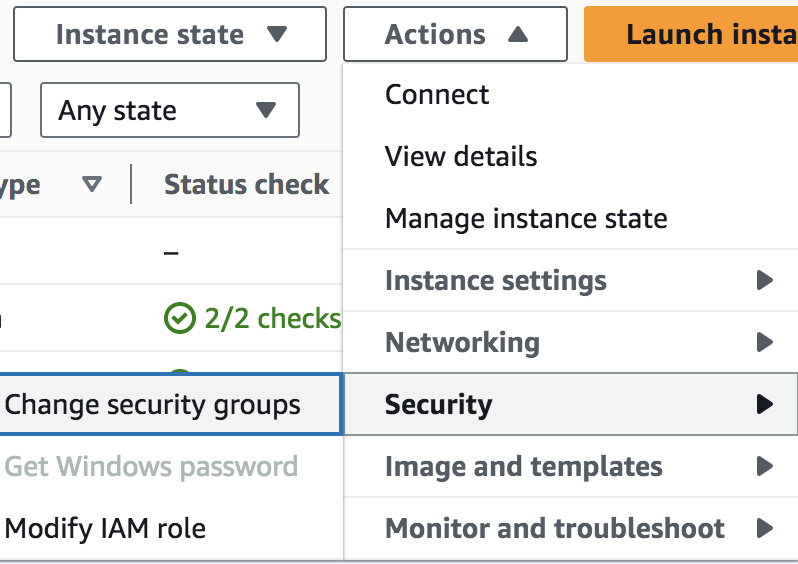
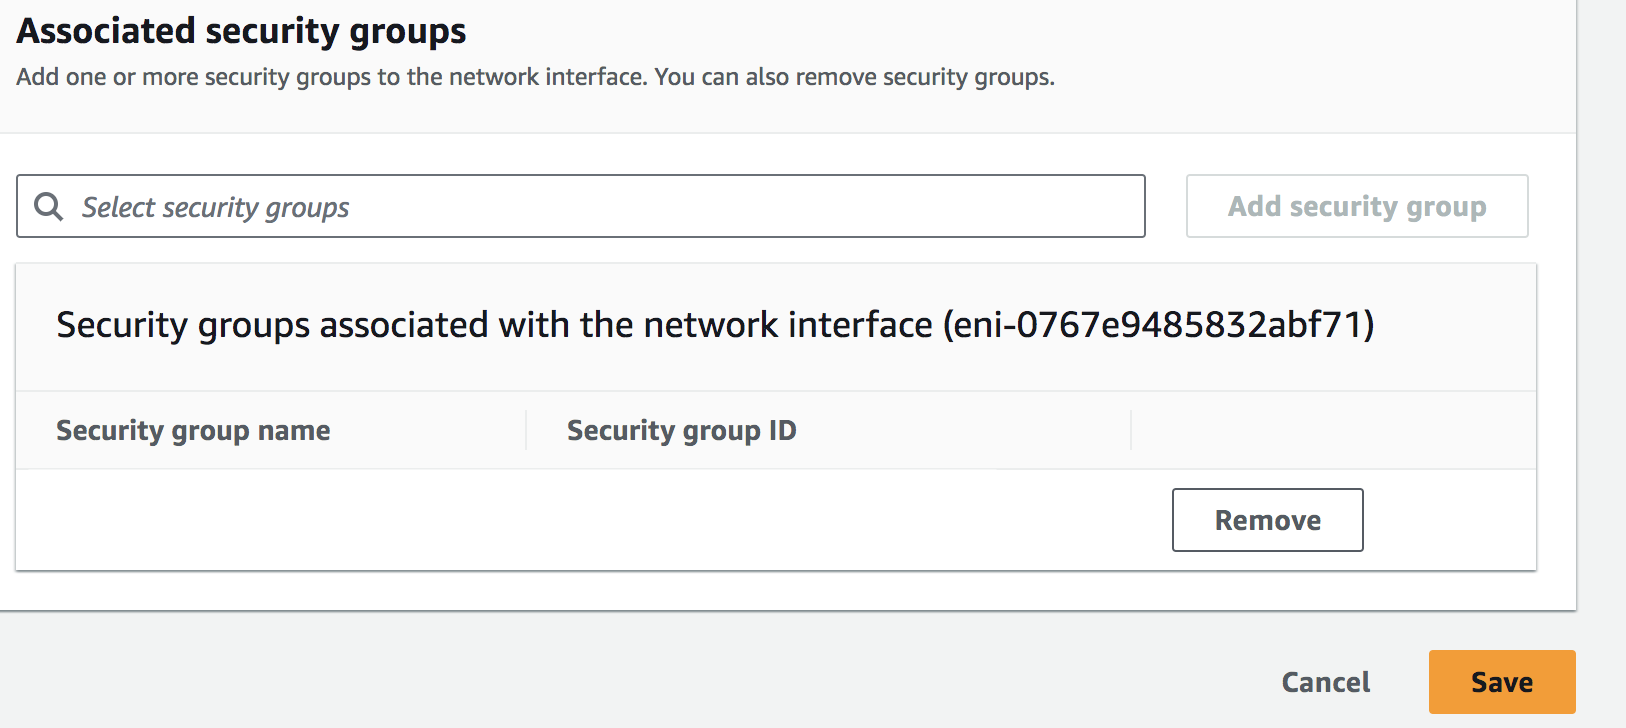
Step 7: Search for the required security group name in the Associated security groups and click on “Add security group”. Remove the existing security group by clicking on the “remove” option

Step 8: Finally save the changes