
Post Date: March 8, 2019
Last Updated: October 14, 2026
Introduction
An Android emulator is a virtual Android device that allows developers to run and test Android applications on a computer without using a physical smartphone or tablet. It is an essential tool in Android development because it helps developers test app functionality, user interfaces, screen sizes, and different Android versions directly from Android Studio.
Android Studio provides an Android Virtual Device (AVD) Manager that allows developers to create and configure virtual devices with different phone models, screen resolutions, and Android API levels.
In this tutorial, you will learn how to create an Android Virtual Device, configure the emulator, and run your Android Studio project step by step.
What Is an Android Emulator?
An Android emulator is software that simulates an Android device on your computer. It allows you to install, launch, and test Android applications in a virtual environment.
An Android Virtual Device (AVD) is the configuration that defines the emulator’s device model, Android version, screen size, and other hardware properties.
Benefits of using an Android emulator:
- Test Android applications without a physical device.
- Check application compatibility across different Android versions.
- Test different screen sizes, resolutions, and orientations.
- Debug application errors using Android Studio tools.
- Speed up application development and testing.
Prerequisites
Before running your Android Studio project on an emulator, make sure you have the following:
- Android Studio installed on your computer.
- An Android project opened in Android Studio.
- The required Android SDK and emulator components installed.
- Sufficient RAM, disk space, and processor resources.
- Hardware virtualization enabled when required by your system.
Steps to Run an Android Studio Project on an Emulator
Step 1: Open Android Studio and Create a Virtual Device
Open your Android Studio project. Click the Run button (the green play icon) in the toolbar.
If you have not created an emulator yet, open the device selector and choose Device Manager or More Actions > Virtual Device Manager, depending on your Android Studio version.
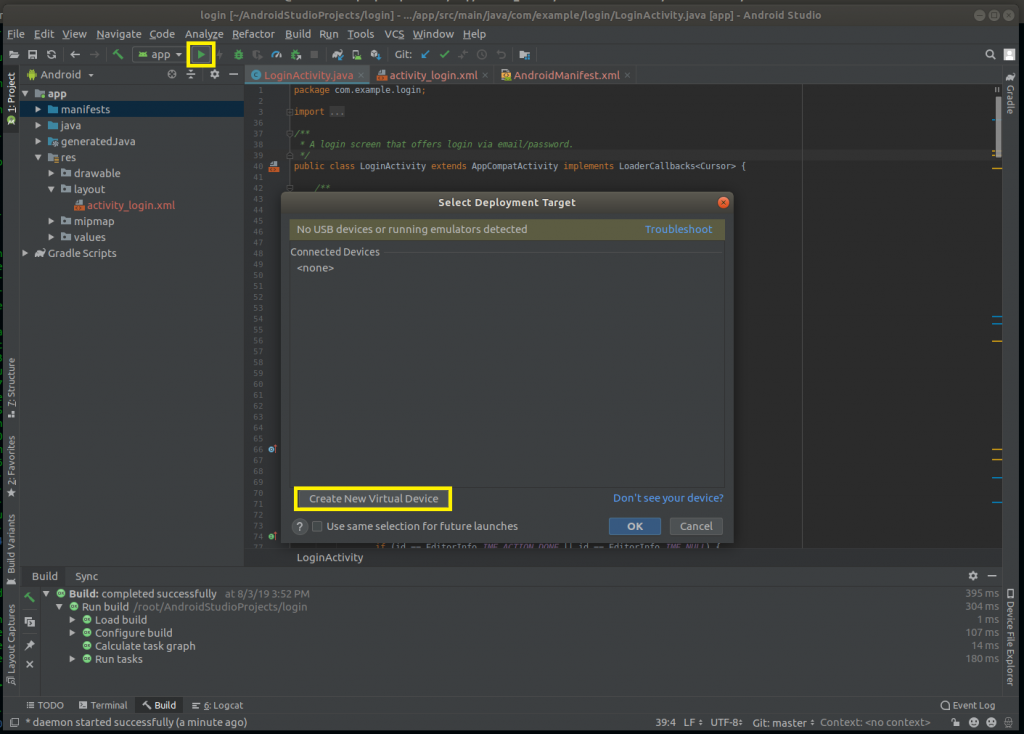
Click Create Virtual Device or the equivalent option to begin configuring a new Android emulator.
Step 2: Select a Phone Model
The Virtual Device Configuration window displays a list of available Android device profiles.
Select a suitable phone model, such as a Pixel device, based on your application’s testing requirements.
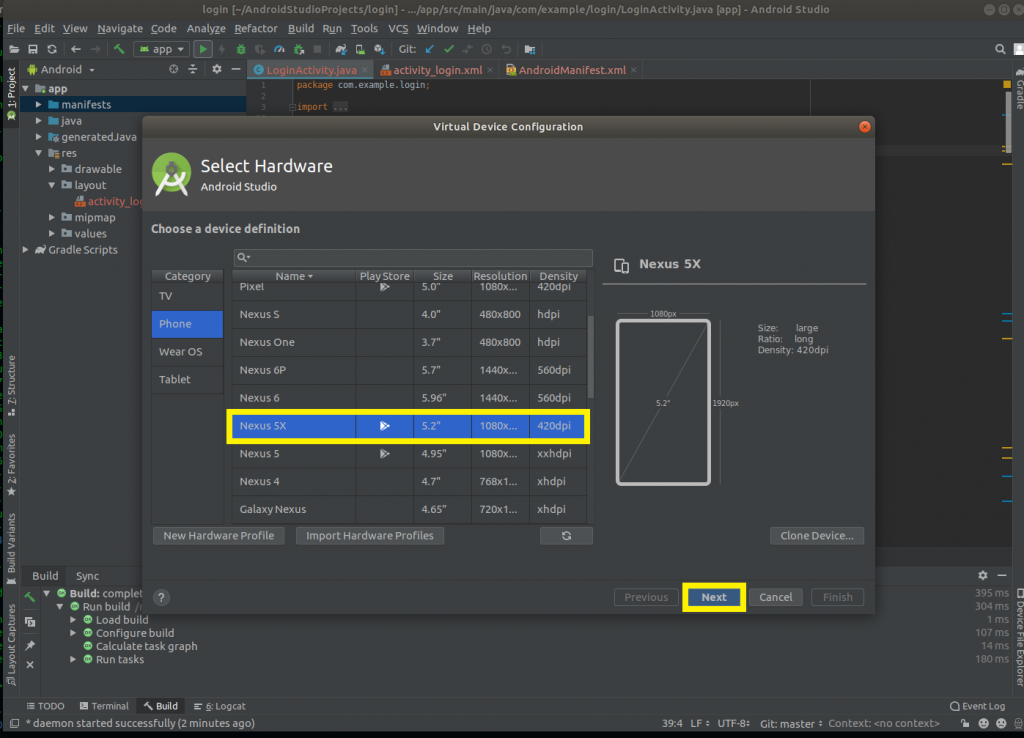
Click Next to continue.
Step 3: Select an Android System Image
Choose an Android system image for your virtual device. The available images include different Android versions and API levels.
An API level represents the version of the Android framework available to your application.
For general testing, choose a stable system image that meets your application’s minimum SDK requirements. If you need to test compatibility with the latest Android release, select a suitable newer system image.
If the required system image is not installed, download it first and accept any required license agreements.
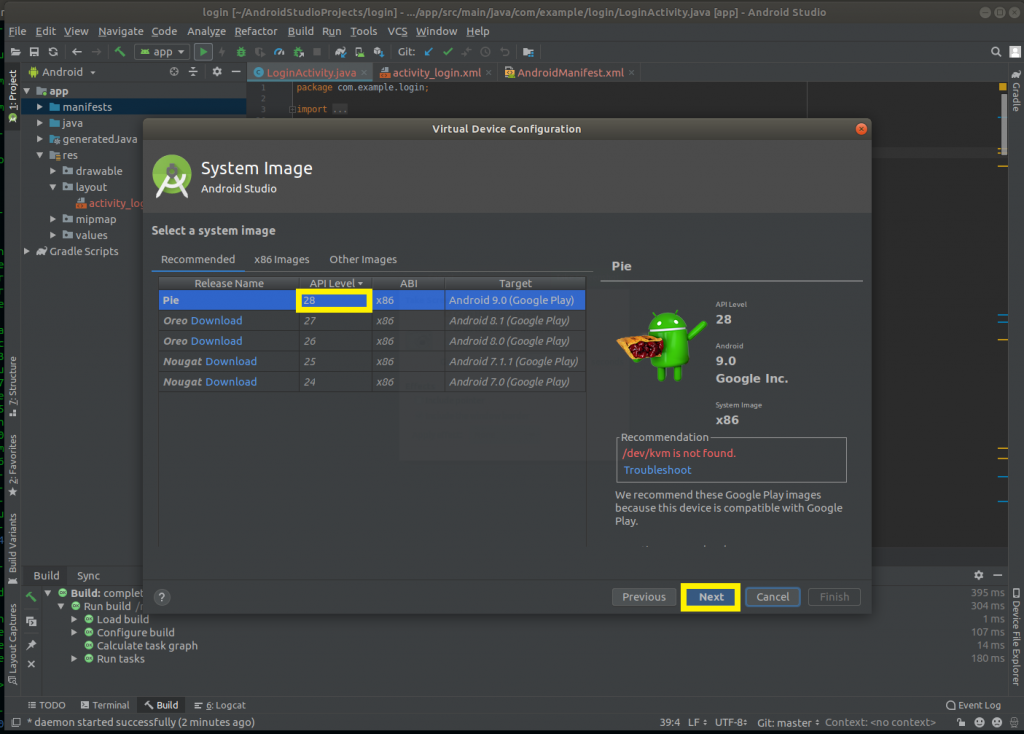
Click Next to proceed.
Step 4: Configure the Virtual Device
Review the virtual device configuration. Depending on the Android Studio version and selected device, you may be able to change settings such as:
- AVD name.
- Startup orientation.
- Screen and device configuration.
- Graphics or performance options.
Keep the default settings if you do not need any custom configuration.
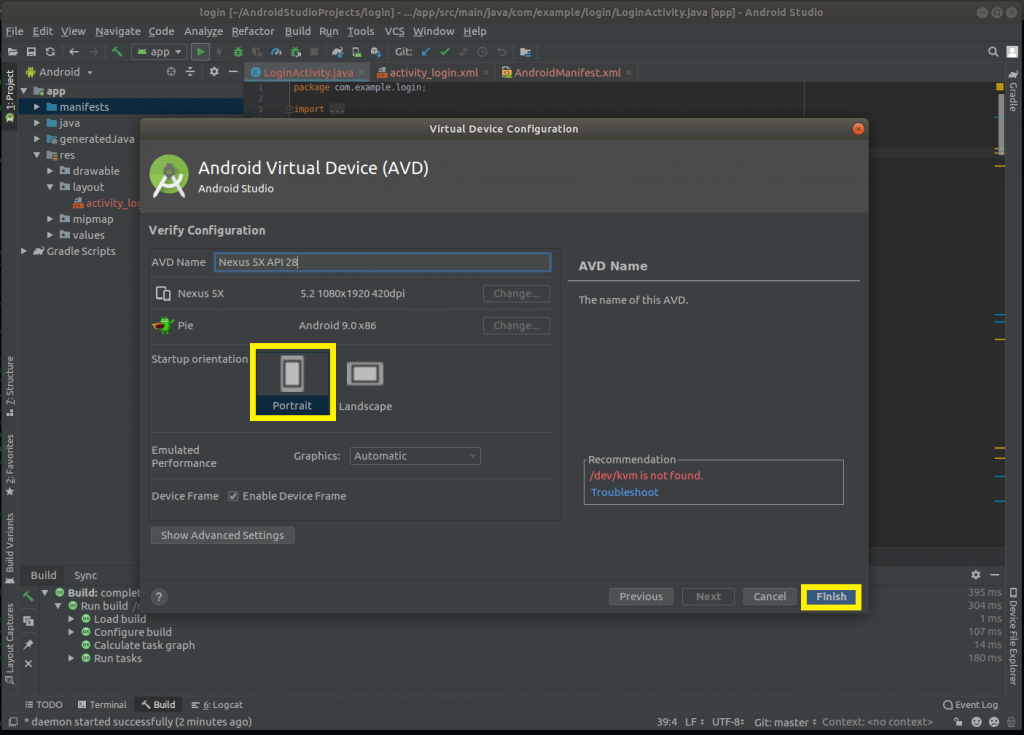
Click Finish to create the Android Virtual Device.
Step 5: Select the Emulator and Run the Project
After creating the virtual device, return to your Android Studio project.
Select the newly created emulator from the device selector in the toolbar. Click the Run button to build and launch your application.
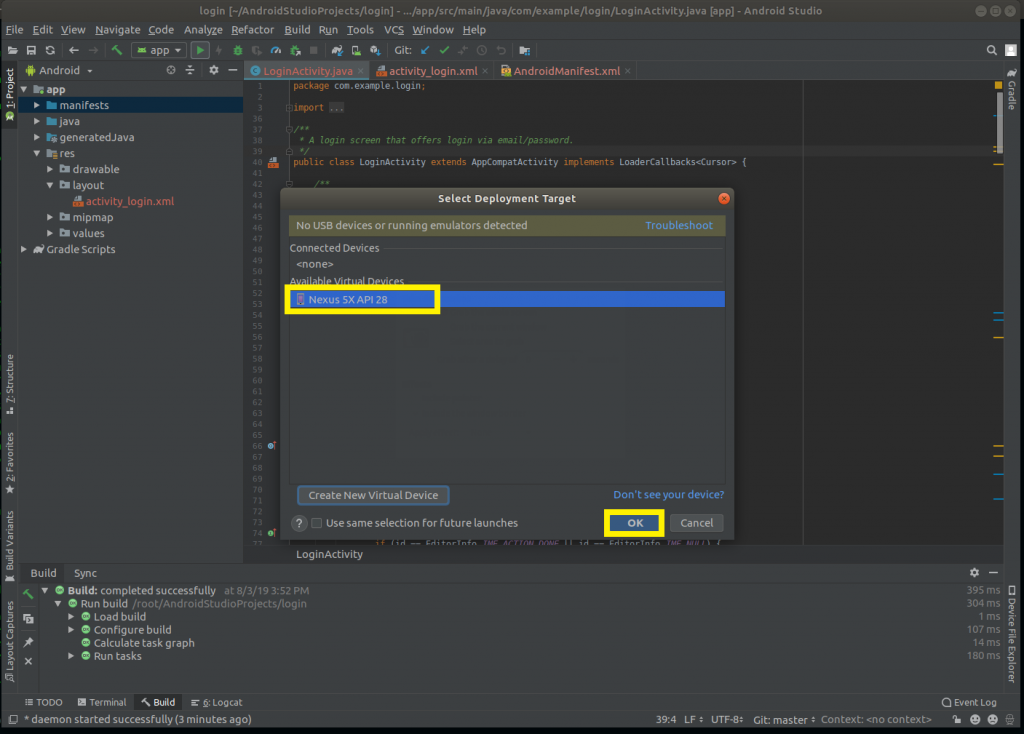
Android Studio will compile the project, start the emulator if necessary, install the application, and launch it on the virtual device.
Step 6: Wait for the Emulator to Start
The Android emulator will boot into the Android operating system. The first startup may take a few minutes, depending on your computer’s performance and the system image.
Once the emulator is ready, Android Studio will install and launch your application automatically.
You can now interact with your application using the mouse and keyboard, test its features, and debug issues directly from Android Studio.
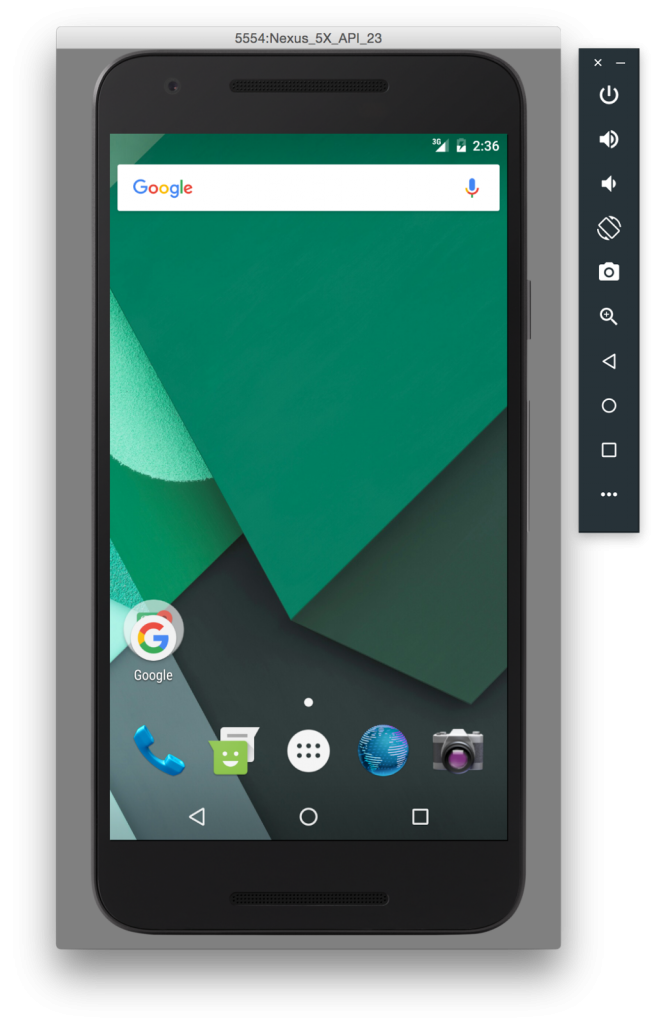
Congratulations! You have successfully configured an Android emulator and run your Android Studio project on a virtual Android device.
Common Android Emulator Problems and Solutions
If the emulator does not start or your application fails to launch, try these troubleshooting steps.
1. Emulator is not starting
- Check whether hardware virtualization is enabled.
- Verify that the required Android Emulator components are installed.
- Restart the emulator or create a new virtual device.
2. Android system image is missing
- Open Device Manager in Android Studio.
- Edit or create a virtual device.
- Download a compatible Android system image.
3. Application is not installing or launching
- Check the build output and Run window for errors.
- Confirm that the selected device meets the application’s minimum Android version.
- Sync the project and rebuild it if necessary.
4. Emulator performance is slow
- Close unnecessary applications to free up system resources.
- Use a suitable device profile and system image.
- Check the emulator’s graphics settings and hardware acceleration configuration.
Conclusion
The Android emulator is a useful tool for developing, testing, and debugging Android applications without requiring a physical Android device. By creating an Android Virtual Device in Android Studio, selecting an appropriate Android system image, and running your project, you can test your application in a virtual environment.
Following the steps in this guide will help you configure an emulator, launch your Android application, and resolve common startup issues. For reliable testing, consider using multiple device profiles and Android versions to check your application’s compatibility across different devices.
Frequently Asked Questions (FAQs)
1. What is an Android emulator in Android Studio?
An Android emulator is a software-based virtual device that simulates an Android smartphone or tablet on a computer. It allows developers to run, test, and debug Android applications without a physical device.
2. How do I create an Android Virtual Device (AVD)?
Open Android Studio, access Device Manager, click Create Virtual Device, select a device profile, choose an Android system image, configure the settings, and click Finish.
3. Can I run an Android Studio project without a physical phone?
Yes. You can use the Android emulator to run and test your application on your computer. A physical Android device is optional, although testing on real devices can help identify hardware-specific issues.
Related Articles
- How to Create Your First Project in Android Studio
- How to Run an Android Studio Project/App on an Emulator
Talk to Our Experts
Need help with Android application development or configuring your Android Studio project? Our experts can help you find the right solution for your business.
Get in touch with us: Contact our team