Including Animations to a React Project
Introduction:
Animations play an important role in modern web applications. They enhance the user experience by making the interfaces more intuitive and adding a sense of interactivity. In React Projects animations can be used to transition elements smoothly, indicate important actions, or create visually appealing effects that will engage users. There are variety of tools to incorporate animations. In this, we will see how to use Aceternity UI components to include animations in react project.
Aceternity UI
Aceternity UI is a new framework for styling websites in React and NextJS. This offers a bunch of starting UI components and the transitions are entirely made from existing libraries such as Tailwind CSS and framer-motion. They provide the source code and example of each component, so that users can choose and customize the component they want to use.
It is very simple to use. We can download the libraries and start using.
Installation steps:
Step 1: Create a react project
To create a react project using CLi, we can use the following command.
npx create-react-app demoAnimation –template typescript
Here demoAnimation is the project name. Next we have to enter into the project folder.
cd demoAnimation
Step 2: Install Tailwind CSS
The next step is we have to install the dependency that requires for animation which is tailwind CSS. It can be installed using a command in terminal.
npm install -D tailwindcss postcss autoprefixer
After installing we have to initiate it, by using the command:
npx tailwindcss init -p
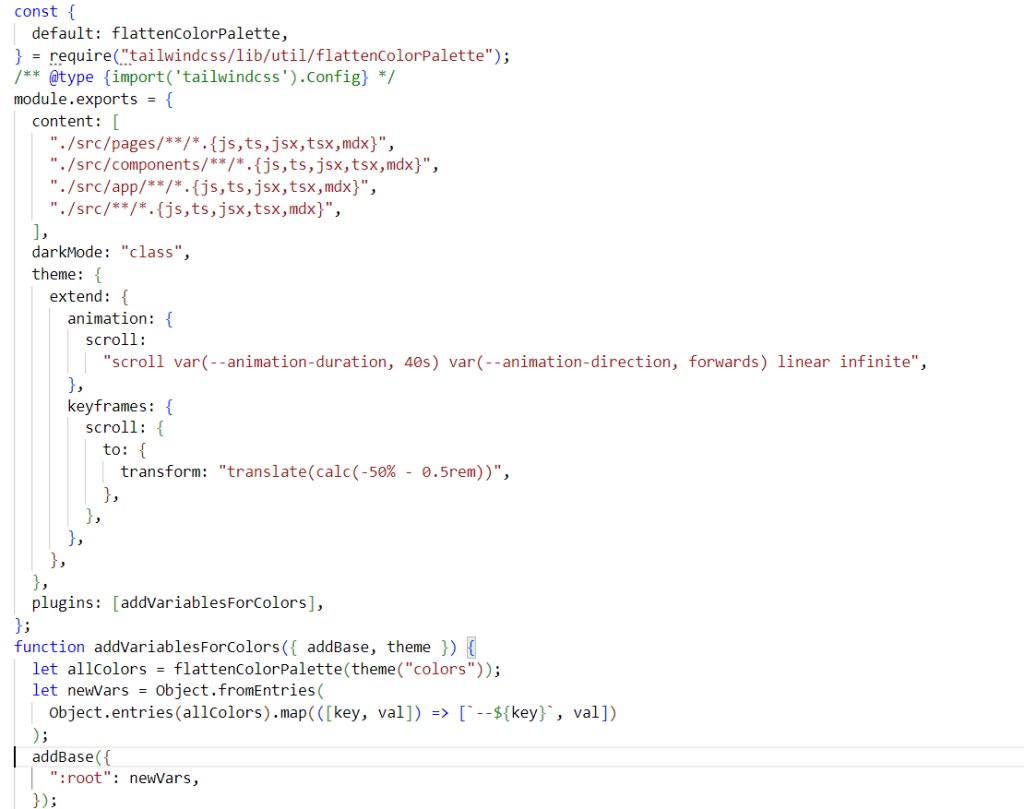
Step 3: Create tailwind.config.js

We have to create a tailwind.config.js file and paste this code in that file. This can be obtained from the official documentation of aceternity UI.
@tailwind base;
@tailwind components;
@tailwind utilities;
Next step is we have to include these lines in index.css file of our project.
Now the project is ready to be used for animations.
For using a component, we have to obtain the code of that particular component and create the file. Then we can use that component in the file.
Here we can see the example for Moving border component.
Step 1:
We have to create a file in our project and use that as component. We can get the code from official documentation of aceternity.
Step 2:
we can call the component and use it in project.
Ex:
<Button
variant=”contained”
className=”bg-white dark:bg-slate-900 text-black dark:text-white border-neutral-200 dark:border-slate-800″> Click me </Button>
We can see the button with moving border.

Conclusion:
In this blog, we got to know about animation and how to use aceternity UI components for better animation in react projects.
