GraphOL use to Upload A file
Introduction:
In this GraphQL guide, we’ll explore how to upload a file using GraphQL in a TypeScript, MongoDB, and Node.js environment. We’ll set up the schema and resolver to handle file uploads and store the data in a MongoDB database.
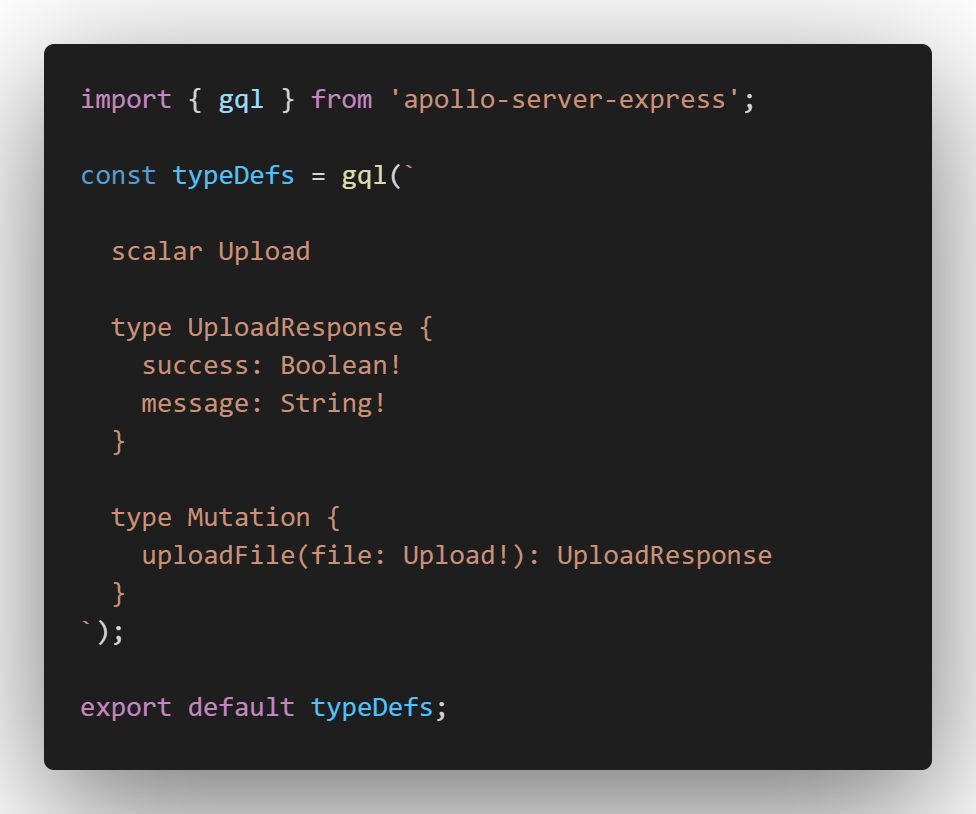
Step 1 : Define the schema for uploading a file
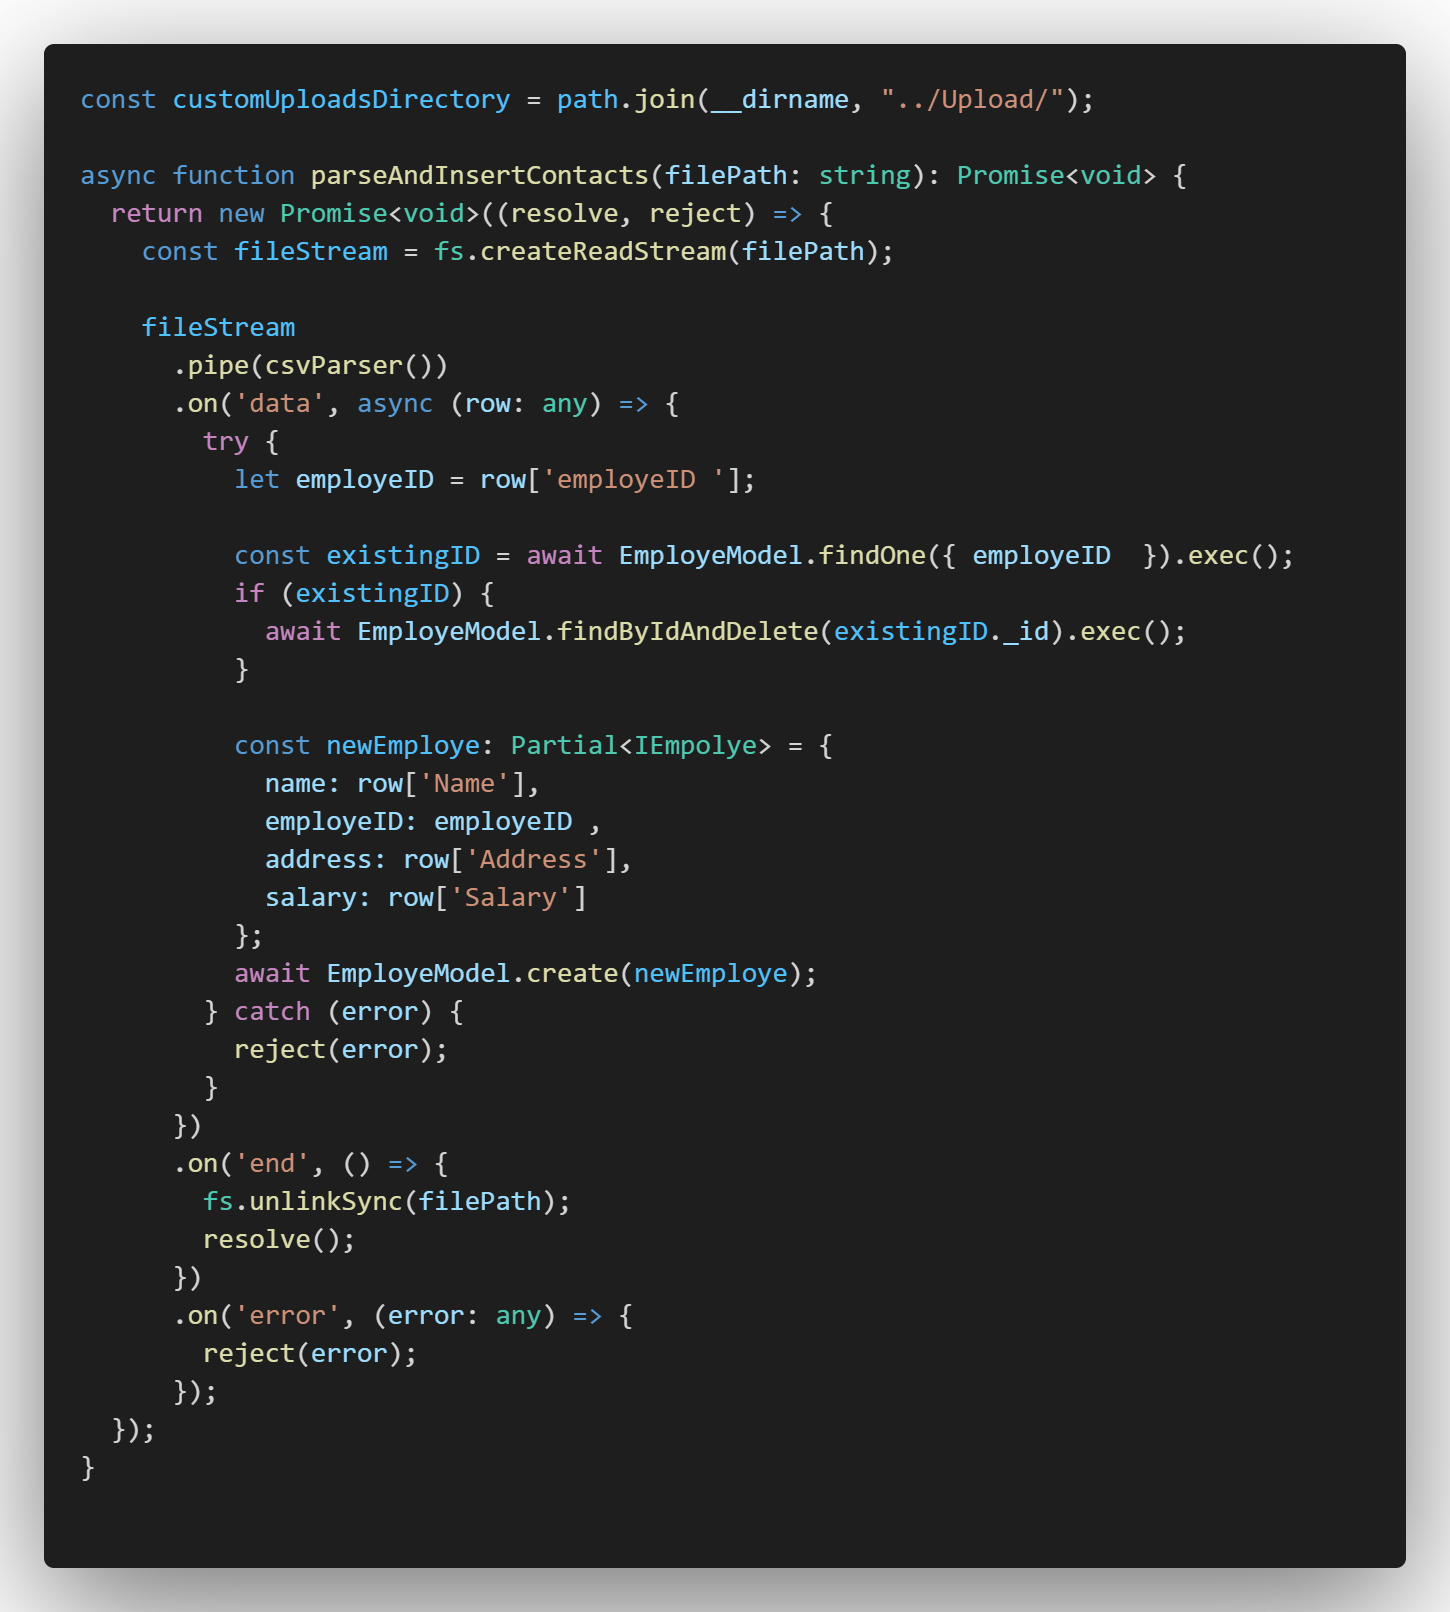
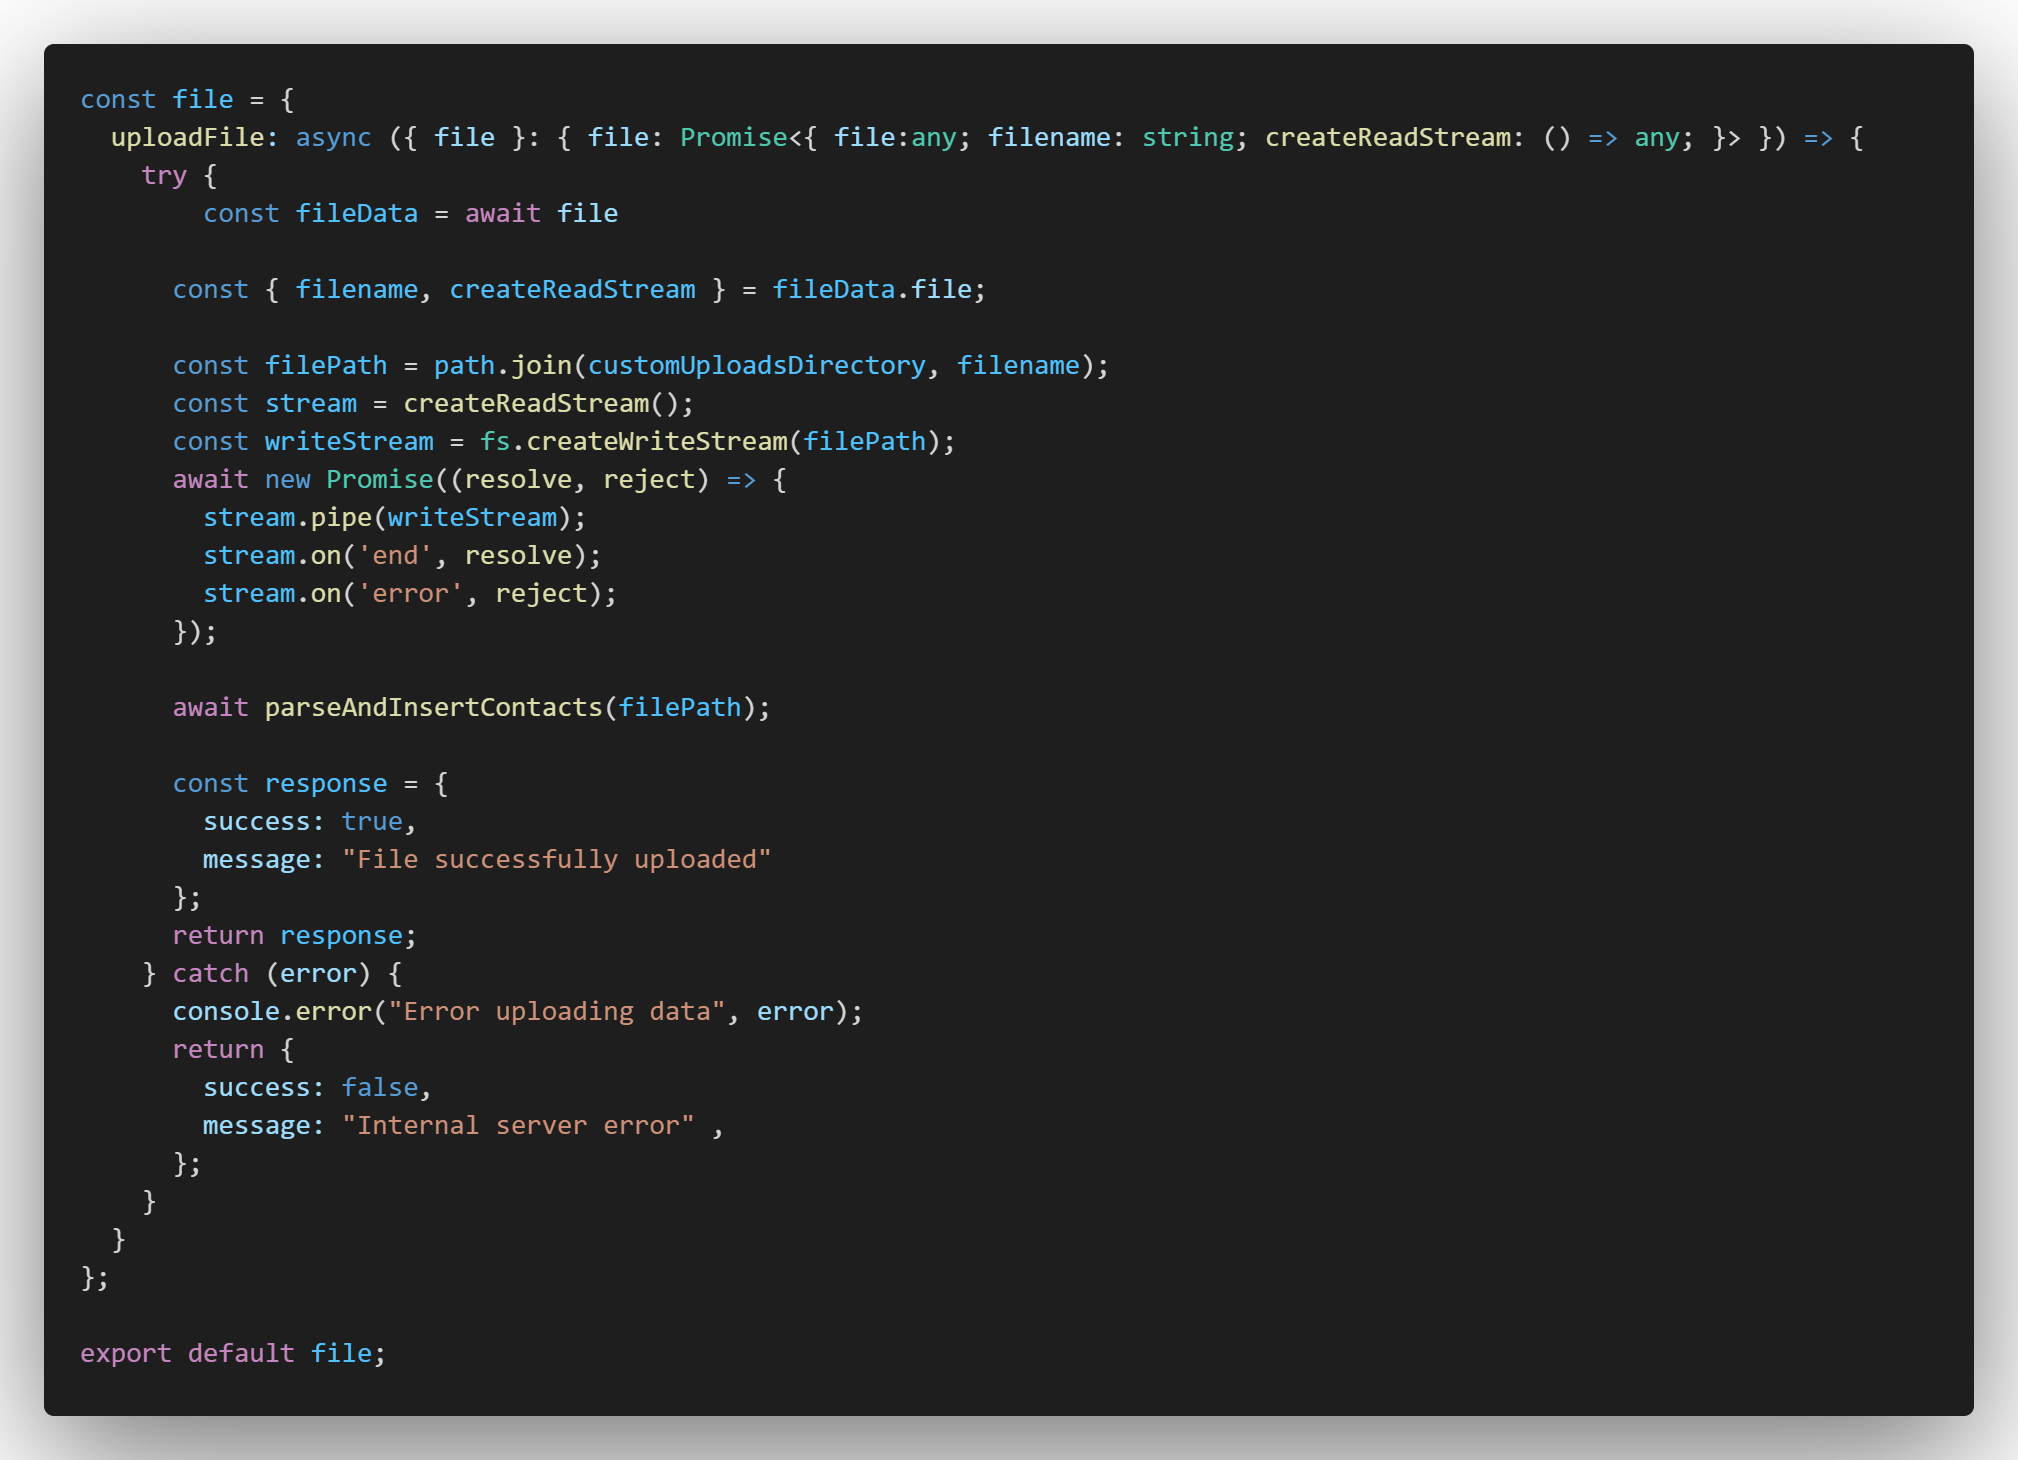
Step 2: Define the Resolver for uploading a file
In this code, when a file is uploaded, the data is stored in the MongoDB database. The process involves reading the file using fs.createReadStream to create a readable stream from the CSV file and piping the stream through csvParser() to parse the CSV data. For each row of data parsed from the CSV:
- It checks if an employee with the same employeID already exists in the database using EmployeModel.findOne.
- If an existing employee is found, it deletes the employee using EmployeModel.findByIdAndDelete.
- It constructs a new employee object with data from the CSV row.
- It creates a new employee record in the database using EmployeModel.create.
- After parsing all rows, it deletes the uploaded CSV file using fs.unlinkSync.
- It resolves the Promise to indicate completion.
Step 3: Uploading a file in Postman
- Open Postman and create a new request.
- Set the request type to POST.
- Enter the URL of your GraphQL endpoint.
- Switch to the Body tab and select form-data.
- Add a key-value pair where the key is the same as the variable name specified in your GraphQL query (file), and the value is the file you want to upload. Click on the value field of the added key, and select File.
- Click on Select Files and choose the file you want to upload (in this case, file.csv).
- Go to the Headers tab and set the Content-Type header to multipart/form-data.
- Click Send to execute the request.
Operation:
{ “query”: “mutation UploadFile($file: Upload!) { uploadFile(file: $file) { success message } }”,”variables”: { “file”: “file.csv” } }
Map:
{ “0”: [“variables.file”] }
0: File