How to remove & install oracle java [Jdk] in ubuntu 16.0.4
How to remove & install oracle java [Jdk] in ubuntu 16.0.4
Date published: 07-12-2019
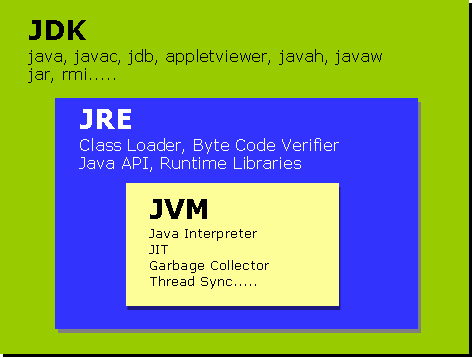
Java is a very popular programming language for a system web application, software development, Android development and so on. Therefore, we need to install the Java Development Kit [JDK] and Java Runtime Environment [JRE] to configure the Java development environment.
For instance, this blog article will guide you to remove older JDK 8 and to install Oracle Java 11 LTS version on Ubuntu 16.04 LTS Xenial system.
Subsequently, you can follow up the instructions given below(one-by-one) from the terminal
To remove Oracle JDK
To remove Oracle JDK completely, here are the guidelines to do:
- Check which JDK packages are installed
sudo dpkg --list | grep -i jdk- In the same vein, remove Oracle Java 8 completely.
sudo apt-get purge oracle-java8-installer sudo apt-get autoremove- Check that all JDK packages have been removed
sudo dpkg --list | grep -i jdkThen if you want to, you can also purge the PPA
Action 1 – Update the current packages
Most importantly update the current packages installed.
sudo apt update

sudo apt upgrade
Action 2 – Install Java JDK11 in Ubuntu 16.04 LTS
JDK compiled the source java file and make a java class file. JRE is used to run that intermediate class file.
Moreover, we need to add the following PPA to your Ubuntu server environment.
This Personal Package Archive (PPA) contains a package oracle-java11-installer having the Java installation script. The command to be executed in terminal as follows,
sudo add-apt-repository ppa:linuxuprising/java
To sum up, this below script downloads the Java archive from the official site and configures it on your system.
Certainly, install Java 11 using the script provided in these packages.
sudo apt update

sudo apt-get install oracle-java11-installer
As a result, install the following package to configure Java 11 as default Java version on your Ubuntu 16 / 18 server system.
sudo apt-get install oracle-java11-set-defaultAction 3 – Verify Java Version and proceed with your work
Check the installed Java version on your system
java -version

java version "11.0.2" 2019-01-15 LTS
Java(TM) SE Runtime Environment 18.9 (build 11.0.2+9-LTS)
Java HotSpot(TM) 64-Bit Server VM 18.9 (build 11.0.2+9-LTS, mixed mode)
Finally, you have successfully installed Java 11 on Ubuntu 16.04 LTS system.
Thanks for using pheonix solutions.

