
Post Date: October 25, 2018
Last Updated: September 30, 2026
Introduction
This guide explains how to run Nagios and GitLab CE on the same server, each on its own port — Nagios for monitoring, GitLab for hosting Git repositories.
A few important updates from the original version of this guide: it referenced GitLab 11.4.0 and Nagios Core 4.3.2, both many years out of date at this point and carrying known, unpatched vulnerabilities if actually installed at those pinned versions. The steps below install whatever the current stable release is at install time rather than an old pinned version. It’s also worth noting that CentOS 7/RHEL 7 have both reached end-of-life — if you’re setting this up on a new server, AlmaLinux or Rocky Linux (RHEL-compatible, currently supported) are the better foundation.
Prerequisites
- A CentOS/RHEL-family server (ideally a currently supported version)
- Root or sudo access
- Enough resources to run both services (GitLab in particular is memory-hungry — 4GB+ RAM is a reasonable minimum)
Architecture
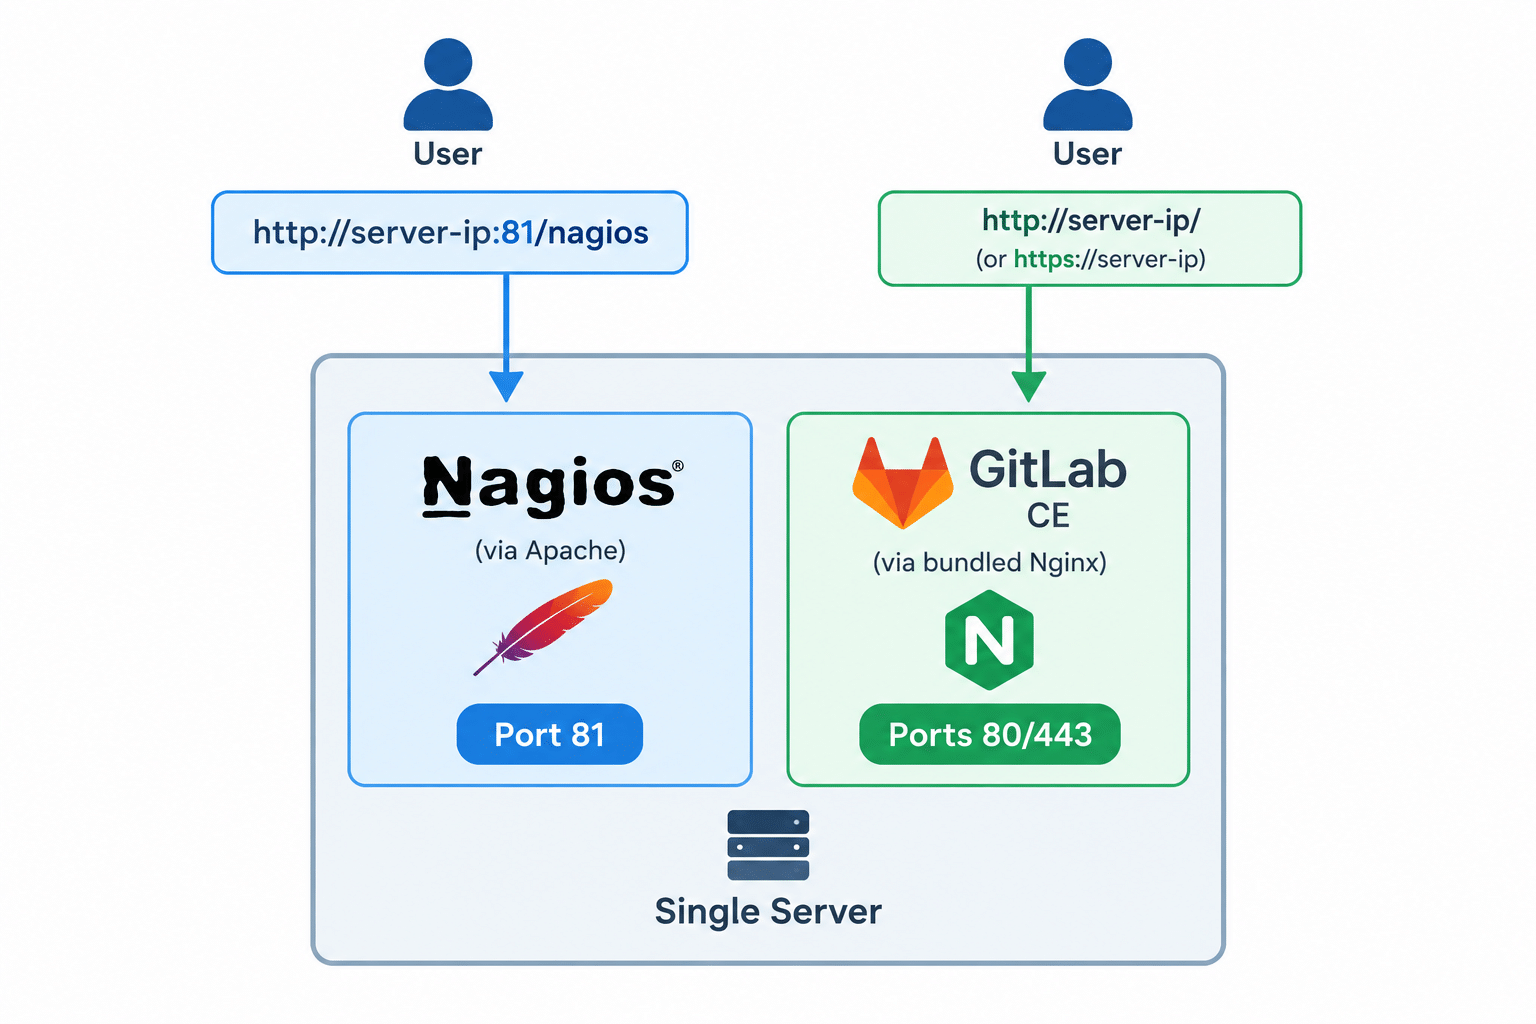
- Nagios runs under Apache, bound to a non-default port (81 in this guide)
- GitLab CE bundles its own Nginx, bound to port 80/443
- Both services run independently on the same host, distinguished only by port — Apache never conflicts with GitLab’s bundled Nginx because they’re each listening on different ports
Part 1: Nagios Installation
1. Install Required Packages
yum install httpd php gcc glibc glibc-common gd gd-devel make net-snmp unzip -y
Note: The original had a typo —
glibc-commaninstead ofglibc-common— which would fail with “No package available” since that package name doesn’t exist.
2. Download and Extract Nagios
Check the official Nagios Core downloads page for the current version and download link before running this:
wget https://sourceforge.net/projects/nagios/files/nagios-4.x/nagios-<VERSION>/nagios-<VERSION>.tar.gz/download -O nagios-<VERSION>.tar.gz
wget https://nagios-plugins.org/download/nagios-plugins-<VERSION>.tar.gz
Note: The original SourceForge URL was missing
/downloadat the end. Without it,wgetdownloads SourceForge’s HTML landing page instead of the actual.tar.gzfile — the command appears to succeed but produces a useless file. Adding/downloadand using-Oto name the output correctly fixes this.
Extract both:
tar -zxvf nagios-<VERSION>.tar.gz
tar -zxpvf nagios-plugins-<VERSION>.tar.gz
3. Create the Nagios User and Group
useradd nagios
passwd nagios
groupadd nagcmd
usermod -G nagcmd nagios
usermod -G nagcmd apache
4. Compile and Install Nagios Core
cd nagios-<VERSION>
./configure --with-command-group=nagcmd
make all
make install
make install-init
make install-commandmode
make install-config
5. Install the Web Interface
make install-webconf
htpasswd -s -c /usr/local/nagios/etc/htpasswd.users nagiosadmin
You’ll be prompted to set a password for the nagiosadmin account.
6. Configure Email Alerts (Optional)
vi /usr/local/nagios/etc/objects/contacts.cfg
Update the contact email address, then restart Apache:
systemctl restart httpd
7. Install Nagios Plugins
cd nagios-plugins-<VERSION>/
./configure --with-nagios-user=nagios --with-nagios-group=nagios
make
make install
8. Verify the Configuration
/usr/local/nagios/bin/nagios -v /usr/local/nagios/etc/nagios.cfg
Fix any errors reported before continuing.
9. Change Apache’s Port for Nagios
Since GitLab’s bundled Nginx will use port 80, move Nagios’s Apache to a different port:
vi /etc/httpd/conf/httpd.conf
Change Listen 80 to Listen 81.
10. Open the Firewall Port
This step was missing from the original guide — without it, the Nagios web interface won’t be reachable externally even though everything else installed correctly:
firewall-cmd --permanent --add-port=81/tcp
firewall-cmd --reload
11. Start and Enable Services
systemctl enable httpd nagios
systemctl restart httpd nagios
12. Log In
http://<ip-address>:81/nagios
Security note: This serves the login page over plain HTTP by default, meaning the
nagiosadminpassword is sent unencrypted. Put this behind HTTPS (a reverse proxy or a certificate on Apache) before exposing it beyond a trusted internal network.
Part 2: GitLab Installation
1. Install Dependencies
yum install curl postfix policycoreutils-python openssh-server
systemctl start postfix
systemctl enable postfix
2. Add the GitLab Package Repository
curl https://packages.gitlab.com/install/repositories/gitlab/gitlab-ce/script.rpm.sh | sudo bash
3. Install GitLab CE
yum install gitlab-ce
This installs the current stable GitLab CE release — not a fixed old version. Given how frequently GitLab ships security patches, always install current rather than pinning an old version number from an old guide.
4. Run Initial Configuration
gitlab-ctl reconfigure
5. Open the Firewall for GitLab
firewall-cmd --permanent --add-service=http
firewall-cmd --permanent --add-service=https
firewall-cmd --reload
6. Enable HTTPS (Strongly Recommended)
GitLab holds source code and credentials — running it over plain HTTP is a real risk. GitLab Omnibus has built-in Let’s Encrypt support. Edit:
vi /etc/gitlab/gitlab.rb
Set your external URL to HTTPS and enable Let’s Encrypt:
external_url "https://your-domain.com"
letsencrypt['enable'] = true
Then reconfigure again:
gitlab-ctl reconfigure
7. Log In
Visit your server’s IP or domain in a browser to reach the GitLab sign-in page.
Note: GitLab’s bundled Nginx runs on port 80/443 — this is separate from Apache (Nagios’s port 81), so the two don’t conflict.
Conclusion
Running Nagios and GitLab on the same server works cleanly since each binds to a different port — Apache on 81 for Nagios, GitLab’s bundled Nginx on 80/443. The real fixes that matter here: use current, non-EOL versions of both (not the old pinned versions from the original guide), fix the broken SourceForge download link with /download, open the firewall for both ports, and put both services behind HTTPS rather than leaving login credentials exposed over plain HTTP.
Frequently Asked Questions
Do Nagios and GitLab conflict since they’re on the same server? No — they’re bound to different ports (81 for Nagios, 80/443 for GitLab), so they run independently without interfering with each other.
Why was my SourceForge download broken? The original URL was missing /download at the end, which caused wget to save SourceForge’s HTML page instead of the actual archive file.
Is it safe to run GitLab CE at whatever version yum install gitlab-ce gives me? Yes — that installs the current stable release, which is the right approach. Pinning an old, specific GitLab version (as the original guide did) means missing years of security patches.
Related Articles
How to Configure CPU Usage Monitoring in Nagios with Percentage Thresholds
How to set up the website monitoring on Nagios?
Talk to Our Technology Experts
Setting up monitoring or Git infrastructure for your team? Our team can help with server monitoring, Git hosting, and ongoing DevOps support.