How to create a project in FireBase
How to create a project in FireBase
Date posted: 22/04/2019
Prerequisite
Make sure that you have API higher than 26 through by
- Click Tools > SDK Manager.
- Click the SDK Tools tab.
- Check the Google Repository checkbox, and click OK.
- Click OK to install.
Step 1 : Find the fire base assistant in your android studio application
Then Go through
Tools > Fire Base.Then Click on it.
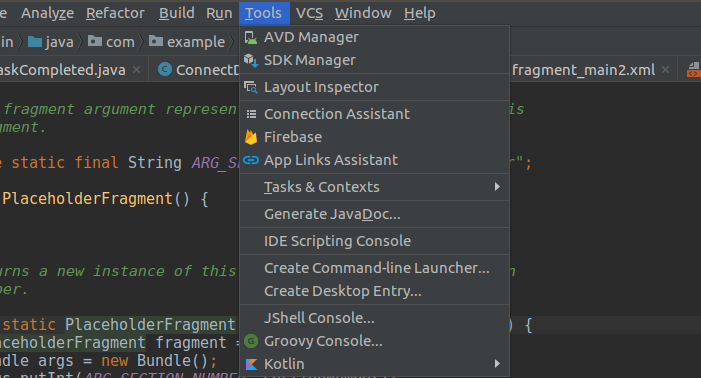
There you have assistant for fire base configuration for your android application.
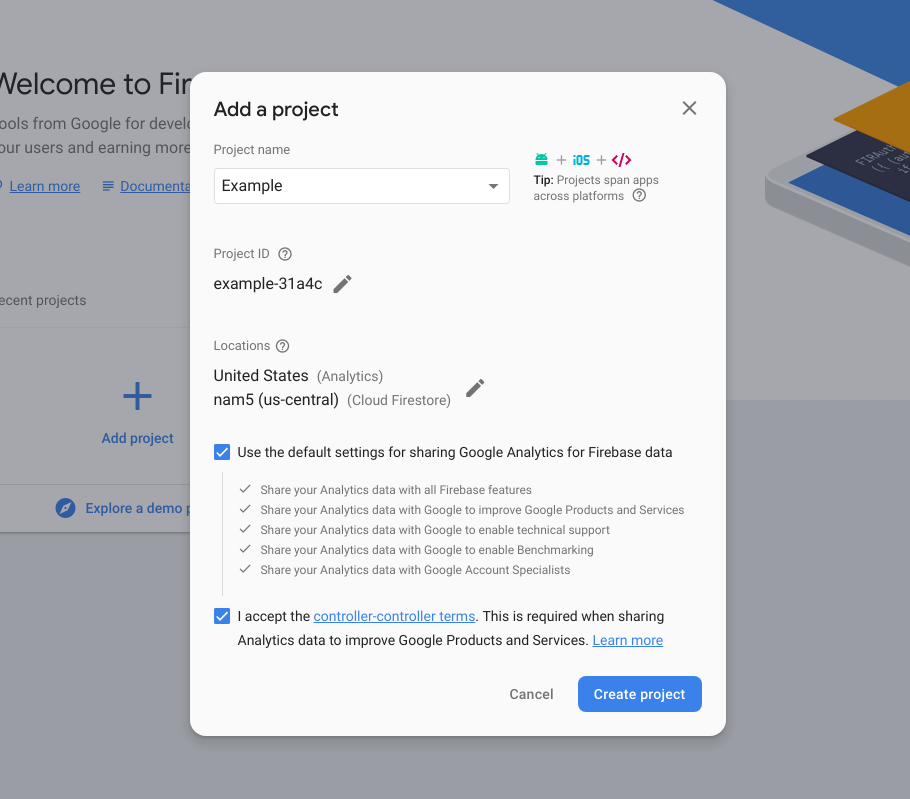
Step 2 : Create Project in Fire Base
You can find appropriate option in assistance in android studio application or else can go to official fire base web site. You can see step towards creating fire base project.
Firstly, you have to create a fire base project and add dependencies in gradle files and insert google-services.json configuration file to your application to complete setting fire base up for your project.
To create project you can find the link for new project in Firebase project guidance or click this link https://console.firebase.google.com/project/.
There you need to create a new project.Your project ID is unique will be deleted if your project is deleted.
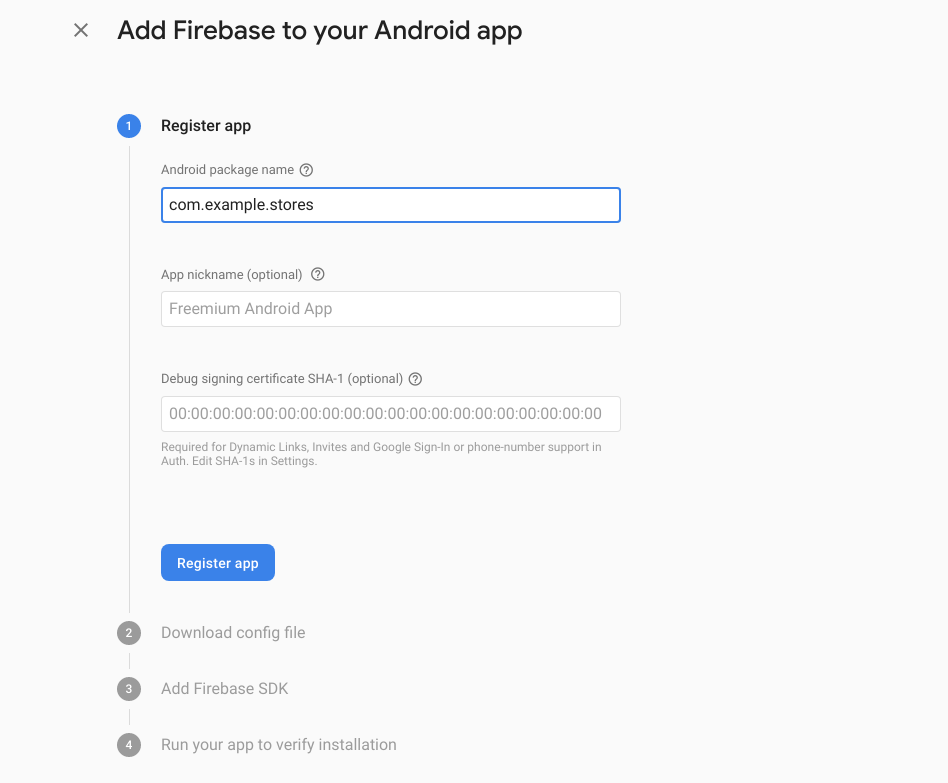
Once created the project.You can add android application package name in your project.
Click on Add app.

Enter your android application package name. That’s the only mandatory Click Next.
Download the configuration file to your local machine.setup the location.
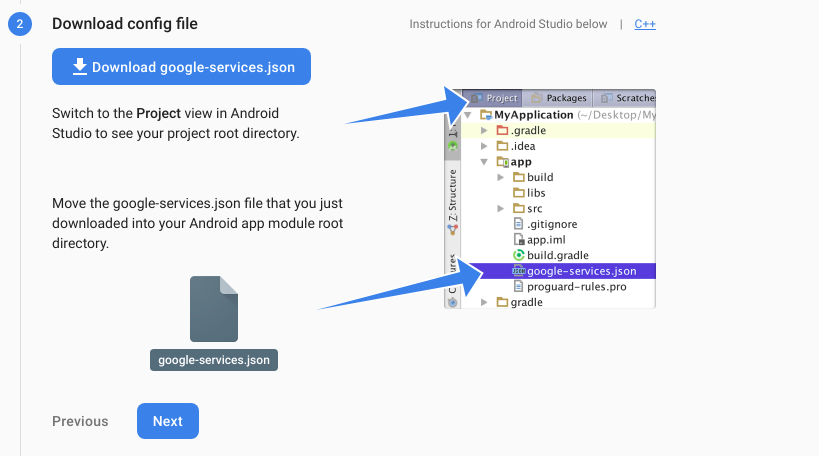
Click Next.
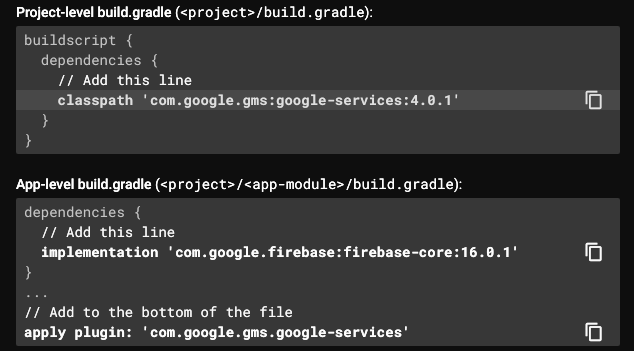
Here you need to add the dependencies to your app gradle file in the below image.and sync it.
At last Run your application to verify installing it.
Thanks for using pheonixsolutions.
You find this tutorial helpful? Share with your friends to keep it alive.