How to Upgrade PrestaShop – Using a 1-click upgrade module
How to Upgrade PrestaShop – Using a 1-click upgrade module
Date posted: 18/11/2019
In extreme worst cases, the manual upgrade process is too tedious, there is an alternative – a free module 1-click update.
As a result, it will automatically execute the course of actions with backup and rollback options available.
Step 1: Download the module
Look forward to the link https://addons.prestashop.com/en/data-migration-backup/5496-.html to download the 1-click upgrade module from the valid PrestaShop site.
Step 2: Append the module
Move to Improve tab -> Modules -> Module manager
Click the Upload the module button in the upper right corner of your site.
Then, choose the 1-click upgrade module zip.
Step 3: Execute the appended module
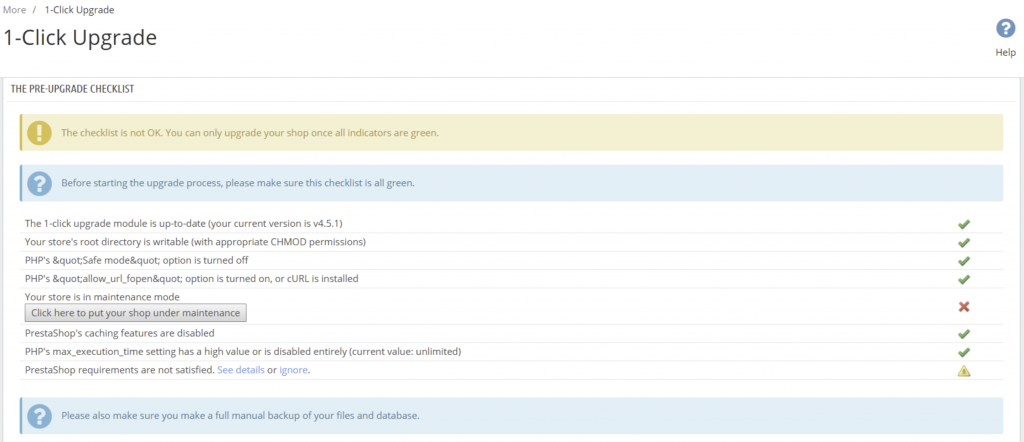
The installed module will welcome you with the Preupgrade Checklist; before you proceed with the upgrade, make sure every point here has a green tick.
Note: Adjust your shop under maintenance mode. Otherwise, the green tick won’t be available.
Then you may choose what type of upgrade you wish to run.
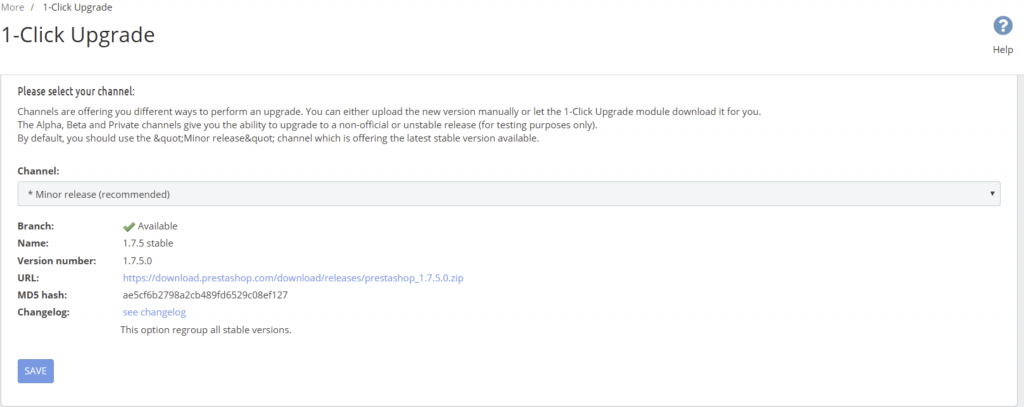
It is also highly recommended to let the module make a backup; in this case, it may roll back to the previous version if the upgrade goes wrong.
It will take more time to take a backup of all files, modules present in it. “Patience is the mother of success“
Note: If you have taken the manual backup of files and database dump already, you can skip the rollback option in customization.

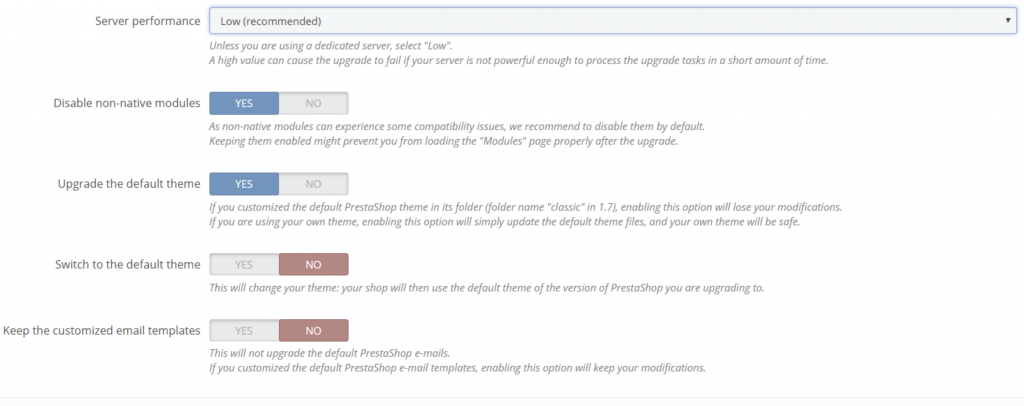
Finally, specify the Upgrade Options (Server Performance, Disable non-native modules, Upgrade the default theme, Switch to the default theme and Keep the customized email templates)
And click Save.
If the configuration is chosen and all options are valid, the Upgrade Now button will be available. Click it to launch the upgrade.
While upgrading, you will able to see notifications such as,
Backup files in progress. 30374 files left
Backup files in progress. 29974 files left
Backup files in progress. 29574 files left
Backup files in progress. 29174 files left
Backup files in progress. 28774 files left and so on…
Keep monitoring the track, it will display an error on permission, ownership, request time out, etc.
Request time out

Therefore, a fine solution is to increase max input and execution time in PHP value based on your webserver configuration.
Then, watch keenly on the Error box:

Check the ownership and permission of the file and make it perfect. When the process will be completed, the Upgrade successful message will appear.
There you go!!! You have successfully upgraded the Prestashop account on your domain.
Thanks for using pheonix solutions.