How to install and configure Opencart – 3.0.2 On CentOS – 7.
How to install and configure Opencart – 3.0.2 On CentOS – 7.
DATE POSTED: 19-10-2018
What is Opencart and its real-time purpose in this world ?
OpenCart is a free and open source online e-commerce web application. It is written in PHP and uses MySQL to store its database.
It has multi-store feature that means you can easily manage multiple stores from a single admin interface. It is multilingual translated into more than 30 languages and supports multi-currency. It is used to create and run your own online business by creating an online store and much more powerful, user friendly and free online shopping cart platform.
Initial Steps Must Followed Before Begin To Install Opencart:
1.Install the Extra Packages for Enterprise Linux (EPEL) repository .
sudo yum install epel-release
2.Make sure your server packages are up to date.
sudo yum update
3.Install the unzip utility.
sudo yum install unzip
4.You should Install a Linux, Apache, MySQL, PHP (LAMP) stack On CentOS 7.
4.1 Install Apache Setup:
Install Apache httpd Package.
yum -y install httpd
Now configure your system to start Apache at boot time..
systemctl start httpd.service
systemctl enable httpd.service
To be able to access the web server from outside, we have to open the HTTP (80) and HTTPS (443) ports in the firewall. The default firewall on CentOS is firewalld which can be configured with the firewalld-cmd command.
firewall-cmd --permanent --zone=public --add-service=http
firewall-cmd --permanent --zone=public --add-service=https
firewall-cmd --reload
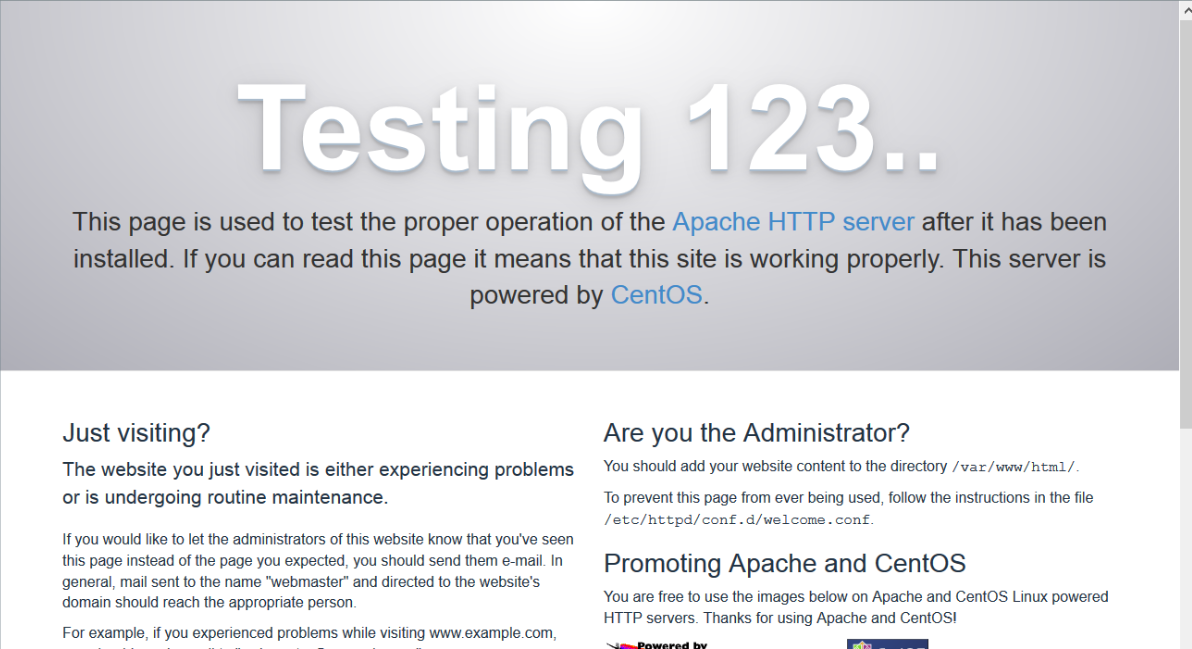
Now direct your browser to the IP address of your server, in my case http://Your domain name or use your ip address(10.1.1.1) and you should see the Apache placeholder page:
4.2 Install MYSQL/ mariaDB Setup:
Enable the MySQL 5.7 repository with the following command:
sudo yum localinstall https://dev.mysql.com/get/mysql57-community-release-el7-11.noarch
Install MySQL as any other package using yum:
sudo yum install mysql-community-server
Sections bellow are relevant for both MySQL 8.0 and MySQL 5.7
Starting MySQL
Once the installation is completed, start the MySQL service and enable it to automatically start on boot with:
sudo systemctl enable mysqld
sudo systemctl start mysqld
We can check the MySQL service status by typing:
sudo systemctl status mysqld
mysqld.service - MySQL Server
Loaded: loaded (/usr/lib/systemd/system/mysqld.service; enabled; vendor preset: disabled)
Active: active (running) since Wed 2018-10-18 11:02:43 UTC; 12min ago
Docs: man:mysqld(8)
http://dev.mysql.com/doc/refman/en/using-systemd.html
Process: 4293 ExecStartPre=/usr/bin/mysqld_pre_systemd (code=exited, status=0/SUCCESS)
Main PID: 4310 (mysqld)
Status: "SERVER_OPERATING"
CGroup: /system.slice/mysqld.service
└─4310 /usr/sbin/mysqld
Note : In Mysql(create database and user and give privileges to that user ).
4.3 Install Latest Version PHP 7.2:
Add the Remi CentOS repository.
yum-config-manager --enable remi-php72
yum -y install php php-opcache
In this example and in the downloadable virtual machine, I’ll use PHP 7.2.
We must restart Apache to apply the changes,
systemctl restart httpd.service
Testing PHP / Getting Details About Your PHP Installation:
The document root of the default website is /var/www/html. We will create a small PHP file (info.php) in that directory and call it in a browser to test the PHP installation. The file will display lots of useful details about our PHP installation, such as the installed PHP version.
nano /var/www/html/info.php
<?php
phpinfo();
Now we call that file in a browser (e.g. http://Your domain name or use your ip address(10.1.1.1)/info.php):
The perfect LAMP setup has installed in our virtual machine. Now Focus on Installation of Opencart setup.
Installing Opencart 3.0.2:
Here, we will give you a simpler steps , follow it to launch your opencart web application.
Step 1:Make a directory named downloads.
[root@sms ~]# mkdir downloads
Step2:
change your directory to downloads.
[root@sms ~]# cd /root/downloads
Then , use wget command to download
wget https://github.com/opencart/opencart/releases/download/3.0.2.0/3.0.2.0-OpenCart.zip
[root@sms ~]# cd /root/downloads

[root@sms downloads]# wget https://github.com/opencart/opencart/releases/downloa                                                                                                          d/3.0.2.0/3.0.2.0-OpenCart.zip
--2018-10-19 07:45:45--  https://github.com/opencart/opencart/releases/download/                                                                                                             3.0.2.0/3.0.2.0-OpenCart.zip
Resolving github.com (github.com)... 192.30.253.112, 192.30.253.113
Connecting to github.com (github.com)|192.30.253.112|:443... connected.
HTTP request sent, awaiting response... 302 Found
Location: https://github-production-release-asset-2e65be.s3.amazonaws.com/214118                                                                                                             6/35472250-6b2b-11e7-9682-7433c2747bde?X-Amz-Algorithm=AWS4-HMAC-SHA256&X-Amz-Cr                                                                                                             edential=AKIAIWNJYAX4CSVEH53A%2F20181019%2Fus-east-1%2Fs3%2Faws4_request&X-Amz-D                                                                                                             ate=20181019T074545Z&X-Amz-Expires=300&X-Amz-Signature=fe0366f6118d8f13053d68b2c                                                                                                             ddd9e4914c3902b8f1f95a51c02f58b9429e10c&X-Amz-SignedHeaders=host&actor_id=0&resp                                                                                                             onse-content-disposition=attachment%3B%20filename%3D3.0.2.0-OpenCart.zip&respons                                                                                                             e-content-type=application%2Foctet-stream [following]
--2018-10-19 07:45:45--  https://github-production-release-asset-2e65be.s3.amazo                                                                                                             naws.com/2141186/35472250-6b2b-11e7-9682-7433c2747bde?X-Amz-Algorithm=AWS4-HMAC-                                                                                                             SHA256&X-Amz-Credential=AKIAIWNJYAX4CSVEH53A%2F20181019%2Fus-east-1%2Fs3%2Faws4_                                                                                                             request&X-Amz-Date=20181019T074545Z&X-Amz-Expires=300&X-Amz-Signature=fe0366f611                                                                                                             8d8f13053d68b2cddd9e4914c3902b8f1f95a51c02f58b9429e10c&X-Amz-SignedHeaders=host&                                                                                                             actor_id=0&response-content-disposition=attachment%3B%20filename%3D3.0.2.0-OpenC                                                                                                             art.zip&response-content-type=application%2Foctet-stream
Resolving github-production-release-asset-2e65be.s3.amazonaws.com (github-produc                                                                                                             tion-release-asset-2e65be.s3.amazonaws.com)... 52.216.162.99
Connecting to github-production-release-asset-2e65be.s3.amazonaws.com (github-pr                                                                                                             oduction-release-asset-2e65be.s3.amazonaws.com)|52.216.162.99|:443... connected.
HTTP request sent, awaiting response... 200 OK
Length: 16544198 (16M) [application/octet-stream]
Saving to: '3.0.2.0-OpenCart.zip'

100%[======================================>] 16,544,198  24.2MB/s   in 0.7s

2018-10-19 07:45:46 (24.2 MB/s) - '3.0.2.0-OpenCart.zip' saved [16544198/1654419                                                                                                             8]
After downloading you need to Unzip the package.
STEP 3:Using unzip 3.0.2.0 – opencart.zip
[root@sms ~]# unzip 3.0.2.0-OpenCart.zip

 Archive:  3.0.2.0-OpenCart.zip
  inflating: build.xml
  inflating: CHANGELOG.md
  inflating: CHANGELOG_AUTO.md
  inflating: composer.json
  inflating: composer.lock
.
.
  inflating: upload/system/storage/vendor/zoujingli/wechat-php-sdk/Wechat/WechatOauth.php
  inflating: upload/system/storage/vendor/zoujingli/wechat-php-sdk/Wechat/WechatPay.php
  inflating: upload/system/storage/vendor/zoujingli/wechat-php-sdk/Wechat/WechatPoi.php
  inflating: upload/system/storage/vendor/zoujingli/wechat-php-sdk/Wechat/WechatReceive.php
  inflating: upload/system/storage/vendor/zoujingli/wechat-php-sdk/Wechat/WechatScript.php
  inflating: upload/system/storage/vendor/zoujingli/wechat-php-sdk/Wechat/WechatService.php
  inflating: upload/system/storage/vendor/zoujingli/wechat-php-sdk/Wechat/WechatUser.php
STEP 4:Now, move the unzipped directory into the following path.
[root@sms downloads]# mv opencart /var/www/html
STEP 5:Then, Switch to the corresponding directory,
[root@sms downloads]#cd /var/www/html
STEP 6:Next, you have to change the ownership and permission of the Opencart directory.
[root@sms html]# chown -R apache.apache opencart
[root@sms html]# chmod -R 775 opencart
STEP 7:After changing permission create the new virtual host configuration for accessing the Opencart application.
[root@sms html]# nano /etc/httpd/conf.d/opencart.conf
STEP 8:After creating the virtual host need to restart the httpd service.
[root@sms html]# systemctl restart httpd
Now you can further proceed to view on your browser by navigating to the following URL: http://local IP (or) domain name(10.1.1.1).
Step By Step Configuration Of Opencart:
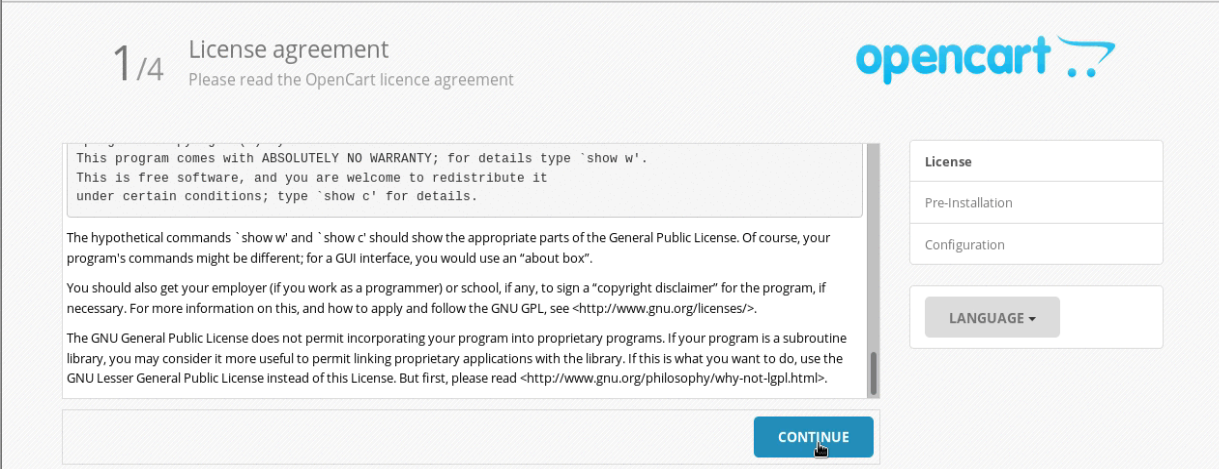
Step 1:First, you need to accept the license terms to continue.
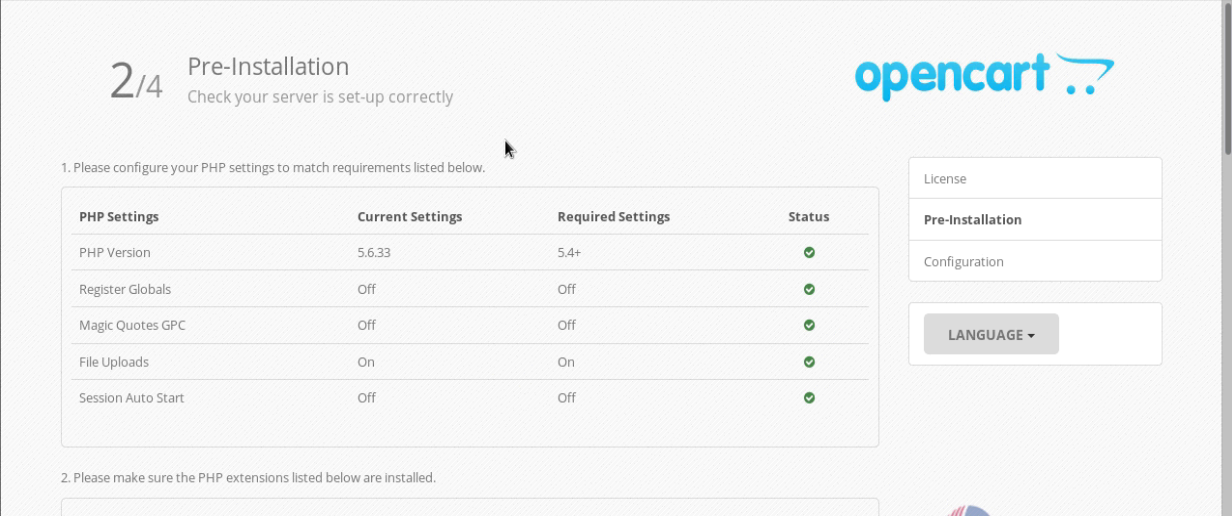
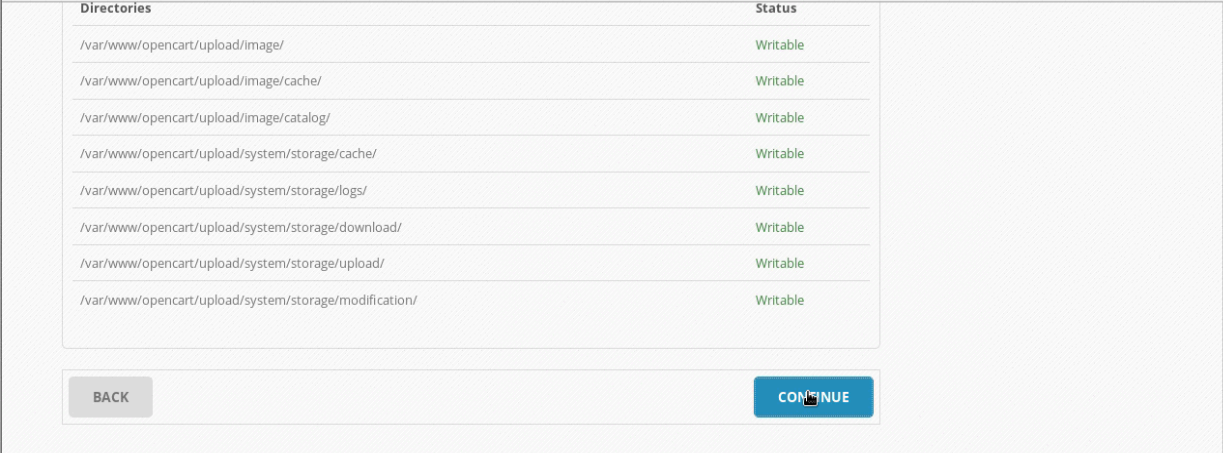
Step 2: Then it will verify the server setup configuration. once the requirements are met you can click continue to proceed.
step 3: Next, you need to configure the database configuration as follows.
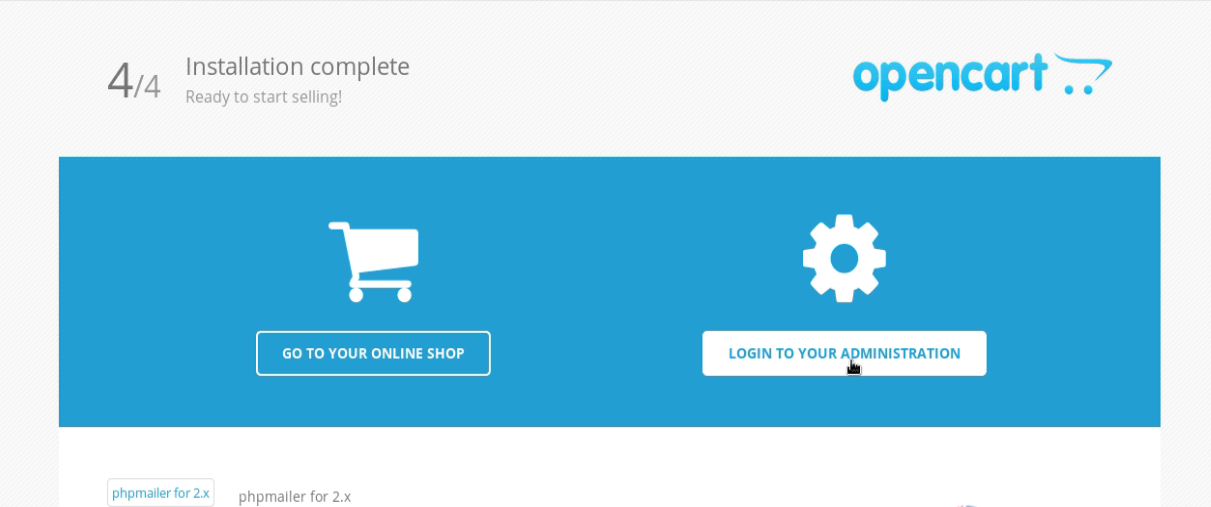
Step 4: Now the installation setup is complete and to access opencart admin panel click on login as admin.
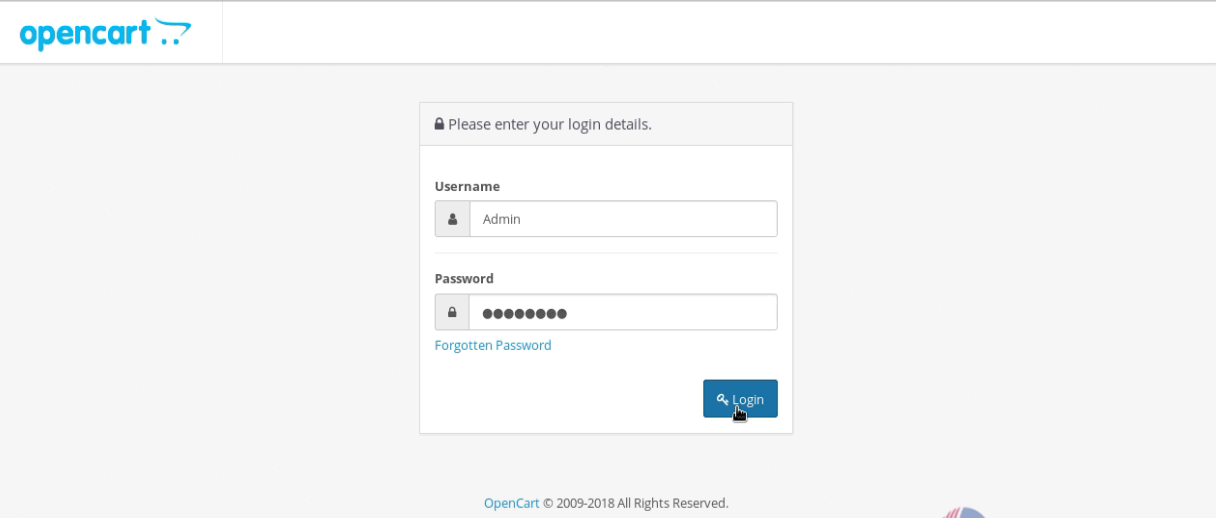
Step 5: Now login with Admin user credential.
Step 6: After successful login, you will see the admin dashboard of opencart.
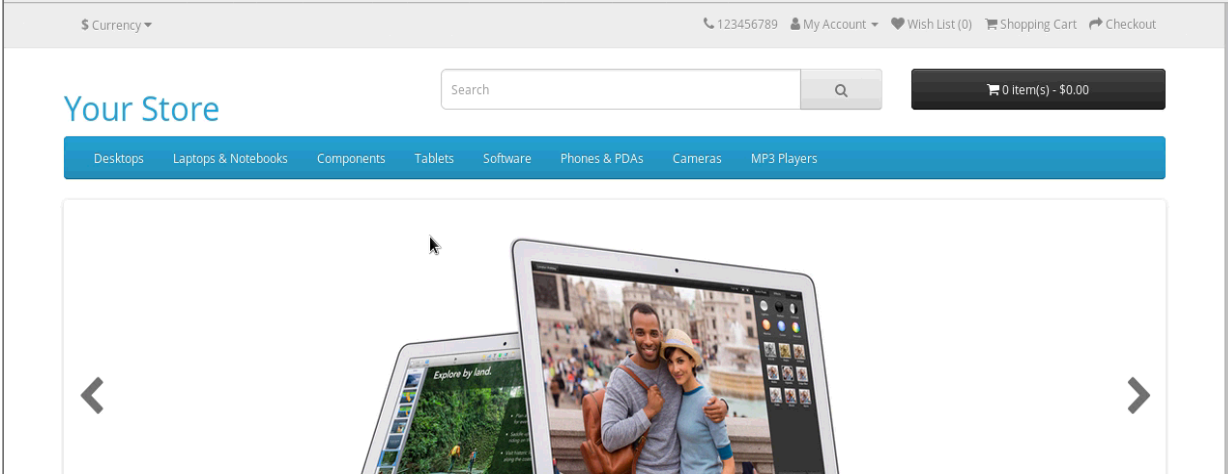
Step 7:Then you can choose the Admin user profile and click on your store option, and it will redirect to your site.
Step 8: Thus by this method to install Opencart 3.0.2 on CentOS 7 comes to an end and launched successfully.
Thank you! for using PHEONIX SOLUTIONS.
You find this tutorial helpful? Share with your friends to keep it alive.Be the first to comment, we value your suggestions. For further queries please comment below.




1 thought on “How to install and configure Opencart – 3.0.2 On CentOS – 7.”