Deploy a sample app with Docker over SSL
1)To achieve the above, first we need to install docker. Please follow the below link to install docker.
https://docs.docker.com/engine/install/ubuntu/#install-using-the-repository
2) Create a sample application. Create a directory called “helloapp”. Create file index.js.
mkdir helloapp
cd helloapp
vi index.js
3) Copy and paste the below content.
| const express = require(“express”); const app = express(); app.get(“/”, (req, res) => { res.send(“Hi Everyone ! Welcome to Pheonix Solutions”); }); app.listen(8080, () => { console.log(“Server started on port 8080”); }); |
4) Create a file with name package.json
vi package.json
5) Copy and paste the below content.
| { “dependencies”: { “express”: “*” }, “scripts”: { “start”: “node index.js” } } |
6) Now create a Docker file. Dockerfile contains instructions for building a Node application using the Docker node:alpine image and the contents of your current project directory.
vi Dockerfile
7) Now copy and paste the below content. These instructions build a Node image by copying the project code from the current directory to the container and installing dependencies with npm install. They also take advantage of Docker’s caching and image layering by separating the copy of package.json and package-lock.json, containing the project’s listed dependencies, from the copy of the rest of the application code.
| #base image FROM node:alpine #install dependancies WORKDIR /usr/helloapp COPY ./package.json ./ RUN npm install COPY ./ ./ EXPOSE 8080 #start-up command CMD [“npm”, “start”] |
8) Create a directory in the current project directory for the configuration file
mkdir nginx-conf
nano nginx-conf/nginx.conf
| server { listen 80; listen [::]:80; root /var/www/html; index index.html index.htm index.nginx-debian.html; server_name dockertestings.pheonixsolutions.com www.dockertestings.pheonixsolutions.com; location / { proxy_pass http://dockertestings.pheonixsolutions.com:8080; } location ~ /.well-known/acme-challenge { allow all; root /var/www/html; } } |
9) Next we will create a docker-compose file. The docker-compose.yml file will define our services, including the Node application and web server. It will specify details like named volumes, which will be critical to sharing SSL credentials between containers, as well as network and port information. It will also allow us to specify specific commands to run when our containers are created. This file is the central resource that will define how our services will work together.
nano docker-compose.yml
Copy and paste the below content.
| version: ‘3’ services: nodejs: build: context: . dockerfile: Dockerfile image: helloapp container_name: helloapp ports: – “8080:8080” restart: always networks: – app-network webserver: image: nginx:mainline-alpine container_name: webserver restart: always ports: – “80:80” volumes: – web-root:/var/www/html – ./nginx-conf:/etc/nginx/conf.d – certbot-etc:/etc/letsencrypt – certbot-var:/var/lib/letsencrypt depends_on: – nodejs networks: – app-network certbot: image: certbot/certbot container_name: certbot volumes: – certbot-etc:/etc/letsencrypt – certbot-var:/var/lib/letsencrypt – web-root:/var/www/html depends_on: – webserver command: certonly –webroot –webroot-path=/var/www/html –email abc@example.com –agree-tos –no-eff-email –staging -d example.com -d www.example.com volumes: certbot-etc: certbot-var: web-root: driver: local driver_opts: type: none device: /home/helloapp/ o: bind networks: app-network: driver: bridge |
10) We can start our containers with docker-compose up, which will create and run our containers and services in the order we have specified. If our domain requests are successful, we will see the correct exit status in our output and the right certificates mounted in the /etc/letsencrypt/live folder on the webserver container.
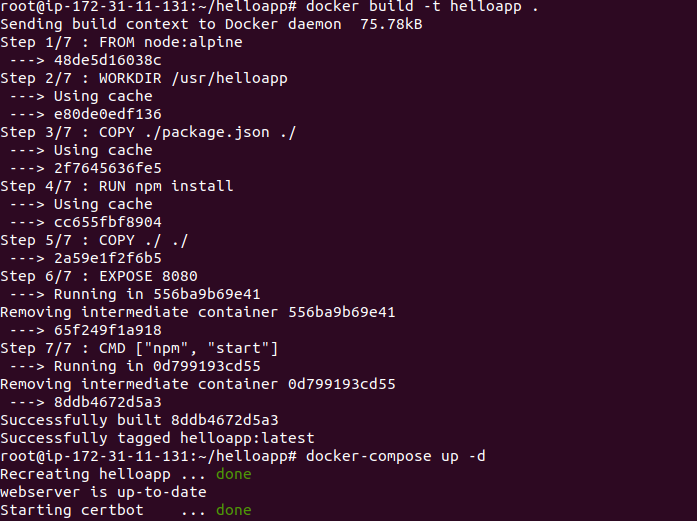
First build the image with the below command.
Docker build -t helloapp .
Now run the below command to create the services and run the containers.
docker-compose up -d
11) Using docker-compose ps, check the status of your services.

12) If you want to check the service logs, execute the below command.
docker-compose logs service_name
13) You can now check that your credentials have been mounted to the webserver container with docker-compose exec
docker-compose exec webserver ls -la /etc/letsencrypt/live

14) Now that you know your request will be successful, you can edit the certbot service definition to remove the –staging flag. Open docker-compose.yml
nano docker.compose.yml
15) Find the section of the file with the certbot service definition, and replace the –staging flag in the command option with the –force-renewal flag, which will tell Certbot that you want to request a new certificate with the same domains as an existing certificate. The certbot service definition should now look like below.
| certbot: image: certbot/certbot container_name: certbot volumes: – certbot-etc:/etc/letsencrypt – certbot-var:/var/lib/letsencrypt – web-root:/var/www/html depends_on: – webserver command: certonly –webroot –webroot-path=/var/www/html –email abc@gmail.com –agree-tos –no-eff-email –force-renewal -d dockertestings.pheonixsolutions.com |
16) You can now run docker-compose up to recreate the certbot container and its relevant volumes. We will also include the –no-deps option to tell Compose that it can skip starting the webserver service, since it is already running.
docker-compose up –force-recreate –no-deps certbot
17) You will see output indicating that your certificate request was successful.
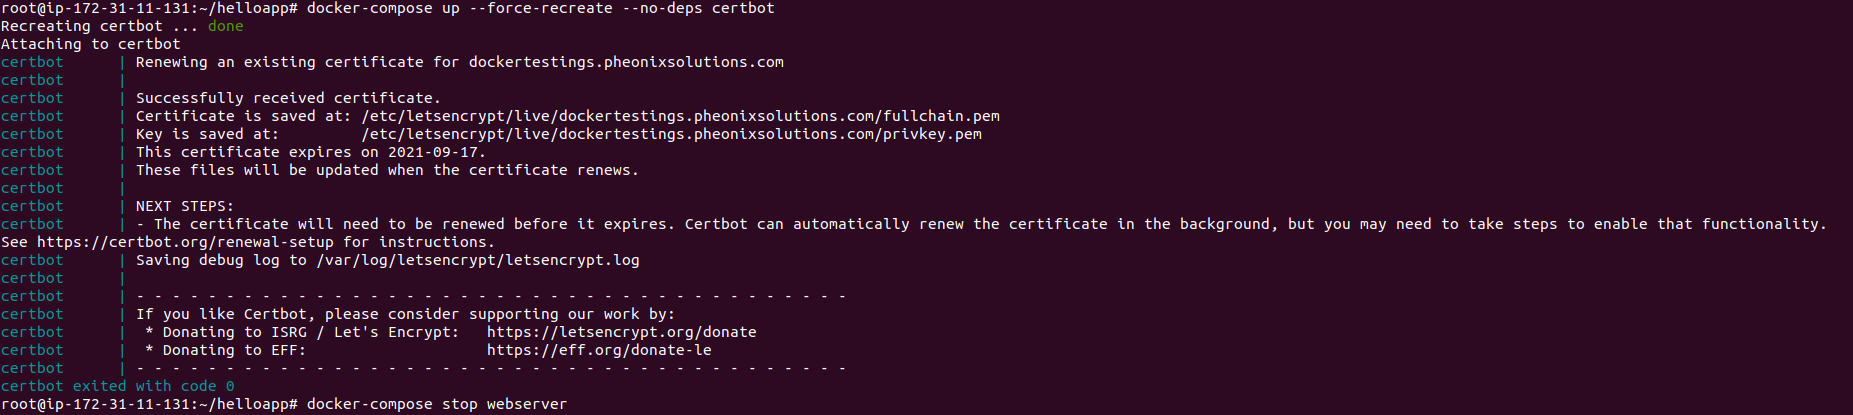
18) Now we will modify the webserver Configuration and Service Definition. First stop the webserver with the below command. Enabling SSL in our Nginx configuration will involve adding an HTTP redirect to HTTPS and specifying our SSL certificate and key locations. It will also involve specifying our Diffie-Hellman group, which we will use for perfect forward secrecy.
docker-compose stop webserver
19) Next, create a directory in your current project directory for your Diffie-Hellman key
mkdir dhparam
20) Generate your key with the openssl command
sudo openssl dhparam -out /home/helloapp/dhparam/dhparam-2048.pem 2048
It will take a few moments to generate the key.
21) To add the relevant Diffie-Hellman and SSL information to your Nginx configuration, first remove the Nginx configuration file you created earlier.
rm nginx-conf/nginx.conf
22) Again create config file.
nano nginx-conf/nginx.conf
23) Add the following code to the file to redirect HTTP to HTTPS and to add SSL credentials, protocols, and security headers.
| server { listen 80; listen [::]:80; server_name dockertestings.pheonixsolutions.com; location ~ /.well-known/acme-challenge { allow all; root /var/www/html; } location / { rewrite ^ https://$host$request_uri? permanent; } } server { listen 443 ssl http2; listen [::]:443 ssl http2; server_name dockertestings.pheonixsolutions.com; server_tokens off; ssl_certificate /etc/letsencrypt/live/dockertestings.pheonixsolutions.com/fullchain.pem; ssl_certificate_key /etc/letsencrypt/live/dockertestings.pheonixsolutions.com/privkey.pem; ssl_buffer_size 8k; ssl_dhparam /etc/ssl/certs/dhparam-2048.pem; ssl_protocols TLSv1.2 TLSv1.1 TLSv1; ssl_prefer_server_ciphers on; ssl_ciphers ECDH+AESGCM:ECDH+AES256:ECDH+AES128:DH+3DES:!ADH:!AECDH:!MD5; ssl_ecdh_curve secp384r1; ssl_session_tickets off; ssl_stapling on; ssl_stapling_verify on; resolver 8.8.8.8; location / { try_files $uri @nodejs; } location @nodejs { proxy_pass http://dockertestings.pheonixsolutions.com:8080; add_header X-Frame-Options “SAMEORIGIN” always; add_header X-XSS-Protection “1; mode=block” always; add_header X-Content-Type-Options “nosniff” always; add_header Referrer-Policy “no-referrer-when-downgrade” always; add_header Content-Security-Policy “default-src * data: ‘unsafe-eval’ ‘unsafe-inline'” always; #add_header Strict-Transport-Security “max-age=31536000; includeSubDomains; preload” always; # enable strict transport security only if you understand the implications } root /var/www/html; index index.html index.htm index.nginx-debian.html; } |
24) Before recreating the webserver service, you will need to add a few things to the service definition in your docker-compose.yml file, including relevant port information for HTTPS and a Diffie-Hellman volume definition.
nano docker-compose.yml
25) In the webserver service definition, add the following port mapping and the dhparam named volume. It will be like below.
| webserver: image: nginx:mainline-alpine container_name: webserver restart: always ports: – “80:80” – “443:443” volumes: – web-root:/var/www/html – ./nginx-conf:/etc/nginx/conf.d – certbot-etc:/etc/letsencrypt – certbot-var:/var/lib/letsencrypt – dhparam:/etc/ssl/certs depends_on: – nodejs networks: – app-network |
Next, add the dhparam volume to your volumes definitions
| volumes: certbot-etc: certbot-var: web-root: dhparam: driver: local driver_opts: type: none device: /root/helloapp/dhparam/ o: bind |
Now the complete docker-compose.yml file look like below.
| version: ‘3’ services: nodejs: build: context: . dockerfile: Dockerfile image: helloapp container_name: helloapp ports: – “8080:8080” restart: always networks: – app-network webserver: image: nginx:mainline-alpine container_name: webserver restart: always ports: – “80:80” – “443:443” volumes: – web-root:/var/www/html – ./nginx-conf:/etc/nginx/conf.d – certbot-etc:/etc/letsencrypt – certbot-var:/var/lib/letsencrypt – dhparam:/etc/ssl/certs depends_on: – nodejs networks: – app-network certbot: image: certbot/certbot container_name: certbot volumes: – certbot-etc:/etc/letsencrypt – certbot-var:/var/lib/letsencrypt – web-root:/var/www/html depends_on: – webserver command: certonly –webroot –webroot-path=/var/www/html –email abc@gmail.com –agree-tos –no-eff-email –force-renewal -d dockertestings.pheonixsolutions.com volumes: certbot-etc: certbot-var: web-root: dhparam: driver: local driver_opts: type: none device: /root/helloapp/dhparam/ o: bind networks: app-network: driver: bridge |
26) Recreate the webserver service with the below command
docker-compose up -d –force-recreate –no-deps webserver
27) Check your services with docker-compose ps. It should look like below.

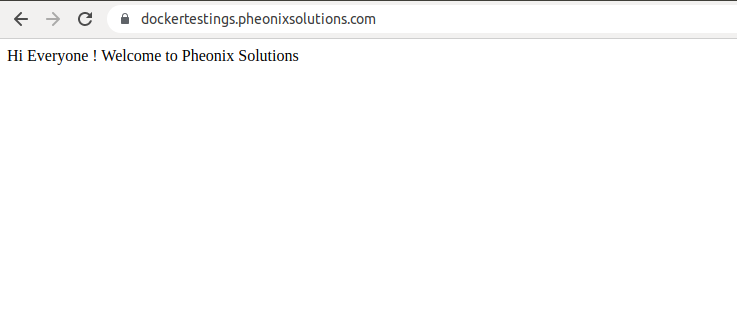
28) Finally, you can visit your domain to ensure that everything is working as expected. Navigate your browser to https://example.com. Replace with your own domain and check.
It should look like below.